In this text, I want to say a few words about how to pack a backpack for hiking and what to carry with you, from my own first-hand experience. In my case, this typically implies the Alps, but most of the text is applicable to any mountain region.
Note also this is about day tours, so I give an appropriate day hiking checklist for various kinds of day hiking tours.
Day tours
A day tour may imply many things of course. But if this is about going into mountains, and in particular in the Alps, here are some possible options:
- Walk to a hut or a simple walk on well-marked paths.
- Climbing some mountain without technical difficulties, without glaciers, just a walk-up tour.
- A via Ferrata tour.
- Glacier routes to summits, or just glacier crossings on some hut tours.
In any of these options this can be:
- A guided tour.
- A non-guided tour.
Regarding the number of participants this can be:
- A solo tour.
- A group tour.
Obviously, a group tour can be guided or non-guided. Also obviously, going solo is not the smartest way of going into mountains, but as you might have realized most of my tours described in the site are in fact solo tours. Well, nobody is perfect.
Also, any of the tours 1-4 can be with or without a guide.
For each of these tours, you will have somewhat different stuff in your backpack. This is why it was necessary to mention the types of tours first.
Packing backpack for guided and non-guided hut tours
All you have with you in the mountain (on you or in the pack) can be categorized as follows:
- Items for protection from elements (clothes, Sun protection).
- Technical stuff.
- Food & water.
In my previous text, I was writing already about what to wear in the Alps. Here just to give a few more details and a possible list.
- What to wear:
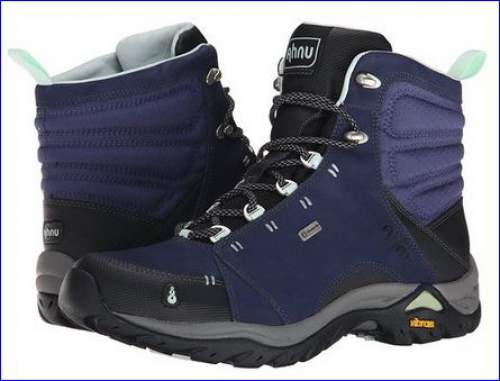
- Strong hiking boots with good ankle support. See one great example here. How about hiking shoes instead of boots? In principle, this may OK if you are on even terrain or on good paths, but better avoid. Though I climbed Kreuzspitze in Austrian Alps in my Merrel Moab low-cut shoes. The reason, the biggest part of the route is along a gravel road and the rest after that was not so bad, and I wanted to do it very fast and light.
- Hiking pants, preferably with removable legs. Yes, it may be warm in the Alps as well.
- Layered upper clothing. This implies synthetic of course: a T-shirt, a fleece, a waterproof jacket (stored in the pack if it is too warm). I sometimes use so-called 3-in-1 type jackets, you can see one in the text.
- A hat or a cap for sun protection.
- In the pack:
- One extra layer for the upper body.
- Waterproof pants.
- Sunglasses.
- Light gloves. I usually also have a pair of waterproof gloves. Here you can read about a few waterproof gloves for men, and for women, I would recommend these Outdoor Research gloves.
- A warm cap.
- Some minimal first-aid kit.
- Sun protection cream. I use those with the strongest factor 50.
- Map of the area.
- A compass? In the Alps usually, I do not need it, but I do have it occasionally.
- Some pocket knife. I always have my Swiss army knife with me.
- Some plastic bag for valuables, to protect them from rain.
- A pair of walking poles. I never go without them. Many of them are described in this site, so have a look here.
- A backpack of course. Ideally 30-35 liters for a day tour. You have them many described in the site.
- A headlamp. Yes, you are reading correctly, you never know, it may save you from unpleasant situations. Besides, if you start early from an Alpine valley you will need it when you set off. It should be waterproof. If you are very high in mountains, sometimes even in clouds, condensation can be a real issue and you might get into trouble. I had such a situation in clouds in one of my climbs of El Teide on Tenerife island. I was forced to descend for a couple of hours in the complete dark, the lamp did not work. So here is one great example which I warmly recommend. You will see it working even in a glass of water.
- Yeah, this is important, water. In the Alps usually you have water everywhere, but I never drink it directly. Reason: you never know what is above you. See one example from my solo tour to Hochfeiler (Gran Paradiso):
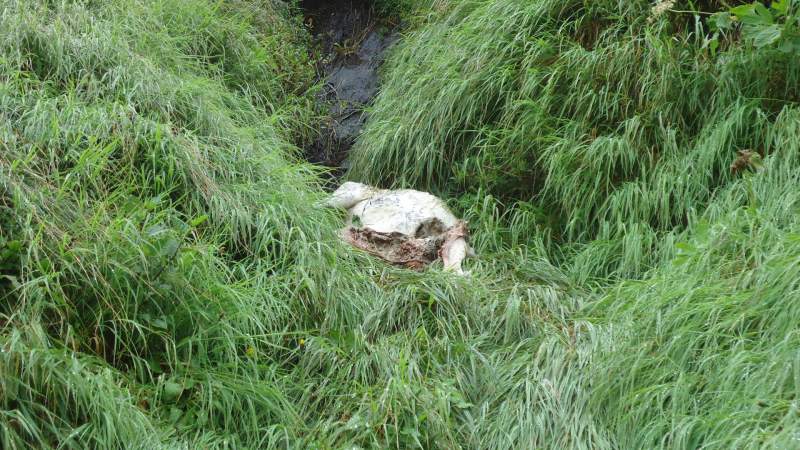
A carcass of a sheep in the clear water stream. So you have several options: carry water with you partly or completely (you can buy in the hut if you need more), use a water filter. There are many great water filters described in this site, please visit my page with equipment reviews.
- How about food? Well if you are with a guide he will expect you to pay a lunch. I am more or less guessing as I have never had one. This may depend on the agreement you had in the first place. Huts with guardians in the Alps normally offer food, it is always simple but good. So if you are ready to pay, no worry you will have it. The rest is up to you, the matter of preference and taste. You can add some snacks. Once on the mountain, I usually do not eat much, perhaps this is the effect of adrenaline.
So what you have above is the basic stuff, you will add things to the list dependent on the tours. See more below.
Walk-up summit tours
Here, there is no much difference as compared with the previous hut tours case, except for the following:
- If you go very high, perhaps you may think about extra layers of clothes.
- If it is without stopping by in a hut, you have to carry the food and water for all day. I would say 2 liters of water (or liquid in general) is an absolute minimum, but this is individual. Water filters will shave the weight of your pack dramatically, but they may be really great for the Alps yet useless in some dry areas like Tenerife. So in such an environment, you will have to carry water.
Via Ferrata tours
I assume you know what via Ferrata means. If so, then obviously you can imagine you will need some extra stuff. You have Ferrata tours everywhere in the Alps, in particular in the Dolomites in the Italian part of the Alps, literally hundreds of them.
I personally know some people who go exclusively for Ferrata tours. This is a matter of choice and preference, I would not argue about it with anybody.
I have been on such tours, so can say a few words about them. Sometimes you have just short passages with fixed cables, chains, or ropes, like in the case of Marmolada normal route which I did a few years ago. But even in such cases, you have to carry your Ferrata stuff.
Such Ferrata tours can be combined with visiting huts, so all that I mentioned above regarding the food and water, holds here as well. The same holds regarding the guide.
So here is what you will have in your backpack as extra stuff:
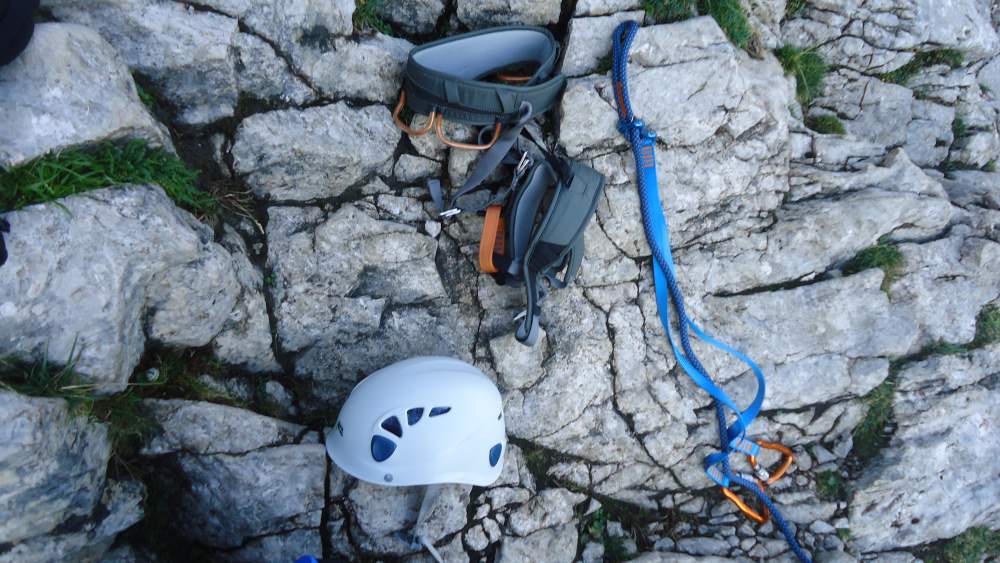
- A climbing harness.
- A Y-shaped lanyard (or sometimes called via Ferrata set).
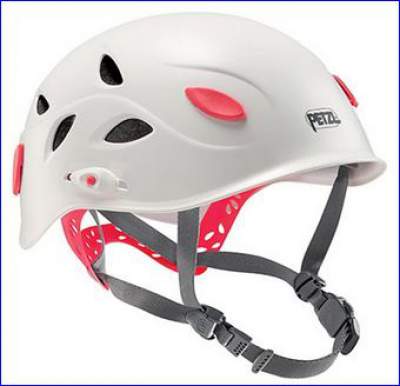
- A helmet.
- One extra carabiner, just in case.
- In some particular cases, you might need rock climbing shoes. Though I have never used them in the Alps, only in some rock walls in the Ardennes in Belgium.
I stress again that these are extra items, so as you can imagine your backpack will become heavier now.
Note, even for such tours I recommend walking poles, you will need them on the approach sections. But make sure they are collapsible. All poles presented in this page are of that type.
Regarding helmets, I have the best options presented in the site. I myself use Petzl Elios, this is a model for men. For women, you might want to see Petzl Elia. Note that these helmets are normally used also in indoor climbing and in rock climbing, so you do not have to buy something extra for Ferrata tours.
As for the mentioned Ferrata set, I use what is called Y-lanyard with a threaded rope energy absorber. You can see these pieces of my equipment in the photo from climbing Alpspitze in German Alps, the harness, lanyard, and helmet:
Glacier day tours
These tours can combine a lot of things mentioned above. Regarding hut tours, there are huts in the Alps where you have to pass glaciers to reach them. So you will need extra stuff even for such tours that are supposed to be the simplest ones.
In some cases, like the Zugspitze tour which I did in 2009, you have many lengthy Ferrata sections, but you have to pass the glacier as well. So in this particular climb, I used crampons.
Here is the list of extra items which you will need (your pack will become quite heavy with all things mentioned above and with those below):
- Crampons. You can read more about them in my article about equipment. I use Petzl crampons, a very reliable steel tool with 12 points. Note that these imply special boots with stiff soles. I use Meindl boots. To use ordinary hiking boots, you will need so-called strap-on crampons, read more here.
- You will need the harness as well. Remember, this is the same tool you need for the Ferrata tours.
- A pair of gaiters.
- An ice axe. One note here; if you are on a guided tour with some simple glacier passage and in a larger group, do not bother with it, unless you want to pretend to be a true climber and to make some trophy pictures. But if you go solo (yes there are idiots who go over glaciers solo, one is writing these lines), then do not go without this tool.
- A rope. In a group, you will have to have a rope with the length corresponding to the number of people. If you are with a guide, no worry, he will bring one for you. If you are solo, what’ the point? So I do not use it.
- Ice screws. In the case you are in a group and without a guide, some of you will have to carry such tools, just in case.
Note, you might not need the helmet, Ferrata lanyard, and if you are solo the harness as well, but this all depends on what is ahead of you. In any case, plan carefully and be informed about the route. My rule is better more than less, just in case (I love this phrase, you noticed it).
When you buy crampons do not miss to order a holster for it. You cannot put crampons in the pack without it, it would damage your equipment and clothes inside the pack. There is a possibility to attach them on the pack of course, but if you use lifts or any means of public transport, you can damage things around and hurt people, so forget it. I have a very strong Cordura box for my crampons.
So how to pack a backpack
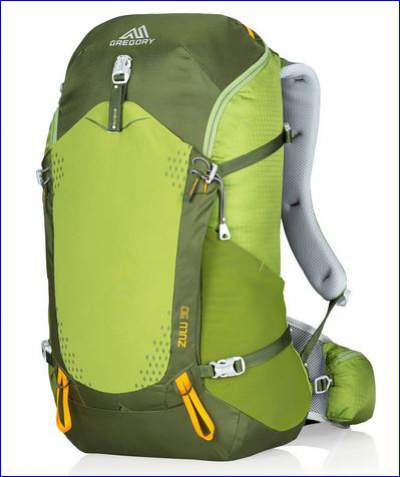
Of course, you have to put this all together in a pack. So which pack to choose? You might want to have a look again at my equipment review page, and in particular to the article with best day packs. I would warmly recommend packs with a good back ventilation. The best possible are systems with tensioned trampoline-style mesh. You can see it in many packs described here, one great example is shown above, the Gregory Zulu 30 pack.
How to organize things in the pack
This will depend on the pack. What I mean by this is the following. Even such small packs may have a separate bottom compartment, plus the main compartment, so you will have more options for organization. Some packs have nice and large front pockets or mesh to store gear like a helmet and extra layers.
Here are a few basic principles to follow:
- Heavier items store as close to your body as possible. This implies water bladder, crampons, rope, other metal hardware. You have noticed that the water bladder sleeve is always closer to the back, so this is the principle applied in practice.
- Heavier items store directly above your gravity center, and as close to it as possible. For these small packs, this practically implies storing crampons and other heavy stuff on the bottom, or some of them in the sleeve if you do not carry a water bladder. This is something from physics, the so-called moment of force, you know I am a physicist by profession.
- Items that you will need frequently store in the upper space or in the pockets around.
- Lighter items can go farther from your body and higher above the gravity center, the moment of force again.
- More about this you can read in my text on how to pack a backpack.
Extras
Many items can be added, here are a few:
- GPS gadget.
- Cell phone.
- Emergency shelter.
- A thermos bottle. Some will keep your tea or coffee warm all day long. Imagine drinking it in the early morning on a mountain summit. I did it. See this one.
So I think it is time to stop here. I hope the text has been useful to you, and if this is so please share it with others. There is a comment box below, I love to hear from you. Thank you and have a nice day.
Leave a Reply