If you plan climbing Cima Piazzi by following the normal route, here is my detailed report with all the details you need to know, and based on the mistakes I did instead of you. So keep reading.
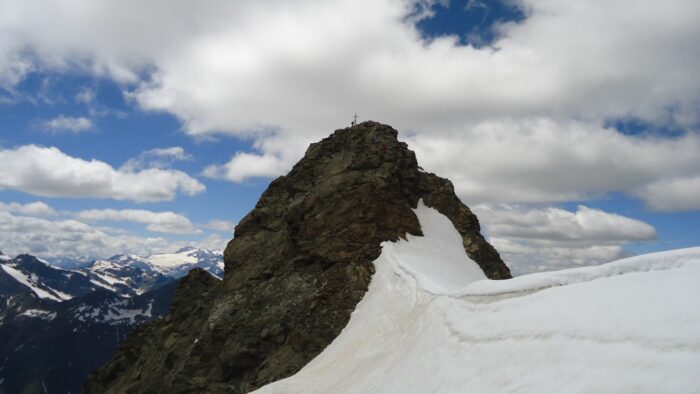
Cima Piazzi – about the name
It is far from clear which name is correct. I have seen it written as in the title above, Cima Piazzi, and also as Cima di Piazzi, Cima de Piazzi, and Cima del Piazzi. This is just to know that all these versions describe the same mountain. I use most of them in the text.
Basic data
- Elevation: 3439 m (11283 ft).
- Location (latitude; longitude): 46.41751 °N; 10.28801 °E.
- Province: Sondrio, Italy.
- Nearest cities: Livigno & Bormio.
Where Cima di Piazzi is located
You have already seen the coordinates, and the zoomable map below will show you more. There are two directions, either from Bormio or from Livigno, so this is the north side of the mountain area. The map will show more on how to get there, so just zoom it in or out.
There are several attractive passes around and you will have to go over any of them. These include the Stelvio Pass, the Gavia Pass, Umbrail Pass, and Foscagno Pass in the direction of Livigno (this one is the closest and the lowest).
The normal route to Cima Piazzi
I shall write only about the route I walked myself. There are other routes but I have no first-hand knowledge about them, and my policy is not to describe routes that I did not experience myself. This is a serious activity and we do it for pleasure, so my opinion is that there may be no guessing in it.
Now, I have made so many mistakes before getting to the summit that it is embarrassing to list them here. After several decades of climbing in the Alps, I should be knowing better. I was very disappointed in myself, so here are some details you will need to know to avoid doing the same mistakes.
You will enter the narrow road from the area known as Arnoga, there is a sign at the main Bormio-Livigno road showing the direction to Viola Valley. There is an entry fee, a machine is on the side of the narrow road and it was annoying. I hardly managed to pay the required 5 Euro fee; it was 5 AM, I had to use my headlamp, and the instructions did not match the buttons that were available.
Very important: the starting point
Note also that you will have to park at parking number 1. There are 4 of them in total, at various elevations, but those are for the Viola Valley and this is not your direction.
If you are clever like me, you will want to go to the fourth, to gain the altitude, and to get to higher ground. But when you get to the highest (parking number 4), you will see the map of the area and realize this is the Viola Valley, and that you have to drive along the narrow road back to parking 1. Driving is stressful on such a narrow road, you will not want to have other cars coming in your direction.
Usually, the so-called normal route to Cima de Piazzi is described as starting from Passo di Verva (Verva Pass, 2301 m). But this is not so, in fact, it starts far below in the valley, at the mentioned parking 1. You will have to walk all the way up. There are several different parts of the route and I have roughly marked them in the picture below:
- The lowest part from the parking 1 to the Verva Pass (blue line).
- The part from the Verva Pass to the rock (yellow line).
- The rock area (red line).
- The short summit section (black).
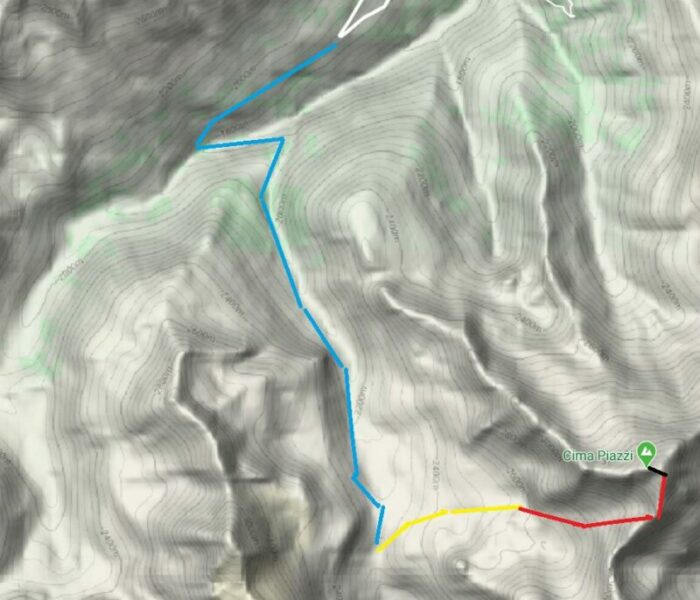
There are reasons why I want to make them separate, so here is what you have.
1. Walk towards the Verva Pass: When you park where you should, and I stress again, this is at the Parking 1, continue walking down the asphalt road that leads to several houses below. After you pass all the houses, you will still be descending and at some point, the road splits.
So do not go up, take the road to the left and descend to the bridge, otherwise you will continue to the Viola Valley. Can you guess what I did? This point is marked red in the zoomable map above, if you miss this, you will be doing great in Viola Valley, but I assume this is a target for another occasion.
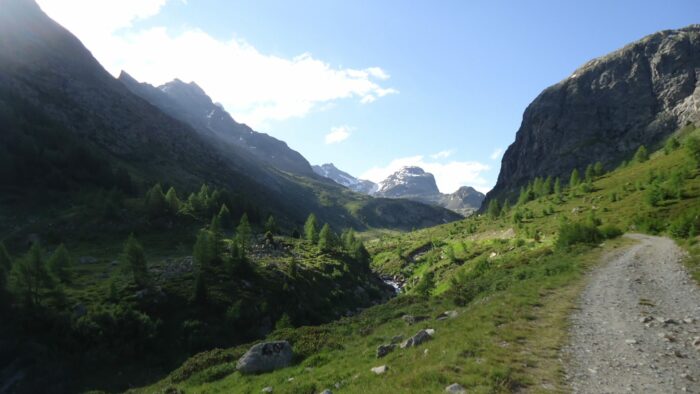
Eventually, you will start to go up, first through the woods, and later you will have meadows around. So keep walking along the gravel road that is closed for the public. This will lead you to the Passo di Verva, my guess is there is around 6 kilometers or so, perhaps less. You will be there in less than 2 hours. The signs tell you 2 hours and 30 minutes.
The pictures above and below show how this looks. Beautiful peaks are around, but the Cima Piazzi summit is not visible. I did not even have a map in the pack.
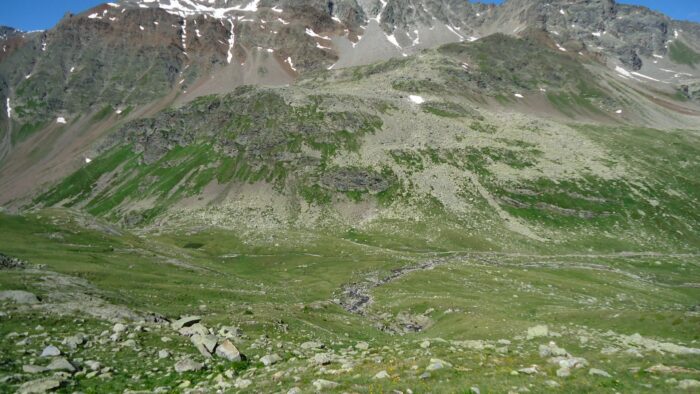
The elevation difference in this part is quite big, the lowest point is around 1800 meters and the pass is at 2301 meters above the sea. So you will have around 500 meters of elevation difference plus around 100 meters when you descend from the parking to the bridge. But this is gradual and the surrounding is great, you will enjoy it. If you have a mountain bike, this would be a good place to use it.
2. From the pass to the rock: At the pass, there is no sign for Cima de Piazzi, but there is one below the pass. I saw it but I wanted to continue to the pass. In any case, as far as I remember, the summit is not visible from here, so you will walk in the north-east direction (to the up-right direction in the picture below).
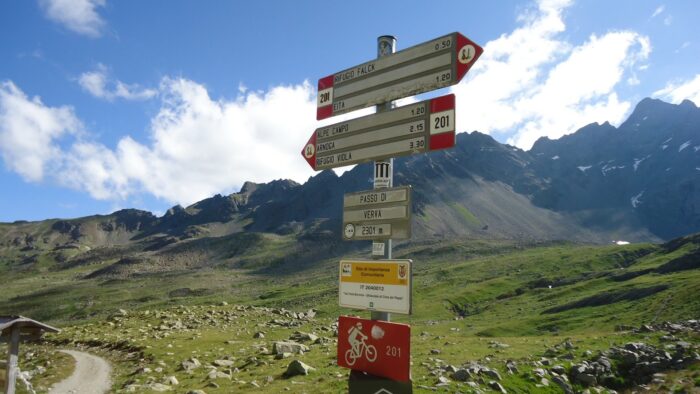
There are a few scarce signs for the route, and also cairns. This is the direction towards the lakes. You will see the water running from that side so this is your direction in any case. Though I lost some time here again trying to find where to go.
One of the lakes (Lago Nero) you will probably not see until you are much higher. But the one that you cannot miss (Lac de Valu) will be on your right side. So continue up, there is a steep scree section, go that way until you get to the rock. At this point, it may be difficult to know where to go.
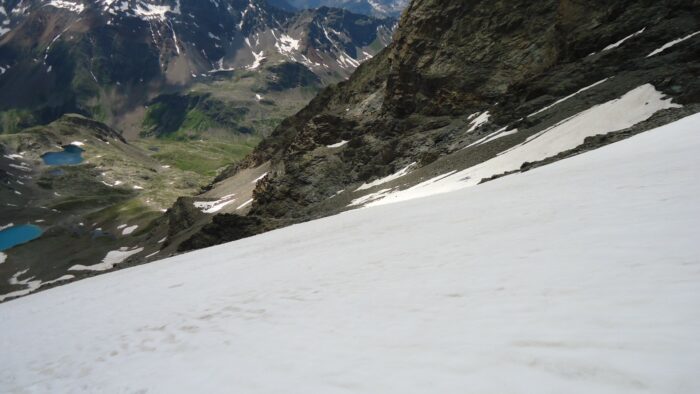
The picture below shows the view back before getting into the rock. The lake (Lac de Valu) is here in real color, and the Verva Pass is far below on the right.
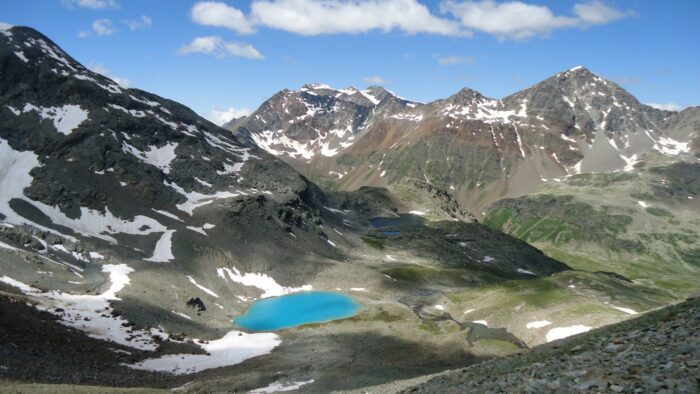
3. The couloir and the rock section: You will be facing the rock formation, and at this point make sure that you find the sign, it will be on the right, in the east direction, but it was very difficult for me to see it. So again, can you guess what I did? Yes, I continued up and realized there was no passage.
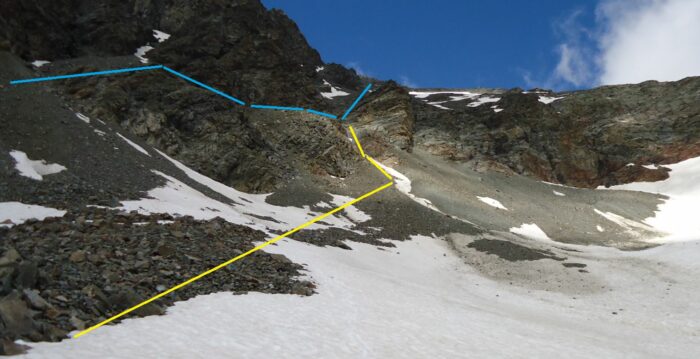
I realize now that I did not take a good picture of the point where you get into the couloir, sorry for that. The best I have is this one below, with the two ways I was going (blue when ascending, and yellow when descending).
The picture below is one of the views when you are in the couloir section, as you realize, it is worth the efforts:
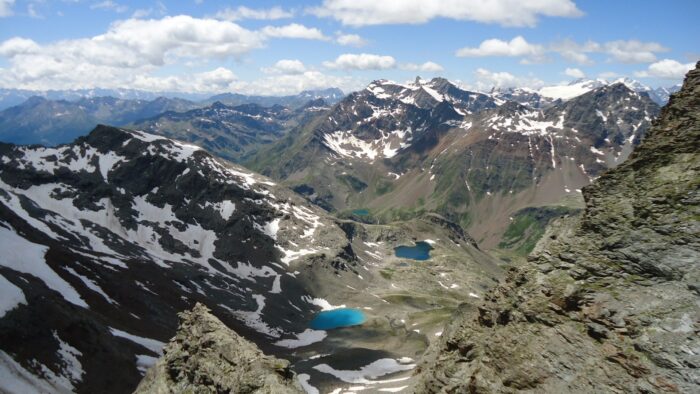
Anyway, the terrain is steep, you have to pass some scree areas and this will lead you to a couloir. There are lots of unstable rocks here, water is running at some places. It is slippery and you will feel unstable, so having walking poles is good at some points, but there are some scramble sections and you will have to put them away. It is better to have a piolet. Oh yes, I had my Petzl ice axe, but it was in the car of course.
In the case of people above you, you will be in trouble if they push any rock, they all lead in the same direction. So try to pass this part without staying too much, and pay attention to what is happening above you.
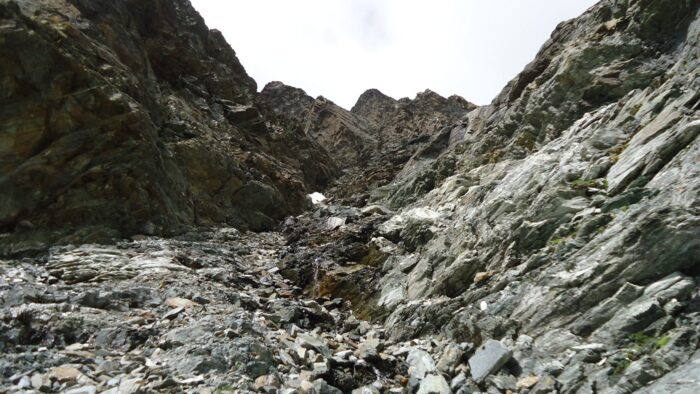
After that you will pass a few snow sections, I was there in mid-July and lots of snow was still there, see the picture below. If this is icy, it may be difficult to pass without crampons. In my case the snow was soft, but my gaiters were in the car, so imagine.
Eventually, you will get close to the ridge that now leads in the north direction. This part is relatively easy to navigate, and you will see the summit. But you might not like what you will see if you have no equipment, keep reading.
4. The summit section: Before the summit, there is a short beautiful passage with a deep snow and a small cornice, see the picture below. This is the highest part of the glacier that completely covers the north side of this mountain. The picture shows two of the Italians passing the cornice (more about them below).
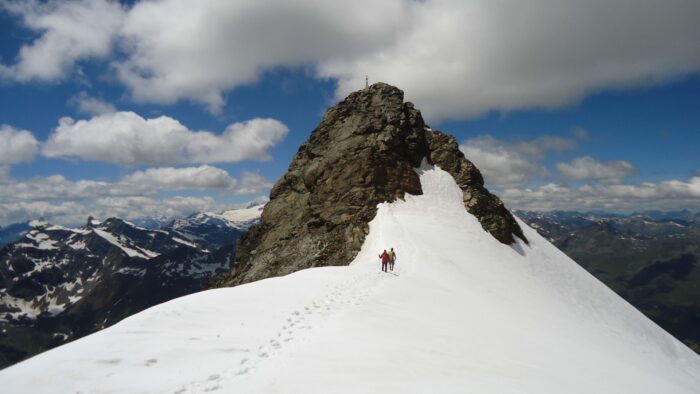
So when you are over it, you will have the rocky summit wall in front of you, with several chains in place. It may be good to have ferrata equipment. No doubt I am becoming boring by repeating the same phrase, but here it is again, I had all the stuff in the car.
But this is doable even without it. Only the last chain is a bit tricky, you have to climb up without a place to put your feet. But there is no need to stick to the chain at this stage, you can pass here on the right and in a few steps, you will be on the summit.
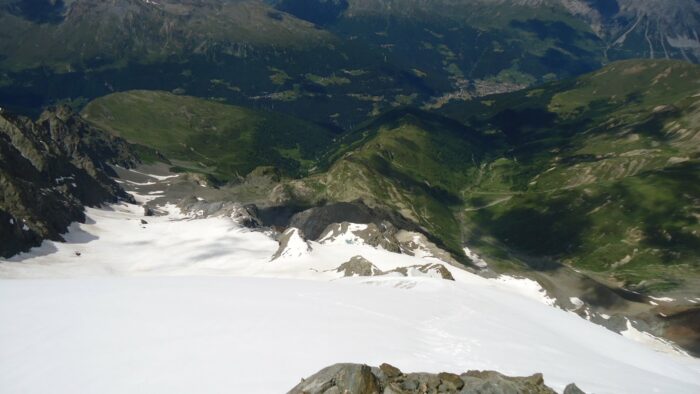
The picture below shows the very steep and completely glaciated north side of Cima del Piazzi, view from the summit:
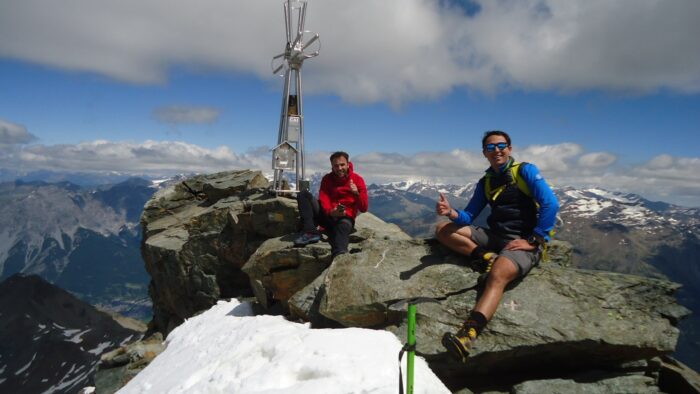
The picture below shows two Italians. I told them I would add the picture to the site, they did not mind so here they are, salutes to my Italian friends.
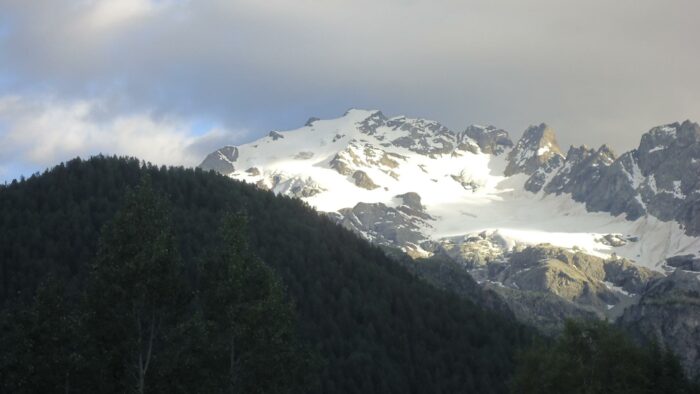
Below is a bit zoomed view of the mentioned north side of the mountain, as seen from the road Bormio-Livigno, trust me when I say that it looks much steeper in reality:
I have taken some photos from the summit, but they are not so great and I would rather not show them here. I guess it is time to buy a new camera.
After staying for about half an hour on the summit, I descended the mountain. My Italian friends stayed a bit longer. One of them had a drone and he was making videos, perhaps they will appear somewhere.
Equipment: what is essential and what is not
As usual, I did my homework before going there, or at least I thought I did. It appears also that I did not read proper texts. I am not sure if there is any. It is fair to say also that I did a few mistakes on my own.
So I did not have my helmet, did not have crampons, did not have gaiters, did not have harness and Y-rope. But I managed, and this means it is doable that way, yes this does not mean this is the best way.
Even if you disregard everything else, have at least your helmet. My own Petzl helmet was safely in the car. Here is one episode. When I was trying going in the wrong direction (before the couloir), I saw people below me and realized I had to wait for them to come closer so that we can communicate, to avoid any of them getting injured if I push a rock.
One Italian came, then there were two more, and no one knew the route. Eventually, I noticed the sign in the east direction, and the two young men went first, then I was following, and finally the other Italian.
At one moment, one of the two Italians pushed rock and he was shouting “roccia” in our direction. I was not in the line of the rock, but the third Italian was. He jumped behind the boulder, and the falling rock fell exactly on the spot where he was standing a second before.
This is how we continued, those above would stop at some critical places and they would wait that the others below pass, to avoid accidental rocks when moving. But the order was changing frequently, so we were not a group but we were frequently close to each other.
I used my Lowa Renegade GTX Mid boots. Those are probably not the best option for this climb, I had La Sportiva Nepal Extreme mountaineering and Scarpa Triolet GTX boots in the car (the latter would be the best choice for the upper part). As I mentioned earlier, I did quite a number of mistakes that day. But Lowa Renegade did a great job, the most comfortable boots I have ever had. They were the best choice in particular for the described long approach walk.
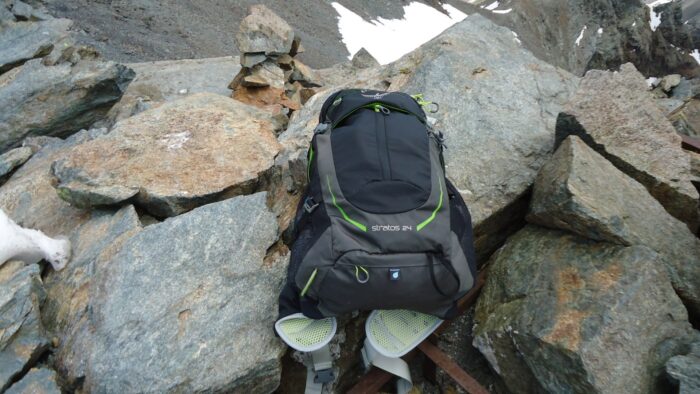
As for the pack, I had my new Osprey Stratos 24, you can see it here below on the summit. It was great because I did not have lots of necessary stuff, otherwise it would be too small.
Water & food
This is a whole day tour, there is water around, so if you have a filter take it with you. I missed taking my filter with me; remember what I said about many mistakes?
There is one building well below the pass that looked like a place where you might get some food and drink, but I did not bother to check. It is visible in the zoomable map above.
How much time is needed really?
Frankly, I am not sure. I missed the direction a few times and wasted a lot of time, this was so in the blue and yellow line sections in the map shown above. I was at the pass at around 11:20 and on the summit around 14:20.
But if you know where you are going and what you are doing, it is probably possible to get to the summit from the parking in 5 hours or so. It will be great to hear from those who climbed the mountain from this side.
Final thoughts
To summarize this report on climbing Cima di Piazzi, in spite of so many mistakes that could have ruined the day, this was a great experience. I ask those who go to the mountains to provide more essential details when they write reports and when they make videos.
But I cannot blame anybody, the mistakes were all mine. Did you know how one of the greatest physicists Niels Bohr defined an expert? He said something like “An expert is somebody who has made all possible mistakes that can be done, in a narrow field”. No doubt, this makes me an expert for the normal route of Cima di Piazzi. I have included it in my list of best mountains to climb in Italy in one day.
Cima Piazzi is lower than Monte Vioz which I climbed a couple of days earlier. The start point is at a similar altitude, but I find Monte Vioz much easier to climb. It is also lower than Pizzo Tresero, but in my view, it is far more demanding mainly because of the bigger altitude difference.
The total height difference is around 1700 meters, there is a part below the parking where you have to descend some 100 meters or so.
Thank you for reading. Note that I have an open invitation for guest authors, so send me something and I shall be happy to add it to the site. It must be an original and first-hand experience. Let me know if you have any question, there is a comment box below.
Mateusz Kubczak says
Hi,
I do not know if You respond but i will give there a shot.
i am planing to be at livingo in the begginig of march. So that will be winter in the best. how hard can it be to get to the summit of Cima Piazzi in the winter? its thill managable? of course iw ill heve all nessesary equipmnet like axe(?) and climbing-irons for shoes. A month ago I happily summit RYSY (2500) Polish highest peak.
my wife telling me that i cannot go there alone so my question is it really that hard? i mean of course you need to have special care about avalange etc but is it manageble by Your point?
thanks in advance for respond.
BR/Mateusz
Jovo says
If you go the same route that I used, there are many possible issues because of the snow. Now, I cannot know how much snow there can be, so I can only guess. I have never been there in winter, and this makes my guessing even worse. Here are a few problems you may face.
The long access route from the car parking is by following a gravel mountain road, this is high elevation and most likely all will be under snow. Nobody is there in winter so you will not even know that this is a road. This alone may be a too big obstacle. You simply cannot walk such a long distance in a deep snow, the progress will be too slow, and you will get too tired. I am not even sure that you will get to the car parking, but most likely this will be possible because the area around the parking is inhabited.
Higher, when you get to the pass and you are on the route to the summit, it will be far more snow. I had it plenty in summer. It will be difficult to find the way up, the summit is not visible, and you will not know where to go. That part is ideal for deadly avalanches as well.
All in all, your wife is right. Do not go. But if you still want, perhaps it is better to consider the glacier route, it is shorter and more direct. But I did not go that way because I was solo, and glacier in summer was not an option. In winter, crevasses will be closed but this is still not for a solo tour.
My advise is to choose more mild peaks, there are plenty around Livigno, see the texts about Monte Breva and Monte Vago here in the site.