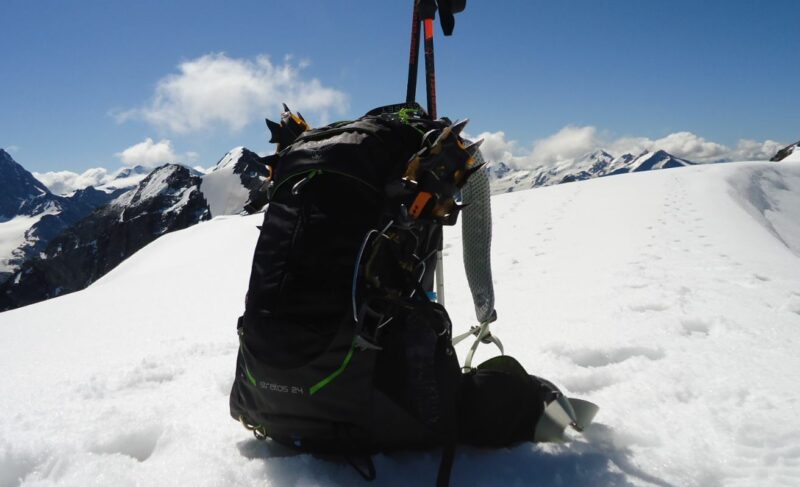
This Osprey Stratos 24 review is about my new great pack for light and fast day hiking, mountaineering, or cycling tours. It offers exceptional comfort and ventilation, and it comes with a rain cover and an adjustable torso length.
Key benefits
- Exceptional comfort, breathability, and ventilation.
- Rain cover.
- Adjustable torso length.
- Hydration compatible.
Osprey Packs Stratos 24 backpack – what this is about
So this is about my new daypack which I used this summer in several day tours in the Alps. You can see it in my reports of climbing Monte Vioz, Cima Piazzi, and also on my short tour to Geisterspitze (Punta degli Spiriti). If you follow the links and scroll through the posts you will see it in pictures.
In fact, I used it also on several other tours that are still not described here in the site, and in my failed attempt to get to Monte Cevedale. So I can say quite a lot about this pack, this is all my own first-hand experience.
I always wanted to have this pack, so this summer I noticed it in my local outdoor store and purchased it for 65 Euro which was a true bargain, though it is more expensive on Amazon and some other online sellers, there will be links below. Apparently, the price was so great because of its black color so customers would rather go for some other of 4 possible color options.
In some of the mentioned tours, I was carrying some really unnecessary equipment, but I was able to put all in this small pack, and what could not fit inside I was attaching from outside. So I was pleasantly surprised by the pack’s performance.
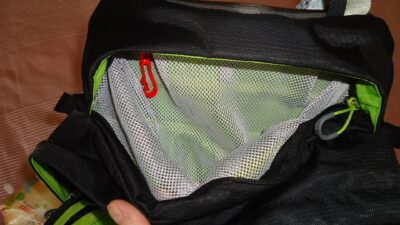
Now back to the pack’s features. So this is the smallest pack in their Stratos series. It is a panel-loading type pack with a zipper instead of a top lid. This is a daypack so you have one main compartment with the mentioned zippered access, see how it looks:
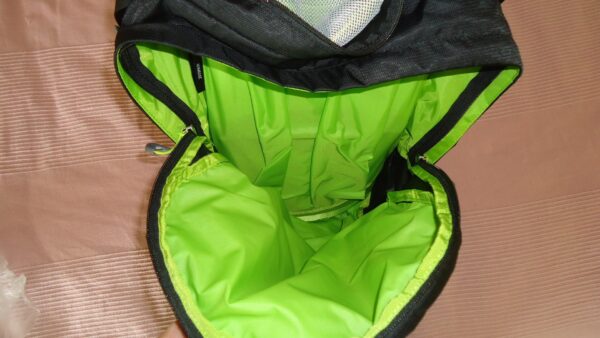
Observe that the inner color is very different from the outside color, so you can easily see what is inside, this is already something that I like, and I think they have chosen the inner color wisely. The same is with all the pockets, you will realize this from the pictures below.
The pack comes with a bonus rain cover that is stored in its own dedicated pocket on the bottom, see the picture below. Note that the cover is removable so you can use the pocket for other purposes as well.
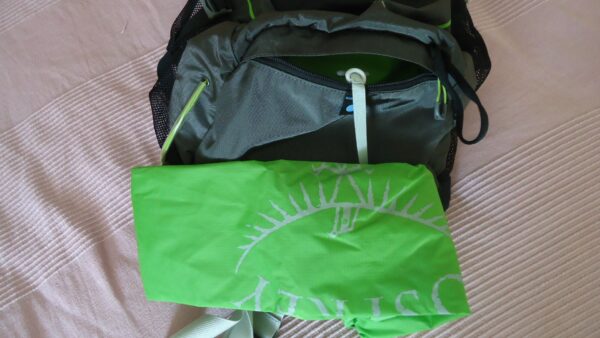
In the area where I do climbing, I would never go without such a rain cover. In one of the unsuccessful tours this summer I was in the snow and rain for more than 6 hours. So such a rain cover is simply a must.
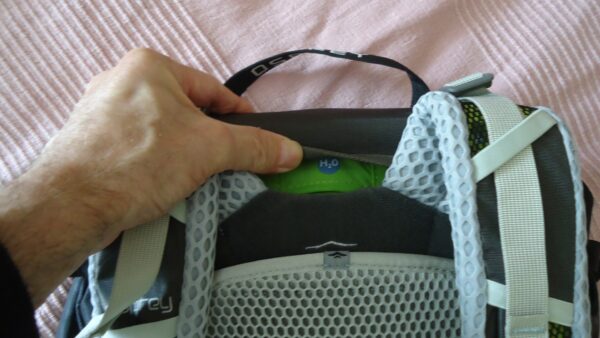
The pack is hydration compatible, there is a deep sleeve in the main compartment, and a hose port is behind the neck, see the picture, so you can route it on either side of the shoulder harness.
The suspension system
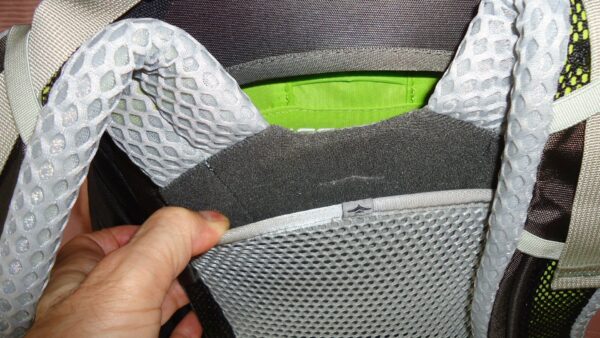
This pack has an adjustable torso length, and this is what makes it different from the previous version. So you have a Velcro hook-and-loop pad on the back and adjusting the torso length is easy. Simply break the connection and then move the harness into the desired position, and after that press firmly to re-engage the connection. There are some markers that can help, see the picture:
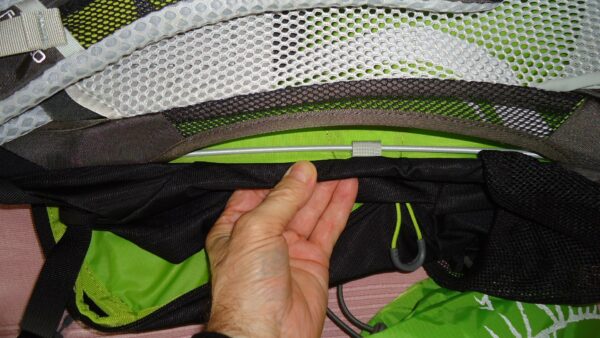
They build it in one size and this is perfectly fine, with such a torso adjustment several family members can use the same pack. The shape of the pack is defined by a peripheral LightWire alloy frame, it is partly visible as shown in the picture:
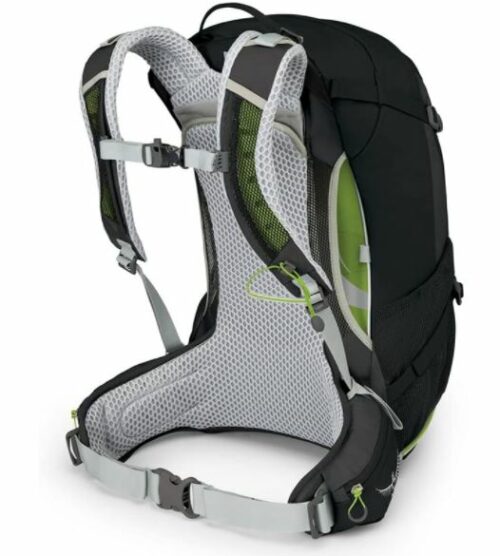
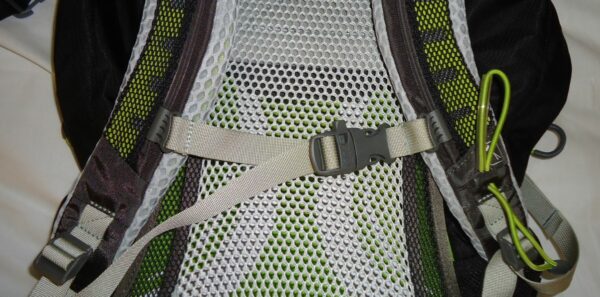
The back panel is what they call the Airspeed Suspension, and this means a trampoline-style ventilated tensioned mesh, see the picture below. You can pass your hand behind the back mesh, the pack is completely separated from the body, so air is free to escape in all possible directions.
This system is now becoming widely popular and you will see it in packs from many brands, but it was originally introduced several decades ago by Deuter in their Futura series. I have been using such Deuter packs for almost two decades already and I am completely convinced that there can be nothing better if you want a ventilated pack.
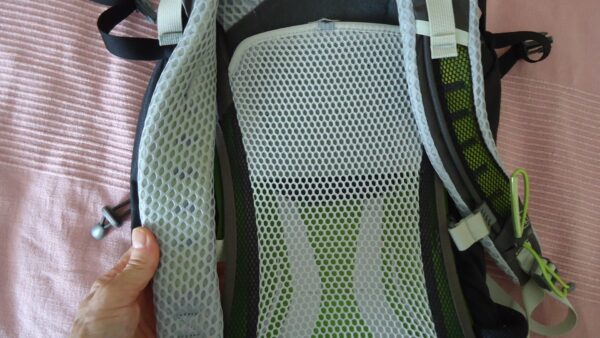
The picture above also shows breathable padding on the shoulder straps. You can see numerous EVA foam cutouts for ventilation. This is an excellent design, as you surely know you will sweat whatever you have, even if it is about such small packs, but this is the best you can have to reduce sweating.
The hip belt is surprisingly wide for such a small pack, it is lightly padded and also very nicely ventilated, see the picture below. What you cannot see is that the lumbar zone is without any foam, the breathable mesh from the hip fins continues smoothly to the lumbar zone, and behind it you have yet another layer of a much stronger and denser mesh for some extra support.
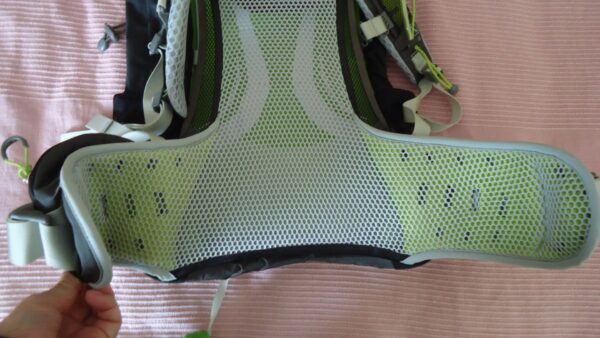
On the front of the belt you have what they call the ErgoPull belt closure. So you pull forward and this is easier than when you have to pull to the sides, I have packs of both types and can compare. The sternum strap is with a sliding connection and you have a safety whistle here, see how this looks:
So as you realize, I have spent quite some time describing the suspension, it deserves it, this is a really great design, and completely appropriate for such a small pack.
Now, because the pack is so separated from the body, some claim that it is pulling you backward and that there is a problem with balance. As mentioned above, I have been using such a system for many years and I disagree with such views. I have never had a problem with balance. But indeed, the fact is that the back of the Stratos 24 pack is rather curved.
Pockets
The pack has 8 pockets in total and this is surprising in view of its size and the fact that it is without the lid where you normally always have some extra pockets. So here is what you have:
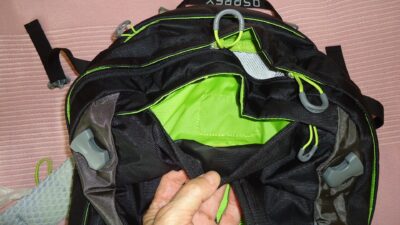
- One zippered top pocket with a key clip inside, the picture below.
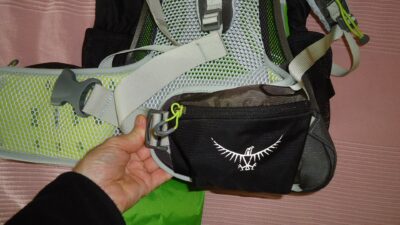
- Dual zippered hip belt pockets with nice pull loops that you can use with gloves, one is shown below.
- Dual side mesh pockets. On one occasion I was carrying my Petzl crampons packed in their carry bag in one on the side pockets, you will see this in my text about Monte Vioz.
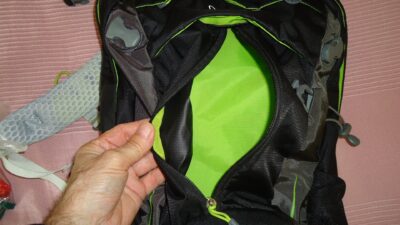
- One large zippered front pocket with a vertical zipper, see it below on the left. Here you can keep thin and large items, like maps or books.
- Yet another small zippered front pocket where I keep very small items and my reading glasses.
- The mentioned bottom rain cover pocket.
Attachment elements and straps
I would start with the element unique to Osprey, the Stow-on-the-Go attachment system for trekking poles. I was using them in the mountains quite often. This is useful when you need free hands for a small scramble, or when you want to take a photo, etc. This includes the loop on the left shoulder strap and a loop on the side of the pack, both are visible in the picture:
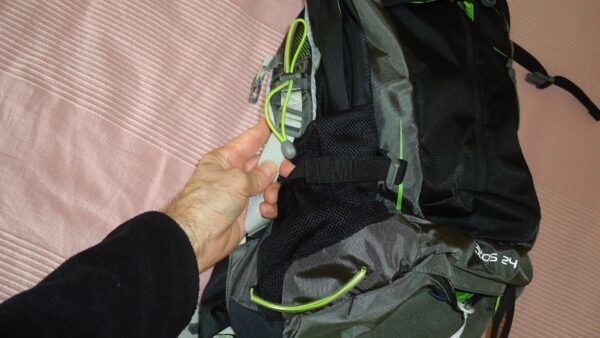
You also have lover side compression straps that run over the side mesh pockets or through them, you can choose. There is also a pair of upper side straps, you can use them to cinch the pack and also to keep in place any longer item which you might carry in the side mesh pockets, like a tripod or an umbrella. In the top picture above you can see that I was able to attach my crampons with the upper side straps.
One large loop is on the front/bottom, so here you can attach an ice axe. This is paired with a bungee loop higher on the front.
There are also several webbing loops on the shoulder straps, for water hose or simply to attach small items.
Materials
You have already seen some of the materials. Here just to add that they use 2 different fabric types, the main is 210D Nylon Crosshatch, and the accent and the bottom are a 420HD Nylon Packcloth. You can see and feel the difference, but both materials look very durable.
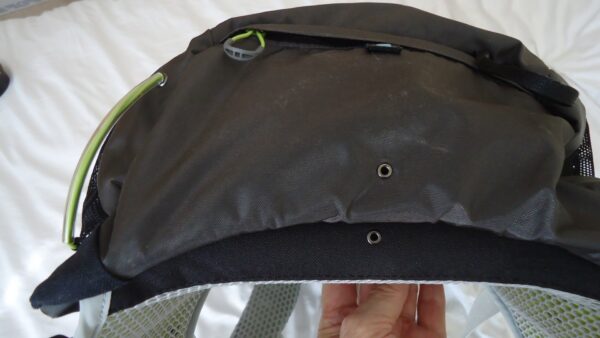
They pay attention to details, and there are many examples here. For example, there are two holes on the bottom, the picture below, one for the rain cover pocket and one for the lumbar zone cavity. This is to drain the water if you store the rain cover wet, and to let the water go if it gets behind the back panel.
Specifications
- Best use: hiking, mountaineering, cycling.
- One size.
- Weight: 2.756 lb (1.25 kg).
- Volume: 1465 in³ (24 l).
- Dimensions (H x W x D): 22 x 11.8 x 11.8 in (56 x 30 x 30 cm).
- Torso fit: 18 – 22 in (46 – 56 cm).
- Waist/Hips fit: 25 – 50 inches (64 – 127 cm).
- Maximum carry weight: 25 lb (11.3 kg).
- Warranty: Osprey’s All Mighty, see the details:

Here are some impressions about this pack from my recent climbing of Piz La Varella (Lavarella) in the Dolomites, Italy:
Final thoughts, rating, pros & cons
In the conclusion of this Osprey Stratos 24 review, I think my only problem with this pack is that currently, I do not have enough opportunity to use it. I am writing this in the time of the virus pandemic, and although I managed to go to the mountains in the summer, my plans for the autumn are under question. But I am sure this is a pack that will serve me for many years.
I found it at a price that was a true bargain, but when you check online it may look a bit expensive. However, it is worth the money. This is a top-class pack, with so many useful features, reliable, and from a renowned brand. If you feel it is too small, check the larger versions from the same series Stratos 34, Stratos 36, or Stratos 50 pack.
Note that the corresponding series for women is Sirrus, so you have Sirrus 24 pack with all main features the same as in the Stratos 24, plus some changes in the design introduced to fit women’s body.
Here is the rating of this pack against my standard set of criteria, as you see the rating for the weight is not particularly high, but the pack does not feel heavy when you have it in the hands.
You might want also to see my comparison Osprey Stratos vs Deuter Futura Packs, I used this pack partly as a base for the text so please have a look. Check also this Osprey Stratos vs Talon packs comparison. Thank you for reading. Do use the comment box below in the case of questions, I shall be happy to answer. Have a nice day.
Mario says
Hi Jovo,
Osprey redesigned the Stratos line in 2022., now it is much taller (new Stratos 24 is 59cm vs old’s 56cm, Sirrus 24 is 55cm vs 49cm, Stratos 26 is 70cm vs 64cm!) and has other changes (for better or worse), like different torso adjustment system, hip belt pockets, materials used, etc.
Did you have any experience with the newer model?
A review with comparison to older model would be really helpful, since older Stratos are now very rare and expensive, and newer model might be good for some, but if not there are good alternatives, like Deuter Futura 26 or 27 or the new Gregory Zulu LT 24 which is similar to Stratos 24 – panel loader, front zipper pocket, almost as good ventilation, but also noticeably lighter at 1.05kg.
All the best,
Mario
Jovo says
Hi Mario, it is difficult to keep up with Osprey, they launch modified versions too frequently. I always follow what they are bringing on the market, but have no time to write about all the new stuff. I am in the mountains right now, with rare connection to the Internet, just came to am official camp in the Dolomites, and that is why I am able to read your comment. My Stratos 24 is one of the three packs that I have in the car with me. I myself would change a few things on it, like too wide straps that are not needed for a pack of that size. I used it yesterday on a long 11 hours day tour.
Andrew says
Do you think the stratos 24 would work for ski touring or mountain biking? Would the side straps be sufficient for strapping some skis on “a-frame” style?
Jovo says
Hi Andrew, I did not use the pack that way so cannot be sure, but here is what I think. For mountain biking, I do not see why not.
As for ski touring and A-frame, not so sure. There are lower and upper straps. The lower gives up to 20 cm total width. The upper strap goes through one extra loop in the middle that keeps it in place, and when you make the strap lose, you can have at least 15 cm for skis. The shortest distance between the two straps is 20 cm, so I do not know if this all would give enough space for those binding mechanisms on the skis. Without trying with skis cannot say more.
Andrew says
Thanks, that’s helpful. I’ll give it a shot and hope for the best! Plenty of use cases for this bag besides skiing anyway.
Jovo says
You are welcome Andrew.
Mark says
I think Osprey is doing away with the Stratos 24 but there are still a few out there. Do. you recommend the Stratos 24 or the MANTA 24. I am also looking at the Gregory Citro 25. I have a few packs that are bigger but really want a workhorse day pack in this size range.
Jovo says
I am sure you will be doing great with any of the two Osprey packs, they are excellent for day tours. The main difference is the back panel design so this is the matter of preference. I love the suspended mesh design in the Stratos pack.
Citro 25 is without adjustable torso length, and it is without Stove-on-the-Go feature which I love.
Chris says
Why use a rain cover? In canoe country, we use heavy duty plastic bags or trash compactor bags. They work — 100% — even if you capsize, something I’ve experienced. Additionally, they are light, durable and affordable.
[FYI: Those who know put ground sheets inside tents. Their purpose is to keep tent occupants dry. This too works easily and cheaply. Plastic or Tyvek are the go-to products. Read about this in Canoeing Wild Rivers by Cliff Jacobson, a book with tons of great advice applicable for those who spend time in the wild — on foot or in a canoe.]
Jovo says
Hi Chris, I have never capsized and have never used a canoe in my life. I am a mountaineer, and for this you need a rain cover. The reasons are explained in my separate text.
For capsizing, a rain cover would be pointless, I guess it is easy to agree about this. I am just curious, what happens with the things in the pack’s pockets when you capsize? Do you use plastic bags for every pocket separately?
As for the plastic sheets in a tent, I assume you talking about tarps and not tents because tents already have a waterproof floor. If this is about tarps, this cannot save you from crawling insects and snakes. I have been through Lime disease so trust me I know what I am talking about.