Here you have my first-hand hiking report to three bivouacs on the Trans-Lagorai Trail: Bivacco Paolo e Nicola, Bivacco Coldosè & Bivacco Moregna. The route also includes three beautiful lakes, so keep reading.
The Bivacco Paolo e Nicola, Bivacco Coldosè, and Bivacco Malga Moregna are comfortable shelters on the Trans-Lagorai Trail. All three are equipped with a wood-burning stove. You can visit these shelters also from the surrounding valleys, from the north and from the south sides.There are three lakes on the same route: Lago Brutto, Lago delle Trote, and Lago di Moregna, so do not miss visiting them.
Coordinates, numbers & details
- Nearest place for supplies: Predazzo.
- Mountain group: Lagorai, Dolomites, Italian Alps.
- Coordinates Bivacco Paolo e Nicola: 46.2568539, 11.6649972.
- Coordinates Bivacco Coldosè: 46.2596050, 11.6246864.
- Coordinates Bivacco Malga Moregna: 46.2672819, 11.6355869.
- Route difficulty: walk-up.
- Maximum elevation difference from the car parking: 589 m (1932 ft).
- Parking coordinates: 46.2902247, 11.6465089.
- Useful map: Val di Fiemme Lagorai – Latemar, Tabacco, 014, 1:25000.
Access roads and map
I have prepared the interactive and zoomable map below, and it shows the following important points on the round tour which I walked from the north side of the Lagorai chain:
- Marker 1: Car parking.
- Marker 2: Bivacco Paolo e Nicola.
- Marker 3: Bivacco Coldosè.
- Marker 4: Bivacco Malga Moregna.
Note that you can explore this area also by using maps from AllTrails.
Bear in mind that the forest road from Predazzo to the car parking is very narrow and at some places rather steep. There are parts with asphalt and parts with macadam. At some passages, you can only pray that nobody will come in your direction when you drive up.
There are huge trucks that transport logs from the area, so it is best to go when they do not operate. This means early in the morning and perhaps very late in the afternoon. But the latter option is not the best because you can expect cars coming from Malga Valmaggiore, which is a popular place, a sort of high-elevation restaurant.
Route description
Below you have several different stages of the route described in detail:
From car parking to Bivacco Paolo e Nicola
The car parking is the same as for Bivacco Cece, at Ponte di Valmaggiore. It must be said that the road continues to Malga di Valmaggiore, and there is a parking there as well, but there was a sign that this was for Malga visitors only.
However, later when I came back from my round route, I saw cars parked and some people were clearly preparing to sleep in the cars. So I am not sure about the actual situation.
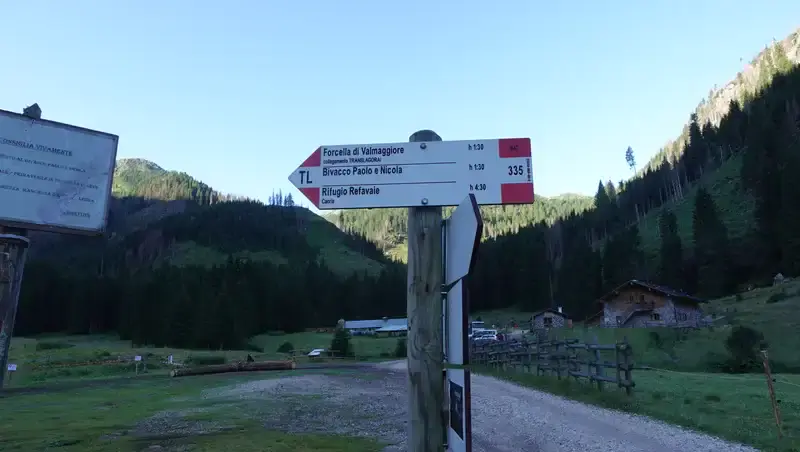
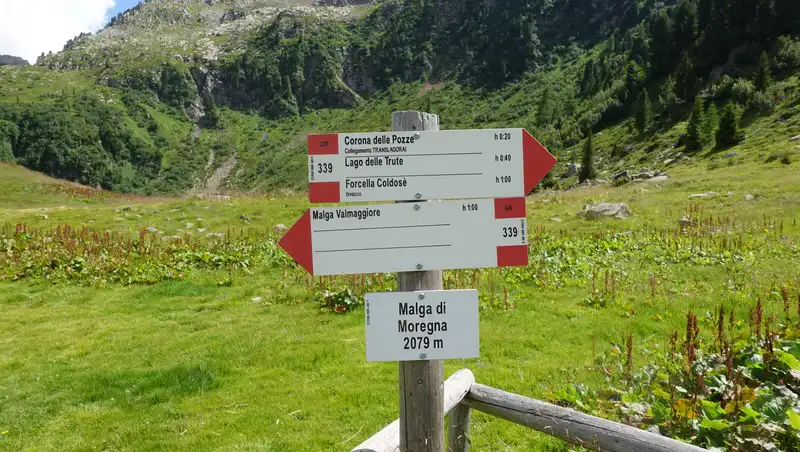
If you want to play it safe, leave the car as described above, at Ponte di Valmaggiore, and walk up towards the Malga. This is only some 15 minutes or so of walking. Here are some signs at Malga di Valmaggiore:
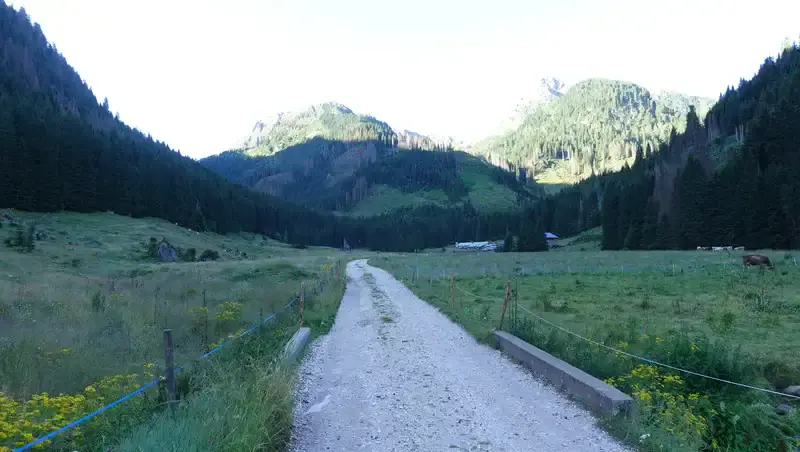
From Malga di Valmaggiore continue up the valley through a beautiful forest; the route is 335. Here you have one photo of the area:

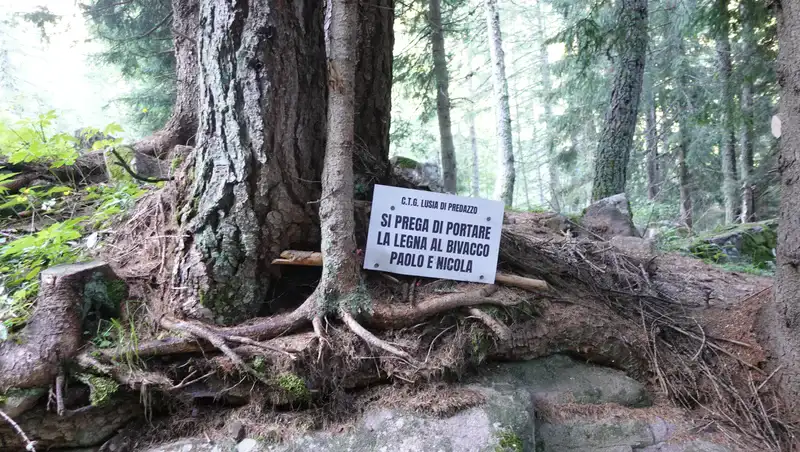
At one point in the forest you will see wood cut and prepared for people who want to carry it up the mountain to Bivacco Paolo e Nicola. Here is the table where they ask people to do so:
When you are out of the forest, there is a steep passage which you have to climb before getting to Bivacco Paolo e Nicola. Here is a view back over the valley which you have just walked up from Malga di Valmaggiore:

If you do this in the morning, this will be the area where you will enjoy the first sunshine, and the bivouac will soon appear above you:

Getting here means you are now on the Trans-Lagorai (TL) trail, and this bivouac is a part of it. For some people this is the first shelter they use when they start from Passo Rolle.
But this is a long TL section, and you can make it easier by sleeping in Bivacco Aldo Moro that is on the same trail and much closer to Passo Rolle.
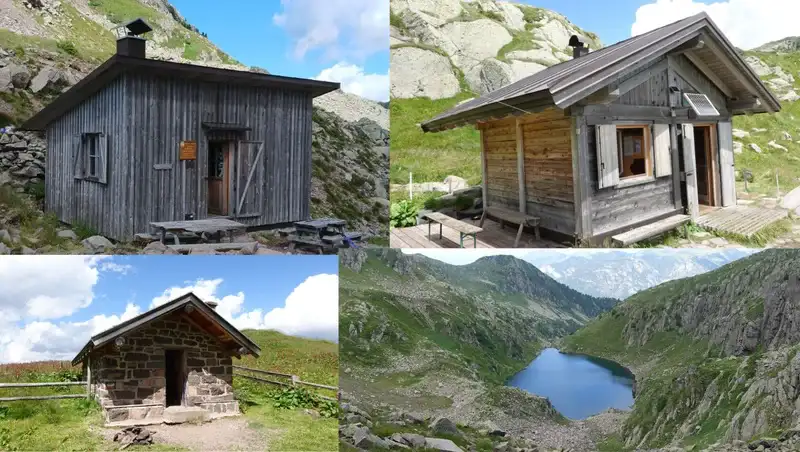
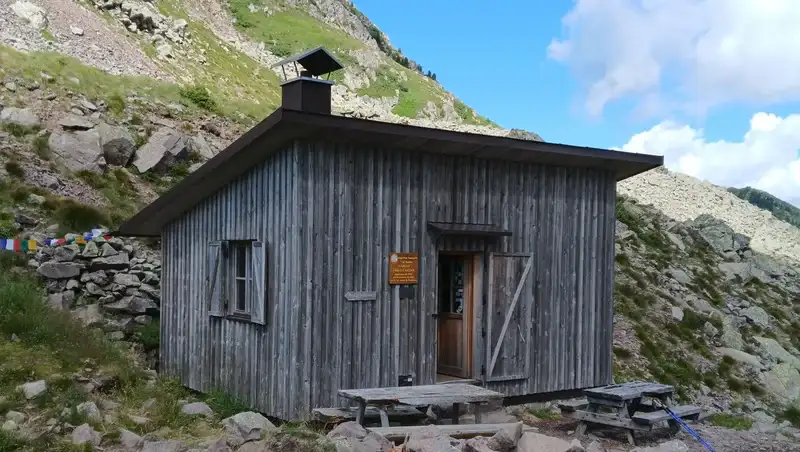
Bivacco Paolo e Nicola
This is a wooden shelter, fully equipped, with mattresses, and plenty of stuff for cooking. There is plenty of wood prepared and stored in a covered space outside.
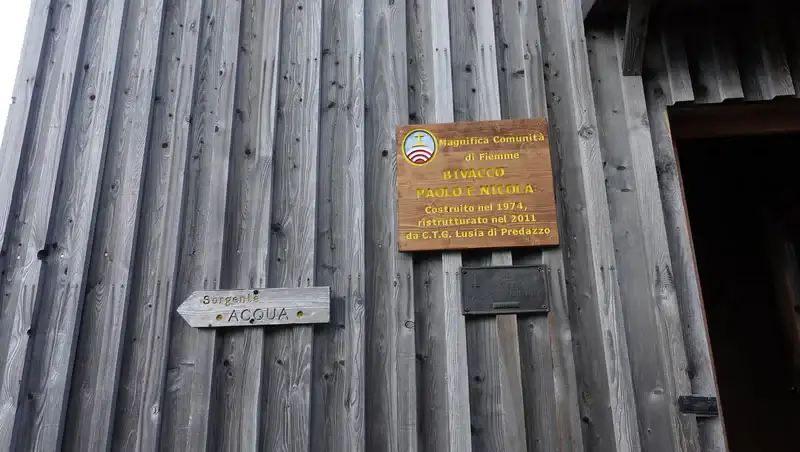
Note that there is a water source close to the bivouac; you will see the sign on the outer wall pointing in its direction:
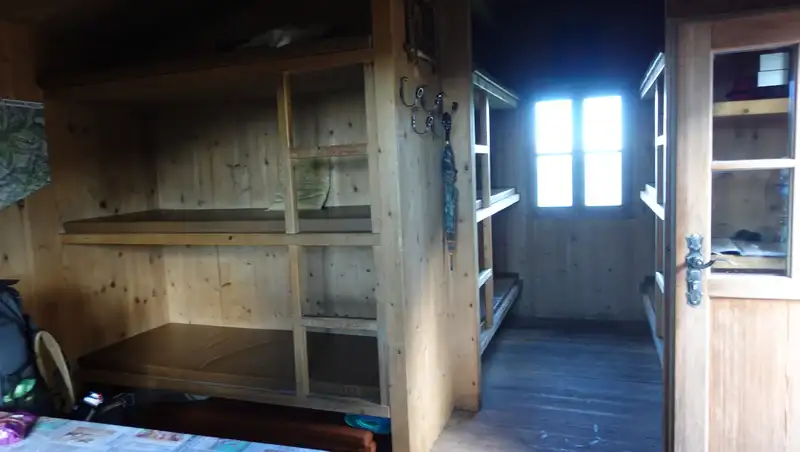
The bivouac is beautifully designed; in fact it is more attractive from inside than from outside. Here is a view of its sleeping area with 9 separate bunk beds:
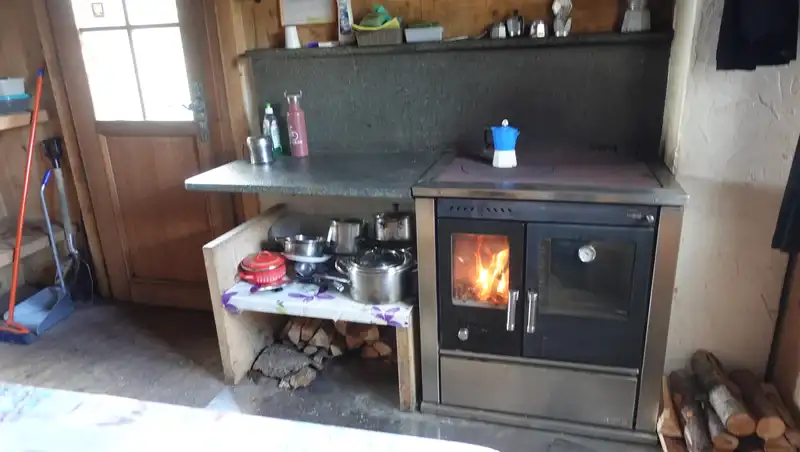
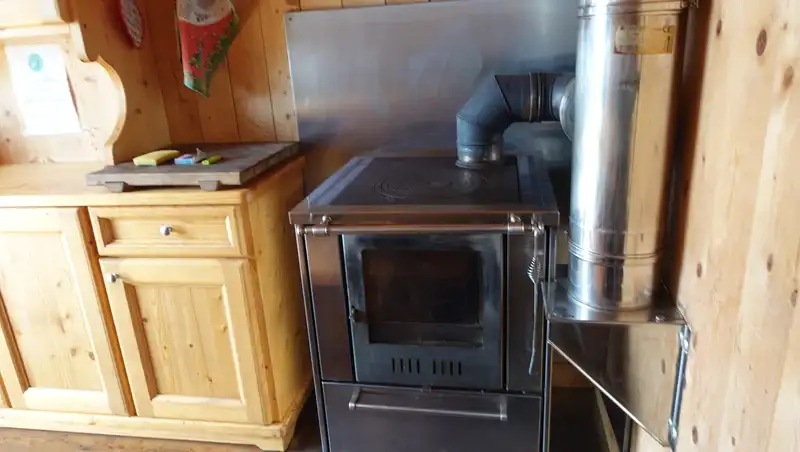
The wood-burning stove is fully functional, even with an oven; here you can see how I was making coffee which was available, together with several Bialetti pots:
From Bivacco Paolo e Nicola to Bivacco Coldosè
If you decide to continue along the TL trail in the south-west direction, you will follow the route that goes to Forcella Moregna (2397 m). The route number is 349.
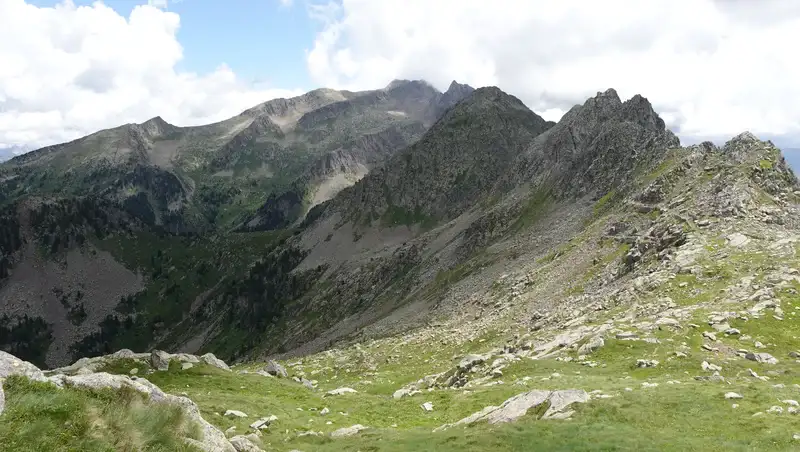
Below you can see the area where the route climbs up; it goes in between the two peaks visible in the photo. The closer peak is Cima Moregna (2517 m).

Here you have the view back from the steep path towards Forcella Moregna:
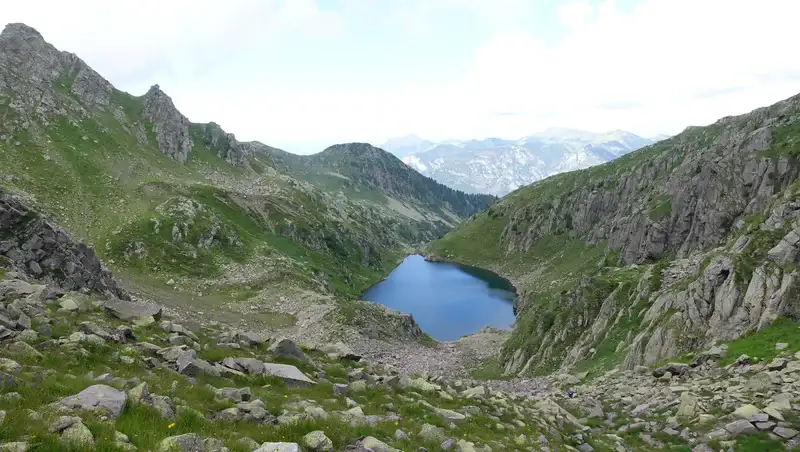
Very soon you will have this beautiful lake below you; this is Lago Brutto, and this literally means “Ugly Lake”. Can you believe?
The route goes along the right side of the lake, and when you pass it, you will have another lake in front of you: Lago delle Trote (Lake of the Trout):
So you descend here and there is a set of tables for various directions. You go to the left now, towards Forcella Coldosè (2183 m).

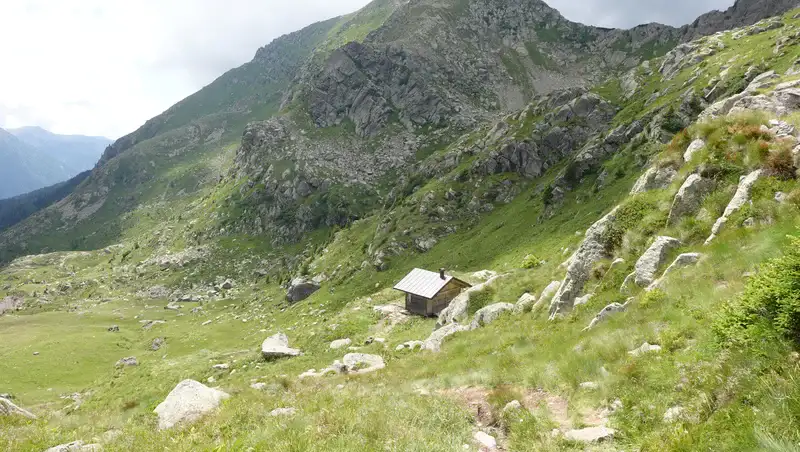
When you get to Forcella Coldosè, you will see the bivouac as shown in the photo below; it is on the sunny side of the slope, in a very pleasant place:
Bivacco Coldosè
This is a very modern shelter made of wood, beautiful from outside and from inside; see how it looks:

I must say, for me this is the best equipped bivouac ever, and here are a few details inside. The beds are modern, equipped with mattresses, blankets, and pillows, and there is also an attic with extra space to sleep and with more mattresses stored there.
The kitchen has plenty of pots for cooking, practically everything you need, with lots of food, coffee, and an incredibly modern stove. But note that the shed outside was empty when I visited the place.

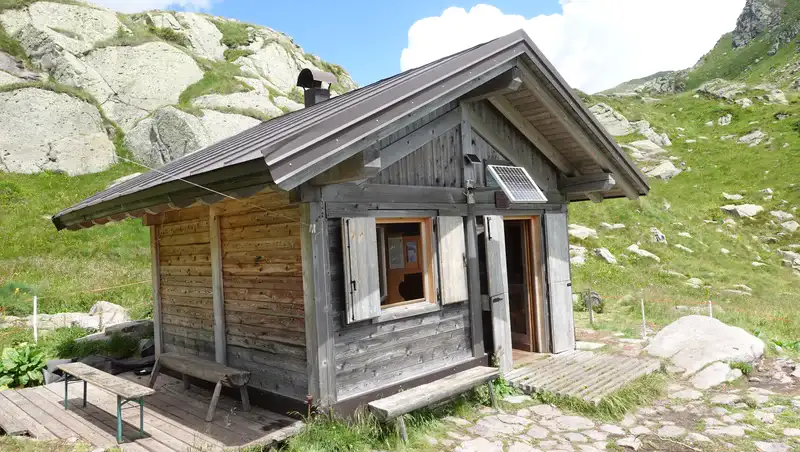
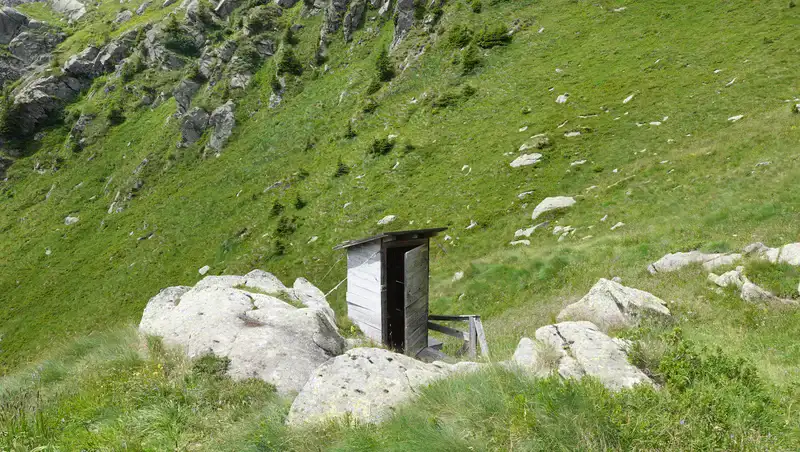
There are solar cells outside, so you have electricity inside, and there is an installation for charging phones. There is even an outhouse close to the building, and this is a rarity in the Alps.
You will want to know that water is available directly in front of the shelter.
From Bivacco Coldosè to Bivacco Malga Moregna
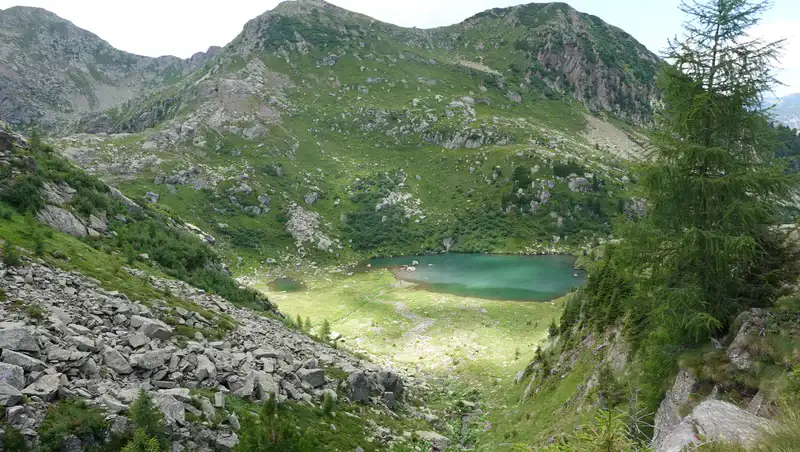
You will walk back to the mentioned Lago delle Trote, and from there follow route 339. Inspect the map given above. At one moment you will have the view of the lake far below you; this is Lago di Moregna.
The photo below shows it, and you can see the buildings next to it; those are Malga Moregna and Bivacco Moregna.

Elevation of the place is shown in the photo below together with some directions.
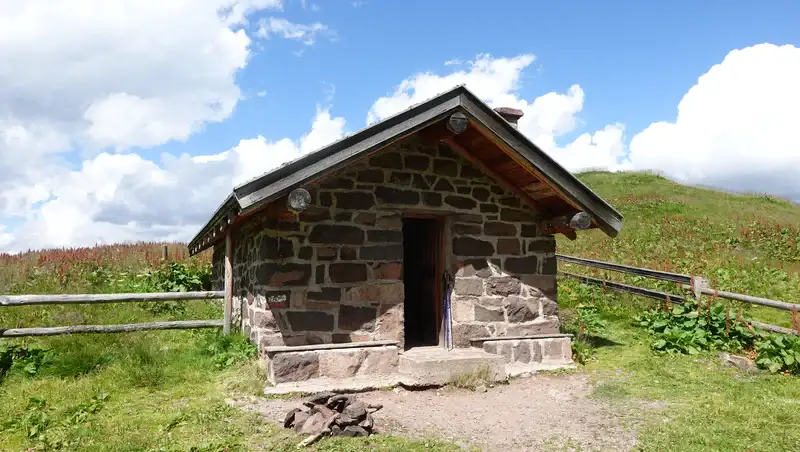
Bivacco Malga Moregna
You will want to take a rest here; the Bivacco is a stone building, and the nearby Malga seems to be always closed.
It is white and pleasant inside, and here are some details:

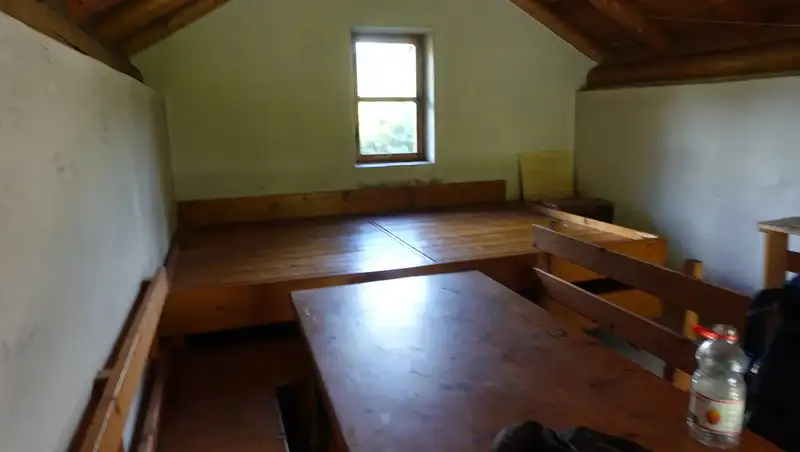

Note that there are no mattresses here. There are a few blankets and the wood for the stove was available as you realize from the photo.
Descent route back to parking
You continue down the mountain by following route 339; it will take you to Malga Valmaggiore where you can take a rest and have a meal.
After that you are on the same road that goes to the parking which is around 1200 meters below.All the details of this round tour are presented in my video; please have a look:
My tour timing
I followed the route as described above. So there is not much to add except for my timing; this may be useful for your planning.
I started at 7:30 am from the parking, and I was at Bivacco Paolo e Nicola at 9:30 am. I had a long rest there and continued at 11:40 am.
At 1:50 pm I was at Bivacco Coldosè, which means it took me 2 hours and 10 minutes.
At 2:30 I was on my way to Bivacco Moregna, and I arrived there at 3:05 pm. The remaining part I did not check my watch, but this is probably some 40 minutes or so till Malga Valmaggiore. So plan one hour to the car to be sure.
Gear for the tour, water & food
There are no exposed passages on this tour, so you do not need any extra equipment. I used Mammut Sapuen GTX boots, a pair of trekking poles, and my Mammut Lithium 40 backpack.
In the backpack, as usual, I had a rain poncho and rain pants, plus a rain jacket.
If you want to stay in any of the shelters, make sure you have your own sleeping bag. You have already seen that water is available in two places, but if you have a purifier you can also take the water from any of the lakes.
Do you want to walk this route?
As you realize, I walk solo, but I have been in this for 40 years already. If you have some mountaineering experience, you can do this tour too. However, if you want to play it safe, which I warmly advise, get in touch with some experts and guides who can help you get here.
Final thoughts
In summary, I hiked the round tour to Bivacco Paolo e Nicola, Bivacco Coldosè, and Bivacco Malga Moregna, starting from Ponte di Valmaggiore parking.
The trail hits three stunning lakes—Lago Brutto, Lago delle Trote, and Lago di Moregna—and offers straightforward access to the bivouacs, with Paolo e Nicola and Coldosè right on the Trans-Lagorai trail, while Moregna’s just a short detour.
The route’s a moderate walk-up with a max elevation gain of 589 m, kicking off from Predazzo as the nearest supply spot.
The bivouacs are solid shelters. Paolo e Nicola’s a cozy wooden setup with bunk beds, a wood stove, and a nearby water source. Coldosè’s the standout, modern, with solar-powered electricity, comfy beds, and a stocked kitchen, though the wood shed was empty when I visited.
Malga Moregna is a stone bivouac, basic with no mattresses but a functional stove. The trail weaves through forests and past lakes, with a steep climb to Paolo e Nicola and scenic views at Forcella Moregna.
No technical gear is needed, just boots, poles, and a backpack with rain gear and a sleeping bag if you are staying overnight. Water is available at the bivouacs or lakes if you’ve got a purifier.
Thank you for reading. Let me know if you have questions or comments; there is a comment section below.
These bivouacs, together with more than 120 others, are included in my interactive map available here on the site. Note that I also have a book titled Dolomites Solo, so have a look if you plan to do some mountaineering tours in the area.
Please join us at our Facebook group Dolomites Visitors Hub.
FAQs
What is the best time of year to hike the Trans-Lagorai Trail to these bivouacs?
The optimal time for hiking the Trans-Lagorai Trail is late spring to early autumn, roughly May to September. During this period, the weather in the Lagorai range is generally stable, with milder temperatures and less snow, making trails more accessible.
Summer offers vibrant greenery and clear lake views, but early autumn can provide stunning foliage and fewer crowds. Winter hiking is possible but requires advanced skills and gear due to snow and potential avalanches, as the Lagorai’s high-altitude paths can be treacherous.
Are the bivouacs suitable for overnight stays, and what should I bring?
All three bivouacs, Paolo e Nicola, Coldosè, and Malga Moregna, are equipped for overnight stays, offering shelter and basic amenities like wood stoves.
Paolo e Nicola and Coldosè have mattresses, but Malga Moregna lacks them. A sleeping bag is essential for comfort and warmth, especially at higher altitudes where nights get cold.
Bring a headlamp, as only Coldosè has solar-powered lighting, and pack enough food since supplies aren’t guaranteed. A portable water purifier is handy, though water sources are available near the bivouacs.
Can beginners hike this route, and are there guided options?
The route is rated as a moderate walk-up, suitable for hikers with some experience, but beginners in good physical condition can manage it with preparation.
The trail has no technical sections, but the 589 m elevation gain and uneven terrain require decent stamina. Trekking poles help with stability.
For those unsure about navigating solo, guided tours are available through local operators in Predazzo or Trento, often listed on platforms like AllTrails or local tourism sites, offering expert guidance and group safety.
How can I prepare for variable weather on the trail?
The Lagorai’s alpine weather can shift rapidly, even in summer. Check forecasts for Predazzo or the Dolomites on apps like Meteo.it before heading out.
Pack lightweight, waterproof gear like a poncho, rain pants, and a jacket, as mentioned in the gear section. Layered clothing is key, bring a moisture-wicking base layer, a warm mid-layer, and a windproof outer layer. Sturdy, waterproof boots like the Mammut Sapuen GTX are ideal for muddy or rocky sections, especially near lakes.
Leave a Reply