I hiked from the parking below Passo Rolle to the Bivacco Aldo Moro, and back, and here is my first-hand report about the tour, so keep reading.
The Bivacco Aldo Moro is the highest elevation shelter on the Trans-Lagorai trail, and it is the first if you start the trail from the east side. To get there, you start from Passo Rolle, and you will be at the shelter in up to 4 hours.
Bivacco Aldo Moro coordinates, numbers & details
- Elevation: 2565 m (8415 ft).
- Nearest places for supplies: San Martino di Castrozza, and Predazzo.
- Mountain group: Lagorai, Dolomites, Italian Alps.
- Coordinates: 46.2646586, 11.7234400.
- Route difficulty: walk up.
- Elevation difference from the car parking: 665 m (2182 ft).
- Parking coordinates: 46.2960853, 11.7756733.
- Time needed from the road to the summit: up to 4 hours.
- Route: 349, Trans-Lagorai Trail (TL).
- Useful map: Pale di San Martino, Kompass 622, 1:25000.
Access roads and map
The interactive and zoomable map below shows the parking at Malga Rolle (the marker 1), which is half a kilometer or so below Passo Rolle in the Paneveggio direction.
The marker 2 shows Colbricon lakes and Rifugio Colbricon location, and the marker 3 is the position of Bivacco Aldo Moro. Please zoom out to see access roads and cities around.
Note that this route and many other routes are available also on AllTrails. According to that AllTrails map, the length of the route in one direction is around 8 kilometers.
Route description
As mentioned, park the car below Passo Rolle, and from there walk in the direction of Laghi di Colbricon. You will see the sign already at the main road. So the route descends a bit and after that it is more or less flat all the way to the Colbricon lakes.
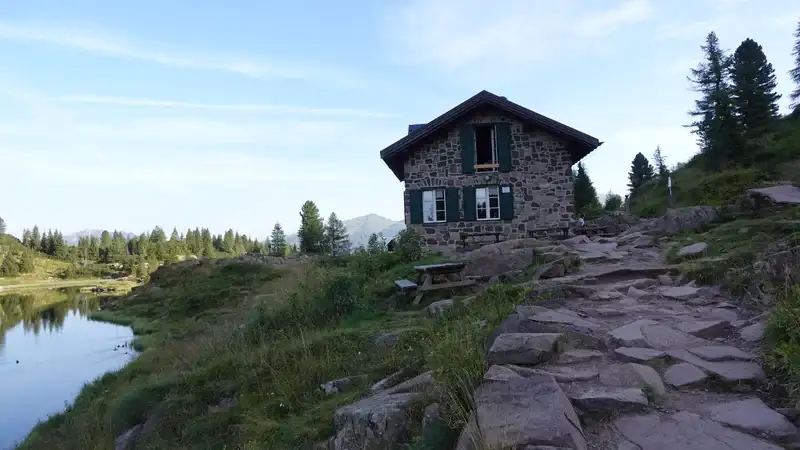
There is a rifugio at the lakes, Rifugio Laghi di Colbricon, a very popular and pleasant place, see how it looks in early morning, later during the day it is usually crowded:
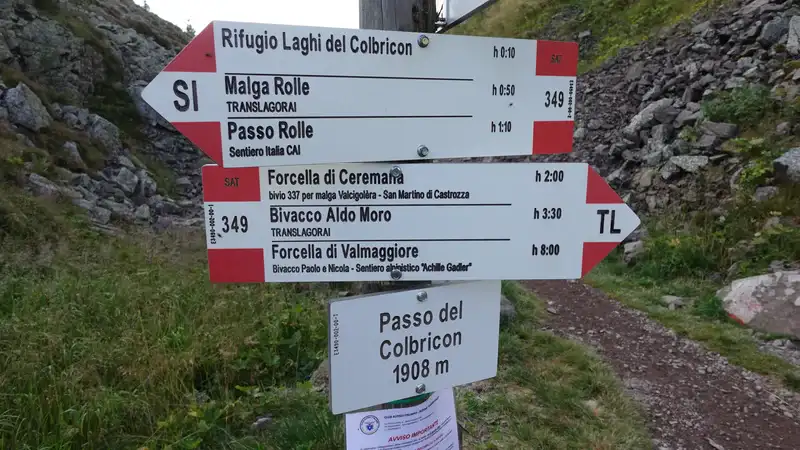
The trail makes a loop around the upper lake, and it leads to Passo di Colbricon behind it:

Here you have plenty of information regarding various directions, you follow the TL route 349:
From here the trail goes up to Forcella Colbricon, with a considerable elevation difference, and this is the steepest and the hardest part of the trip:

When you get to the Forcella Colbricon area, you have all the access route visible. Here is the view back, Passo Rolle is visible and the parking as well, and lakes Colbricon are below:

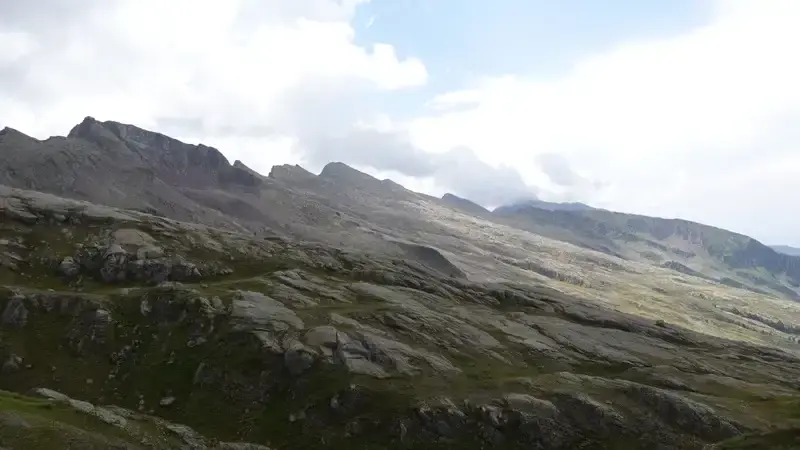
From the same area you will have an overview of the remaining part of the route. Here is the photo of it, this is the Sentiero Achille Gadler, or TL trail. The route goes more or less horizontally below all these summits on the left.
There are many ups and downs, but in general it can be described as very easy and simple. All the time you have excellent views to the north.

There is one passage with a few easy cables, not really worth mentioning, but it shows in the map above when you zoom in. So this is just to know what this is about. You do not need any equipment for this passage.

Close to that part there are a few man-made caves that can be used in case of a sudden storm. The area was the front line during WWI.
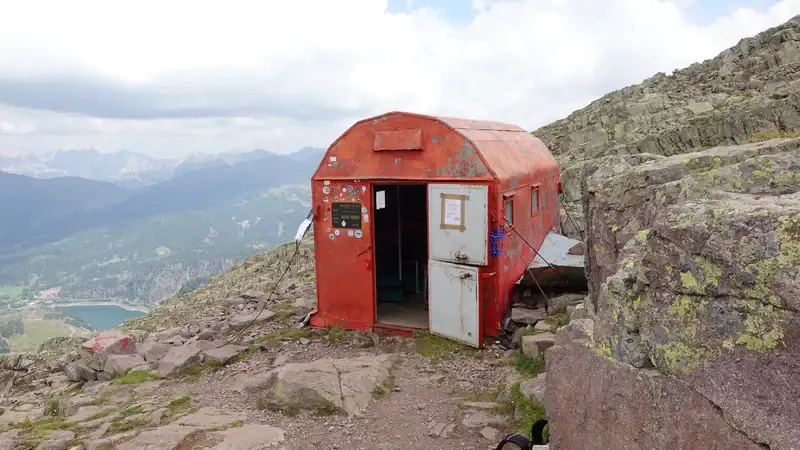
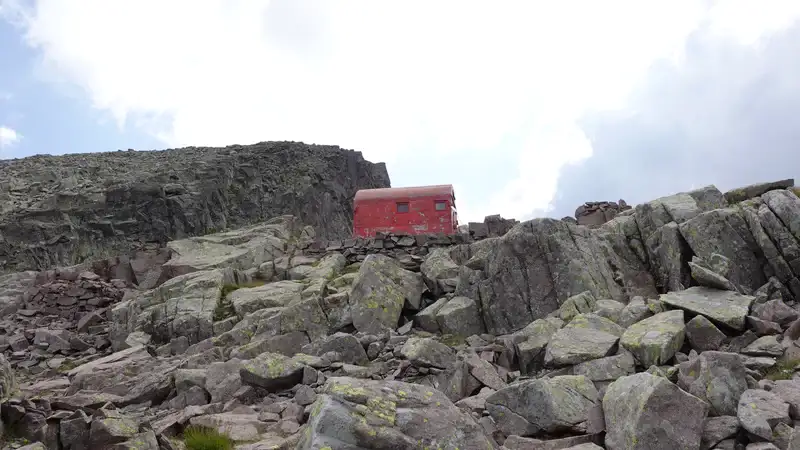
As you walk, most of the time Paneveggio area and Paneveggio lake are visible far below on the right. After quite a long walk, suddenly, Bivacco Aldo Moro will appear above you on your left side:
The bivouac is very typical for the Italian Alps, they are all made the same way, a red metal container with 9 beds inside. You can compare it with Bivacco Musatti and Bivacco Toso. It is equipped with mattresses, pillows, and blankets, plus a table and benches. See how it looks:

Note the following; there was a notice on the wall telling that there would be some works on the bivouac very soon. So if you visit it, it is very likely that it will look much better. But regardless of that, although a bit shabby, this is a comfortable shelter.
All the tour is presented in my video, please have a look:
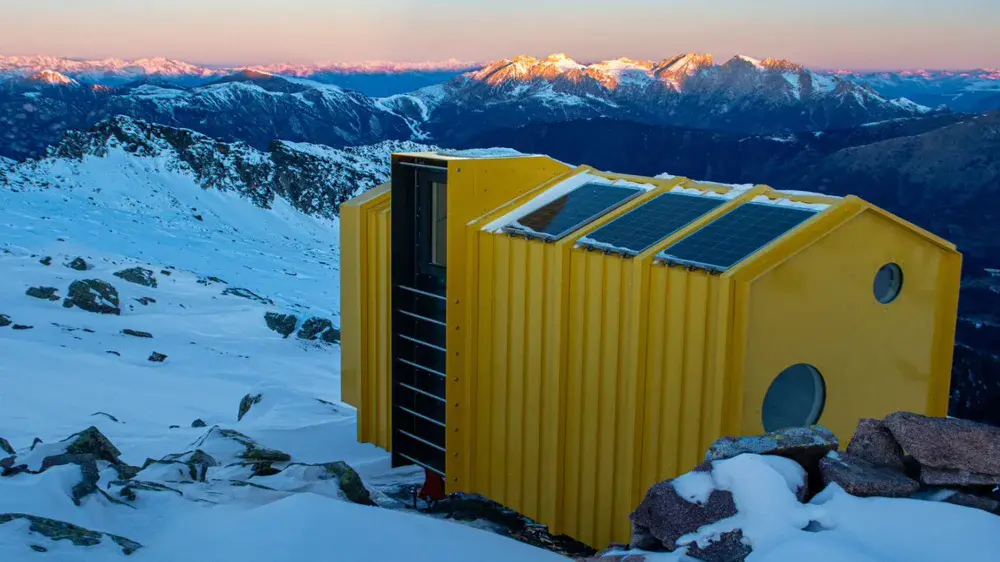
Addition: new Bivacco Aldo Moro
A few months after my visit this bivouac was completely rebuilt. It is ultra modern now, exactly the same as the new bivouac Fiamme Gialle. See how it looks now:
Alternative route to Bivacco Aldo Moro
If you inspect the map above, you will realize that there is yet another route from the Paneveggio Lake. There is a free parking at the east side of the lake, so from there you walk along the south side of the lake and then follow the route 337/376 to the Bivacco.
The elevation at the parking is 1470 m, so this is much lower and therefore harder as compared to the route from Passo Rolle. I did not walk the route and cannot say more about it.
Remember that officially you are not allowed to leave the car at the parking overnight. The same holds everywhere along the main road that goes up to Passo Vales.
However, when I was there on some other occasion, I have seen many Italian people even sleeping in tents close to the parking. This is a pleasant picnic area, with a toilet and running water. So it is up to you.
But you can leave the car overnight on Passo Rolle and follow the route which I walked, this is a safer and also easier option.
My tour to Bivacco Aldo Moro
I started my tour at 7:30 am, and I was at the bivouac at 11:15 am. This makes it 3 hours and 45 minutes, and this is very realistic. I did not push hard, but I did not really make any longer breaks.
Note that the elevation difference from Passo Rolle to the bivouac is relatively small, only 665 m. But the physical distance is substantial, this is why you need far more time than expected.
There were not many people on the trail. On my way up, I met three resting with their big backpacks, so they were clearly on the TL trail. When I was at the shelter, 2-3 people passed the bivouac on the route below it, but they did not make a stop at the shelter. Only one came and stayed a few minutes before continuing on the TL trail.
I stayed quite long at the bivouac, had a meal and also took a short nap. But the weather was changing, and it was time to go back.
Here below is my last view back when I was on Forcella Colbricon again. Only minutes after that there was a lightning strike on the peak very close to me, and my head sunk between my shoulders.
At one moment it started raining, and I put my rain layers on. But the rain stopped quickly and the weather remained stable all the time.
Gear for this tour, water & food
This is a simple walk-up tour, and you do not need anything special. I used Mammut Sapuen GTX boots, a pair of trekking poles, and my Mammut Lithium 40 backpack.
In the backpack, as usual, I had a rain poncho and rain pants, plus a rain jacket.If you want to stay the night in the Bivacco, make sure you have your own sleeping bag, and extra water and food.
There is no water on the route, but there is a water source at the Pass, so make sure you fill your bottles there. You can have food at the Rifugio Colbricon, but make sure you have something to eat in the backpack.
Do you want to walk this route?
As you realize, I walk solo, but I have been in this for 40 years already. If you have some mountaineering experience, you can do this tour too. However, if you want to play safe, which I warmly advise, get in touch with some experts and guides who can help you getting here.
Final thoughts
In summary, this hike from Passo Rolle to Bivacco Aldo Moro is a straightforward, rewarding day trip on the Trans-Lagorai Trail.
The 8-kilometer route, with a 665-meter elevation gain, offers a mix of flat lakeside paths, a steep climb to Forcella Colbricon, and a scenic traverse with minimal technical challenges.
The bivouac itself, a no-frills alpine shelter at 2565 meters, delivers stunning views and a quiet retreat, perfect for a quick nap or a meal. My 3-hour-45-minute trek felt relaxed, with no crowds and only a brief weather scare to keep things interesting.
If you are looking for a manageable Dolomites adventure, this trail delivers without demanding much. Stick to basic hiking gear; decent boots, trekking poles, and rain layers, and you are set.
For overnight stays, pack a sleeping bag and extra supplies, as the bivouac’s basic setup won’t provide much beyond shelter. Check the map, hit the trail early, and you will get a solid taste of the Lagorai’s rugged beauty.
Thank you for reading. Let me know if you have questions or comments, there is a comment section below. For more texts of this type please check under the category Huts and Shelters here in the site. In particular read about the nearby Bivacco Paolo e Nicola.
This bivouac, together with more than 120 others, is included in my interactive map available here on the site. Note that I also have a book titled Dolomites Solo, so have a look if you plan to do some mountaineering tours in the area.
Please join us at our Facebook group Dolomites Visitors Hub.
FAQ
How physically demanding is the hike from Passo Rolle to Bivacco Aldo Moro?
The hike is moderately challenging, primarily due to the 665-meter elevation gain over 8 kilometers. The steepest section is the climb to Forcella Colbricon, which requires decent fitness but no technical skills. The rest of the trail involves gentle ups and downs, making it accessible for most hikers with basic experience.
Expect a 3.5- to 4-hour trek one way at a steady pace. Proper footwear and trekking poles help with stability on rocky sections.
What’s the best time of year to hike the Trans-Lagorai Trail to Bivacco Aldo Moro?
Late spring to early autumn (June to September) is ideal for this trail. Snow can linger in the Lagorai mountains into May, especially at higher elevations like the bivouac’s 2565 meters, making early season hikes riskier without proper gear.
July and August offer stable weather but busier trails, while September provides cooler temperatures and fewer crowds. Always check local weather forecasts, as sudden storms are common in the Dolomites.
Can I camp near Bivacco Aldo Moro instead of staying inside?
Camping near the bivouac is possible but not officially encouraged due to environmental regulations in the Dolomites. The bivouac itself is designed for overnight stays, with 9 beds and basic amenities. If you prefer camping, the Paneveggio Lake area has a picnic spot with facilities, though overnight parking is restricted.
Always follow Leave No Trace principles and check local rules with the Paneveggio-Pale di San Martino Natural Park authorities to avoid fines.
Are there other nearby trails to combine with this hike?
Yes, the Trans-Lagorai Trail offers multiple extensions. From Bivacco Aldo Moro, you can continue west on route 349 toward Monte Cauriol or connect to route 348 for a longer loop through the Lagorai range.
The nearby Colbricon Lakes area also links to shorter trails around Rifugio Laghi di Colbricon, ideal for a relaxed add-on. For a multi-day trek, the full Trans-Lagorai route spans roughly 85 kilometers across the range, with several bivouacs and rifugios for overnight stops.
Leave a Reply