In my first attempt to climb Kesselkogel (Catinaccio d’Antermoia), I had to give up because of rain. A few weeks later I had perfect weather and traversed the mountain on a round tour. Here is my report.
The normal routes to the summit of Kesselkogel (Catinaccio d’Antermoia) are two ferratas, one from the east and one from the west side. They are of the same technical grading and it is best to traverse the mountain regardless of the direction. Without cables, this mountain would be accessible only by true alpinists.
The highest car access is at Muncion on the Val di Fassa side. If you plan to climb the mountain from there and by passing Lago di Antermoia, plan up to 6 hours to the summit. Full ferrata equipment is compulsory.
Kesselkogel (Catinaccio d’Antermoia) coordinates and numbers
- Elevation: 3004 m (9856 ft).
- Nearest places for supplies: Pera, Mazin.
- Mountain group: Catinaccio-Rosengarten, Dolomites, Italian Alps.
- Summit coordinates: 46.4740358 N, 11.6439144 E.
- Route difficulty: easy to medium ferrata.
- Elevation difference from the Muncion car parking: 1484 m (4869 ft).
- Parking coordinates: 46.4464222 N, 11.6895444 E.
- Time needed from the parking to the summit: 6 hours.
- Shelters: in total 6 huts on ascent and descent round route.
- Useful map: Val di Fassa e Dolomiti Fassane. Tabacco 06, 1:25000.
Access roads and map
If you do a round tour, it will include no less than 6 huts, one beautiful lake, and two ferratas. The interactive and zoomable map below shows all the details. I have added the markers and their meaning is as follows:
- Marker 1: Car parking at Muncion.
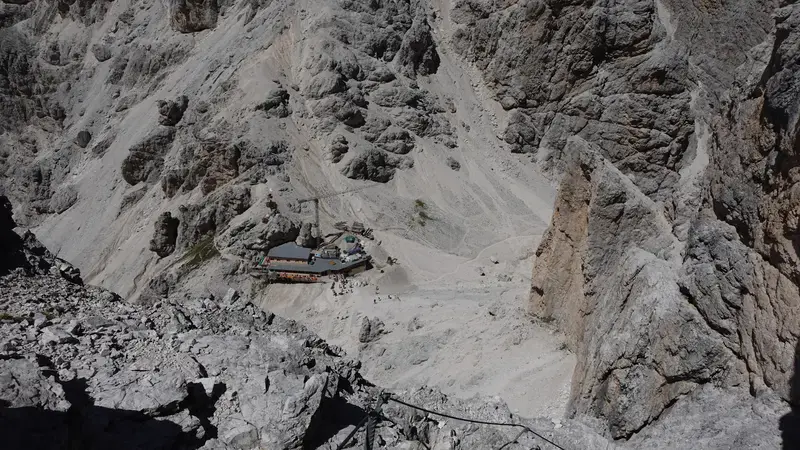
- Marker 2: Rifugio Antermoia.
- Marker 3: Lago di Antermoia.
- Marker 4: The summit of Kesselkogel (Catinaccio d’Antermoia).
- Marker 5: Rifugio Passo Principe.
- Marker 6: Rifugio Vajolet.
- Marker 7: Rifugio Paul Preuss.
- Marker 8: Rifugio Stella Alpina.
- Marker 9: Rifugio Gardeccia.
If you zoom in, you can see lots of details regarding the route. Zoom out to see access roads to the area.
Kesselkogel access route from Muncion
The reason to start from Muncion is that this is the highest point with the car access. But even here you are only at 1520 meters of elevation (4987 ft), so you have a lot to go.
There is a small free parking also at the main road below, but it is at 1350 m (4429 ft) of elevation and the road up is very steep.
At Muncion, there are only a few free places to park, so it is essential to come very early. In my both attempts, I was there at 5 am. There are more places if you want to pay, but it was far from obvious to me how to do this.
From Muncion parking you walk a few meters back to Ronch and then continue in the north direction through the forest, please check the map. The route is 579.
About half an hour later you will be on route 580 and this part will be very steep, with vertical rock walls on the left side above you.
Below is the photo of a shelter that will be on your way up when you are above the treeline. I have entered it, nothing inside, no floor, but it may be useful if you are there in a storm.

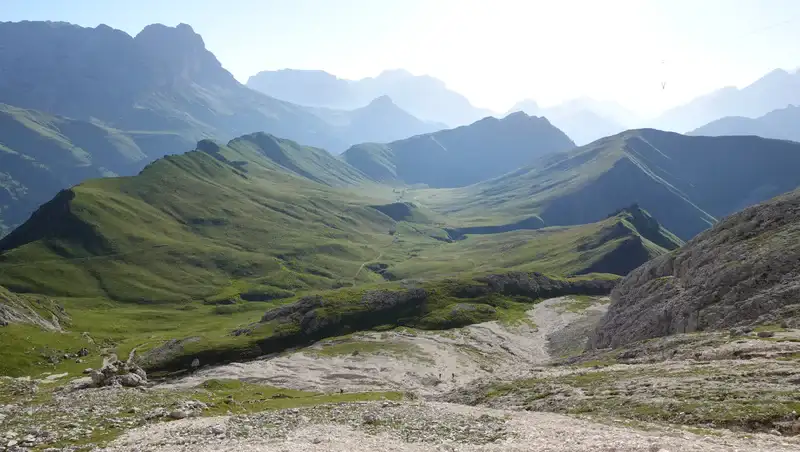
After the steep part you get to a very pleasant and beautiful plateau which is Val de Dona in the map, see the photo below. Elevation here is around 2200 m (7218 ft). This is where the route 577 from Campitello di Fassa joins your Muncion access route.
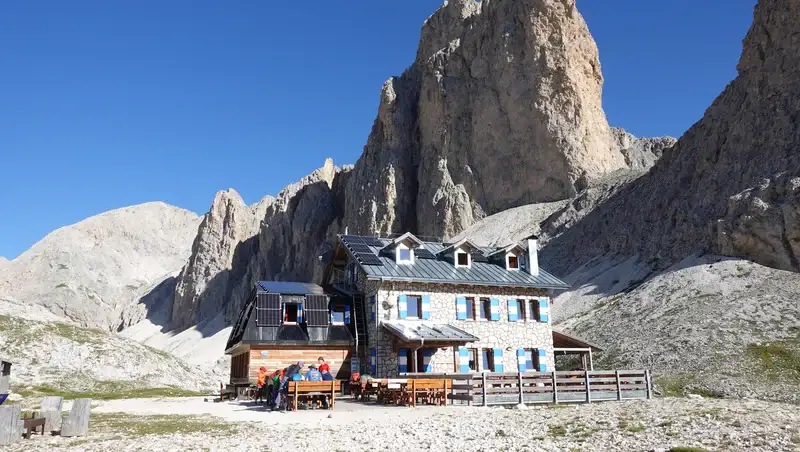
You keep walking up, and eventually you get to Passo Dona (2516 m, 8255 ft) from where you have the first view of Rifugio Antermoia and also the view of the Catinaccio summit, it is on the left behind the hut:

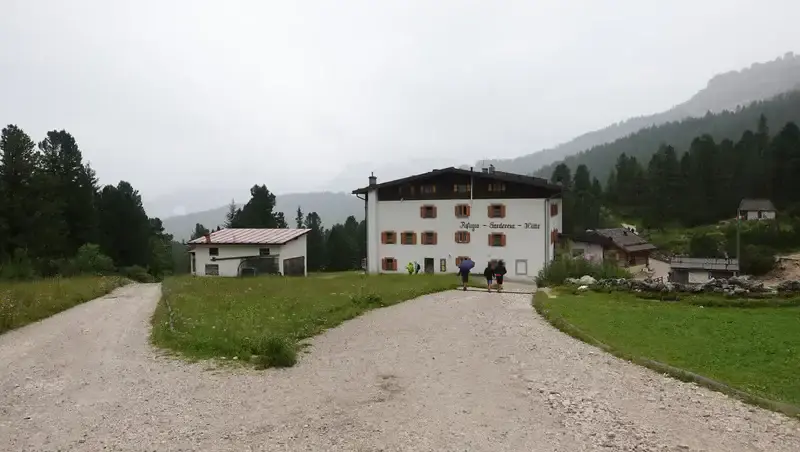
In less than 10 minutes you are at the hut and this is where you can have a rest before continuing.
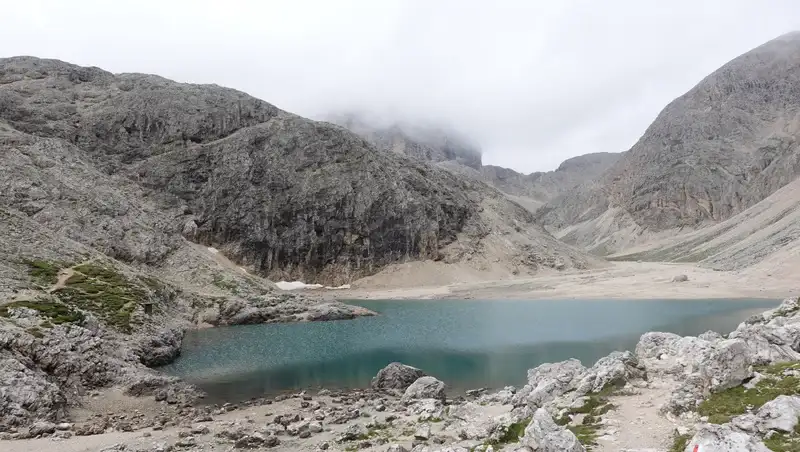
The lake is just a few minutes behind, you can see how it looked to me on my first attempt when it was raining, Kesselkogel summit was in the clouds behind:
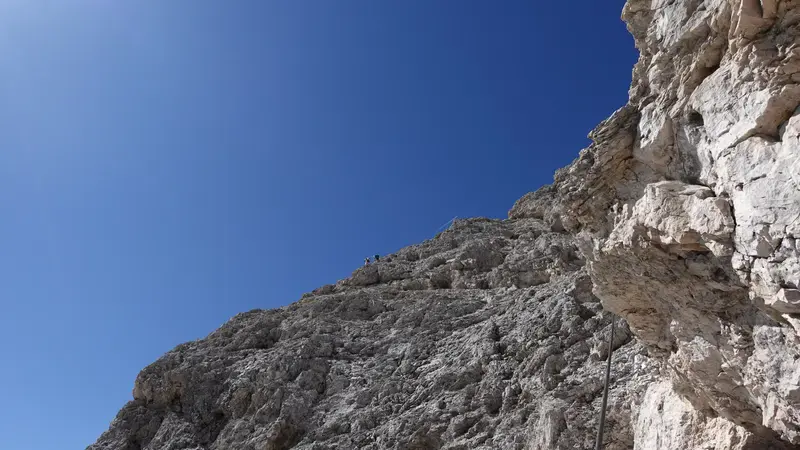
On Kesselkogel ferrata, east side
From the lake, you follow the route that goes in the west direction to Passo Antermoia. At some point the ferrata route splits to the right, see the picture below, so this is your direction. Below you see the mentioned area, this is the view when you are already at easy initial cables:

At one place you have to descend to the saddle shown in the photo below. This is where you have to put your ferrata equipment if you have not done this already at the first cables. In my previous attempt, the storm started when I was there, so I had to give up at this place.
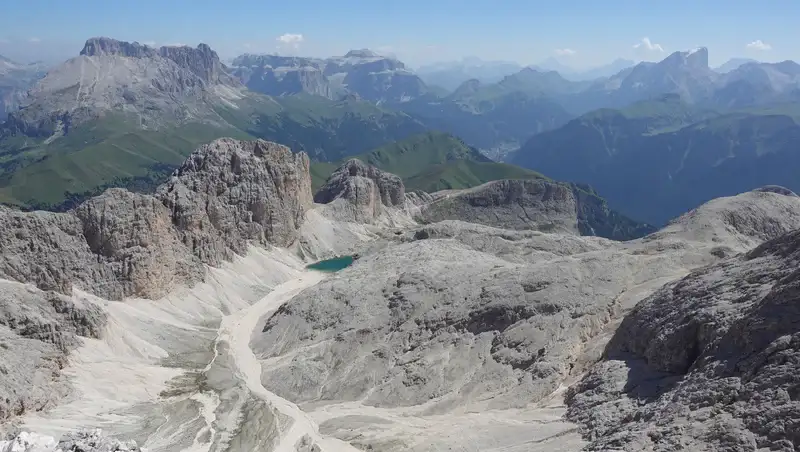
Below is view back towards the Lago di Antermoia. In the distance on the right is Marmolada with its vertical south wall.
After the ladder and steep cables section above the saddle point, the middle is relatively mild, below you see how it looks. There are passages without cables here.
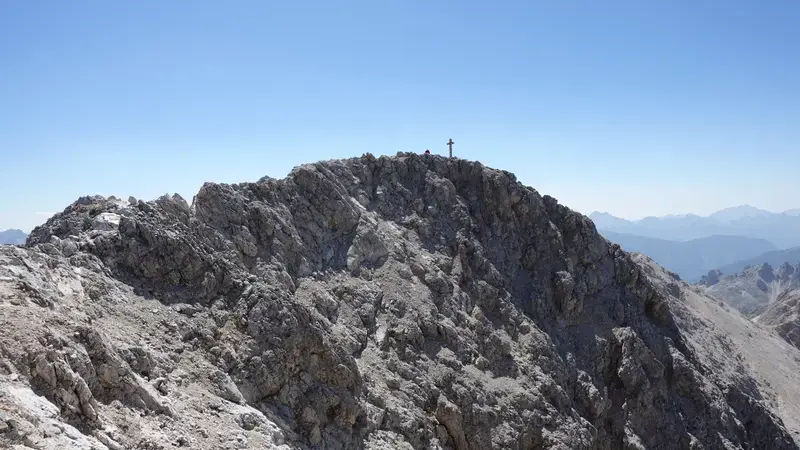
This part ends up with a short and easy summit ridge, and the summit cross is not far:

Now you are rewarded with a breathtaking view of Val di Vajolet and Torri di Vajolet above it. Note that this will be your descent route if you make a round tour.
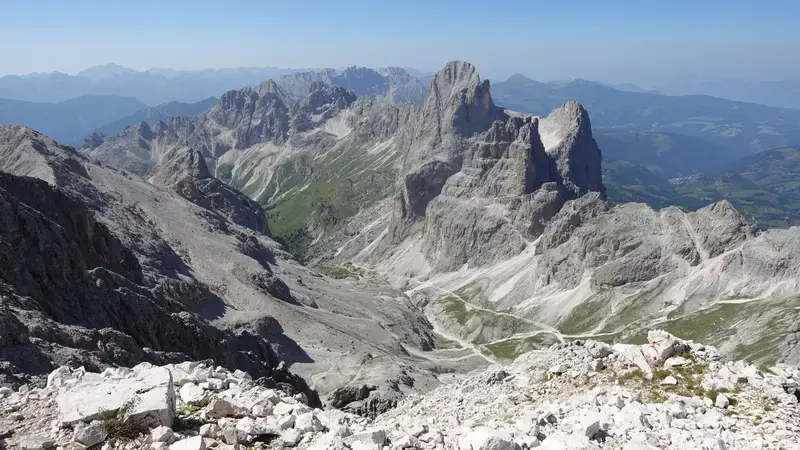
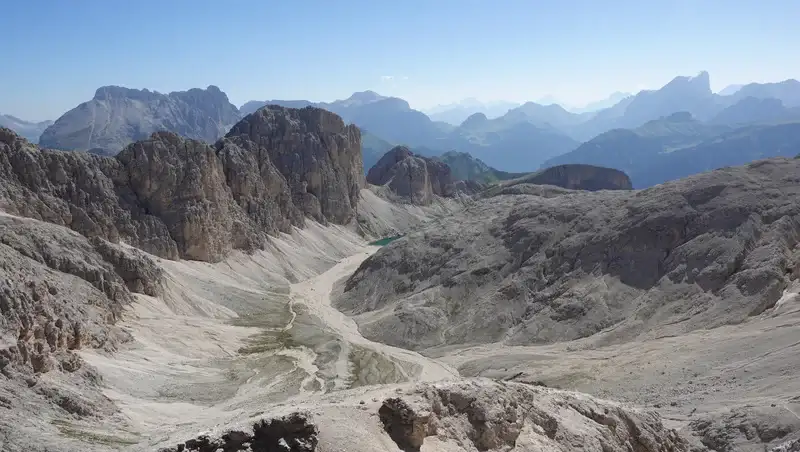
In the north-east direction you have Sassolungo group, Piz Boe, and Marmolada, plus Lago di Antermoia below, lots of stuff to have your eyes busy and to stay long on the summit:
Descent ferrata route: west side
If you descend in the west direction, which means in the direction of Rifugio Passo Principe, bear in mind that the route is a bit longer and more rugged than the east side route. You would not want to do this in a bad weather.
The initial summit ridge part (the photo below) is without cables and it is exposed, not a good place to be in strong wind.
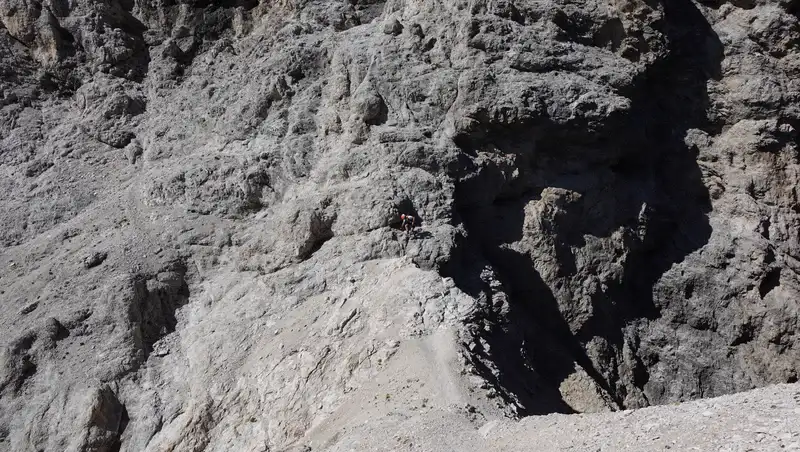
After that summit ridge part, you have mixed passages with and without cables. Here is one with a great view, and you realize it is steep and dangerous. What you see below is the route that goes from Passo di Antermoia down to Passo Principe. I walked it in my first climbing attempt.

Here is yet another passage, the route follows this couloir. There are loose rocks and it is essential to watch your steps, and bear in mind people above and below you.

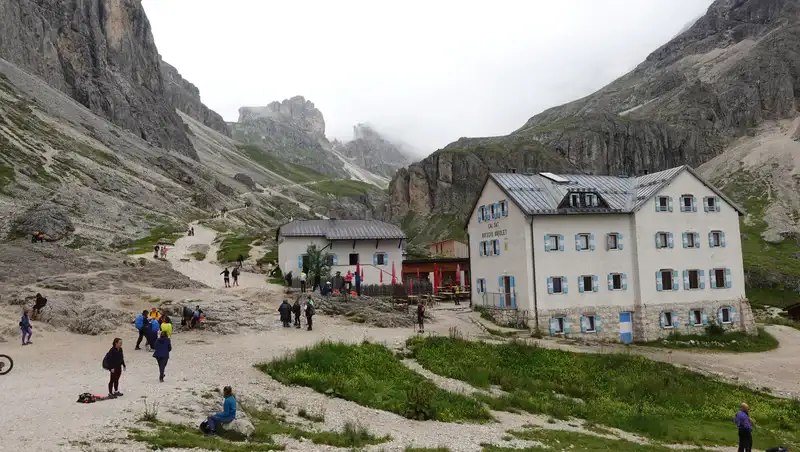
The lower part of the west side is more rugged, with some narrow couloirs, here is one below, and you are now directly above Rifugio Passo Principe:

Below is Rifugio Passo Principe from my first attempt, it was raining as I was approaching it from Passo di Antermoia. The place is incredibly beautiful. The route to Val di Vajolet is on the left.

When you are at Passo Principe, you may decide to go back to Passo di Antermoia and descend the same way. There are also some other options from the same Antermoia Pass, you can find them in the map above.
Round route back to Muncion parking
If you decide to follow the Val di Vajolet route, you descend from Passo Principe hut down the route visible in the photo above. The area will be crowded, possibly more than any other place in the Dolomites. The reason is that the area is simply breathtaking, and there are lifts that people use to get to the high ground from the main Val di Fassa area.
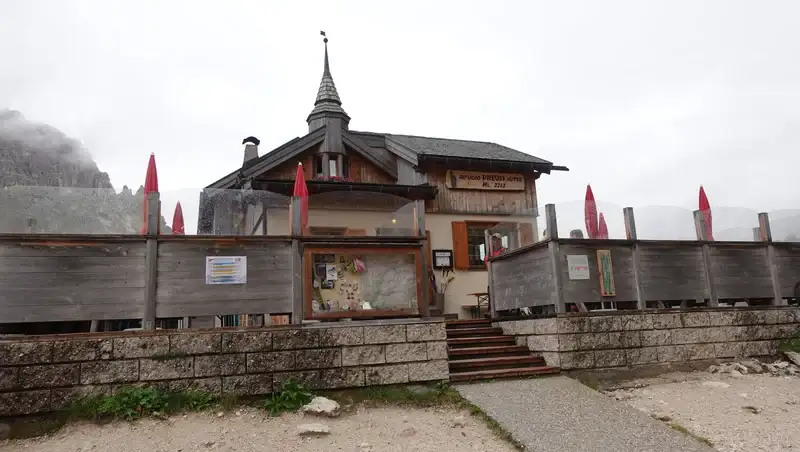
The first hut on your way down will be Rifugio Vajolet, the photo below, and just a few meters from it you have yet another, Rifugio Paul Preuss.
This is the area from where you have other routes up the mountains, in the direction of Gartlhutte at Passo Laurino, and also to Santner Pass hut. There are not too many people around, but this is the photo from my first rain climb.
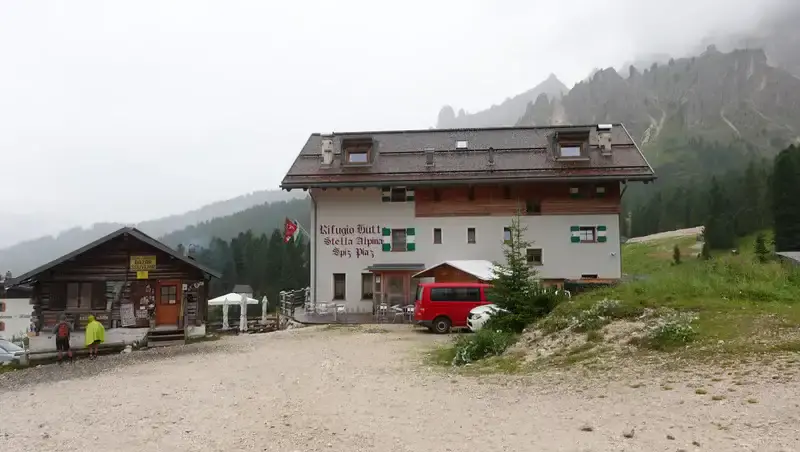
You continue walking down the road, and after some time you are again at the treeline, and soon you will arrive at Stella Alpina hut and Gardeccia hut. Note that there is an asphalt road from Muncion till this place, but it is closed for public.
So what follows after that is a long walk back to Muncion. No doubt, you will be tired, but there are many places with benches to take a rest. There is one place with water here, you will want to know this.
All the tour is presented in my video, please have a look:
My rating of Via Ferrata Kesselkogel
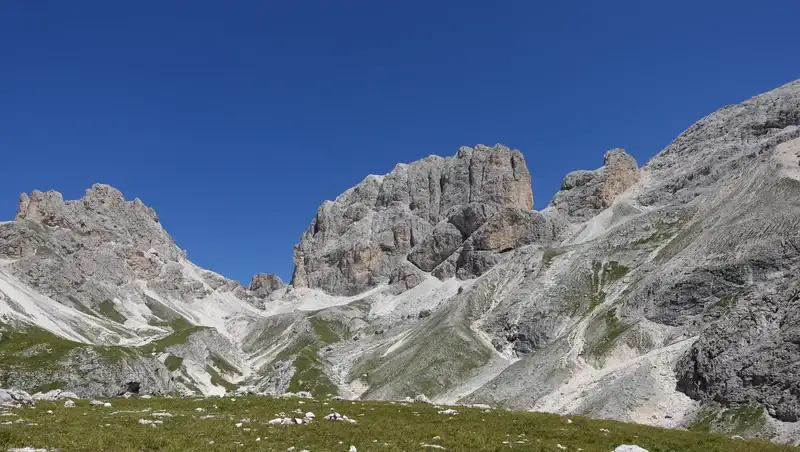
As you have seen, there are two ferratas here, from the east side and from the west side. In my view, they are in the same group B to B+. This may be surprising when you see the mountain from the distance with its vertical cliffs, see the top picture above which shows it from the south side.
But the west side ferrata is a bit longer, with ups and downs, long switchbacks as you can realize from the map above, and it is also more rugged.
The approach from the east side is more direct and shorter. Note that the final ridge passage from both sides is without cables, but the west side is more exposed.
My rating is based on the following three essential criteria, and as usual, assuming that you walk all the way up from the car parking:
| Rating Criteria | Rating (A-E; 1-5) |
|---|---|
| Technical difficulty | B+ |
| Ferrata length | 3 |
| Access route difficulty | D |
| Overall Score | B3D |
I could not find any reliable information for the Length, just to know. My estimate is anywhere between 100 and 300 meters on each of the two ferratas’ cables. So the rating is definitely not above 3.
On the other hand, if you walk from Muncion, plan up to four hours before getting to the cables, hence my Access rating.
My tour to Kesselkogel (Catinaccio d’Antermoia)
As you realize, I climbed the mountain on a round tour by going anti-clockwise. The same was in my previous attempt as well. You can do it in the opposite direction of course.
I started at 5:30 am, so it was dark and I did not record anything for half an hour or so. There was nobody around, and this remained so all the way till Rifugio Antermoia. I was at the hut after 3 hours and 15 minutes, and I continued without any longer break. After 5 hours and 40 minutes from the parking, I was at the summit cross.
On the east side ferrata, I met two groups of Italians and one solo climber, all coming from the west side. It seems that this is what most people do.
In that second climb the weather was simply perfect and you can realize this from the photos. After a long rest on the summit, I descended down the west side. Again, there were people coming in my direction, but nobody going the same way as me.
Gear to use for this Kesselkogel tour & accommodation
Clearly, for this climb you need a full ferrata set, and this means a harness, a Y-rope, and a helmet.
In addition to this, I used Mammut Sapuen GTX boots, a pair of trekking poles, and my Mammut Lithium 40 backpack. Gloves for cables are definitely necessary, and I used them.
In the backpack, as usual, I had a rain poncho and rain pants, plus a rain jacket. If you do not have any and not sure what to choose, think about the Mammut Crater Pro HS which I use myself.
If you want to stay there and climb more peaks around from any of the huts, make sure you have your own sleeping bag or at least a liner.
As for a place to stay, please consult the map below:
Do you want to walk this route?
As you realize, I walk solo, but I have been in this for 40 years already. If you have some mountaineering experience, you can do this tour too. However, if you want to play safe, which I warmly advise, get in touch with some experts and guides who can help you getting here.
Final thoughts
In summary, Kesselkogel is a perfect 3000er for those who want a proper mountain day without extreme technical difficulty. The two ferratas are moderate, never harder than solid B+, and the real effort comes from the long approaches, especially if you start from Muncion and close the full round tour.
Total numbers from my trip: 1484 m ascent, 1484 m descent, around 12 hours car-to-car including summit break. The east side is the quicker and slightly easier option for the ascent; the west side feels more serious on descent because of the longer rugged section and the exposed summit ridge without cables.
Weather and conditions decide everything here, my first attempt failed at the east-side saddle because of a sudden storm.
Bottom line: classic Dolomites 3000er with lake, six huts, two ferratas and massive views. Not an extremely hard climb, but a full-value day. Highly recommended if you accept the distance.
Thank you for reading. Let me know if you have questions or comments, there is a comment section below. Please join us at our Facebook group Dolomites Visitors Hub.
FAQs: Kesselkogel / Catinaccio d’Antermoia Traverse
Is it possible to climb Kesselkogel as a day trip without staying overnight?
Yes, easily. From Muncion parking most fit climbers with early start (4:30–5:30 am) are back at the car in 9–12 hours for the full round tour (east up – west down or vice versa). Starting from Gardeccia with the shuttle service cuts the distance and elevation by roughly 550 m / 5–6 km each way, making the day 6–8 hours.
Which direction is better: east side up or west side up?
Most locals and guides recommend east side up (from Antermoia/Lago) and west side down (to Passo Principe).
Reasons: the east side is shorter, more direct and the rock is drier in the morning; the west side has a few tricky down-climbing moves in narrow chimneys that are safer and more comfortable when climbing up.
If the weather forecast is uncertain, definitely ascend the east side; you can still bail quickly at the saddle before the final wall.
Do I really need full ferrata gear or is it overkill?
Full ferrata kit (harness, Y-lanyard with energy absorber, helmet) is mandatory. Although many sections are only sporadically cabled and could be free-soloed by experienced alpinists, there are several exposed traverses and a 15 m vertical ladder/chimney section on the west side where a slip would have fatal consequences.
When is the best period and what about snow on the route?
Prime season is mid-June to mid-October. Until early July (sometimes late July after heavy winters) there can be snowfields on the upper east side and especially in the west-face couloirs. In that case crampons and ice axe are highly recommended; the cables can be buried and the chimneys become mixed climbs. After mid-September first snow can appear again above 2800 m.
Leave a Reply