There are not many tours in the Dolomites that can match the attractiveness of the Ferrata Possnecker and Piz Selva tour. I completed it myself, and here is my detailed report.
Ferrata Possneker (Pößnecker, Pössnecker) is also known as Ferrata Mesules, and this is the shortest route to Piz Selva (2941 m; 9649 ft). It has two separate cables sections, the first is at the very beginning and the second is directly under the summit.
You can make a round tour and from Piz Selva continue to Piz Gralba (2972 m; 9751 ft) and Piz Miara (2964 m; 9724 ft) before descending to Val Lasties. Here you will have the third ferrata section. After that you have to walk up back to Passo Sella.
Major attractions of the round tour are:
- The Ferrata Possneker itself.
- Spectacular views of Piz Boe group.
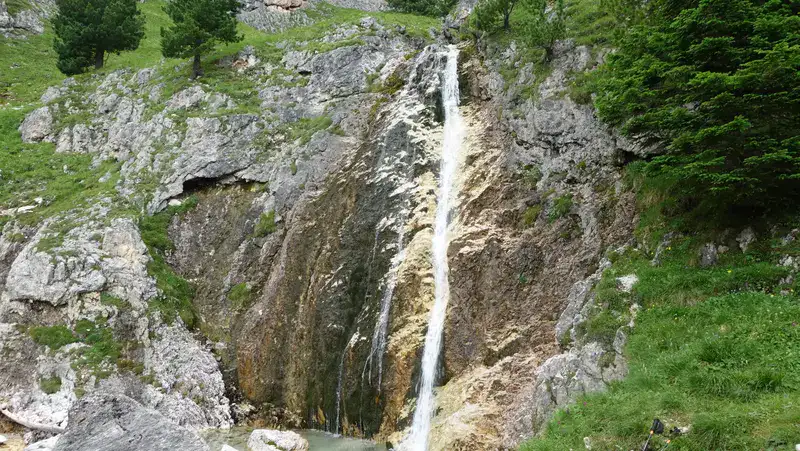
- Cascata Schiavaneis.
Each of these attractions are worth seeing for themselves, and here you have them all three on this incredible tour.
Coordinates, numbers & details
- Piz Selva elevation: 2941 m (9649 ft).
- Piz Selva coordinates: 46.5149222 °N, 11.7909419 °E.
- Route difficulty: hard ferrata.
- Useful map: Tabacco number 07, Alta Badia Arabba-Marmolada, 1:25000.
- Free parking at Passo Sella 2218 m (7277 ft).
- Elevation difference from the parking: 723 m (2372 ft).
- Time needed to the summit: at least 3 hours and 30 minutes.
- Total time for the round tour: 7-8 hours.
- The lowest point on the round tour through Val Lasties: 2050 m (6726 ft).
- The total elevation difference for the round tour: 891 m (2923 ft).
[Sibelius: Symphony No. 3, 2nd Movement (Andantino Con Moto, Quasi Allegretto)]
Access roads & location
There are many access roads to the area. If you plan to do the tour, your destination should be Passo Sella. The interactive map below will show all the roads if you simply zoom out.
To see the details of the climbing route, please zoom in and follow the description in the text below.
- The marker 1 shows the position of the free parking at the pass.
- The marker 2 is the beginning of the ferrata.
- The marker 3 is the Piz Selva summit.
- From the marker 4, which shows Piz Miara summit, you can follow the descent route in the south-east direction.
Finding a parking
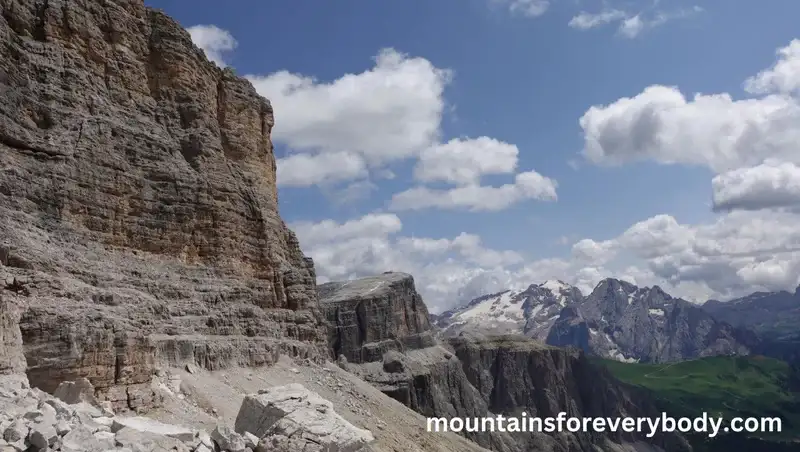
Sella Pass is a major hub for various mountaineering, hiking, and cable-car routes, and with two enormously attractive massifs, the Sella group and the Sasso Piatto group close to it.
This is why there are many parking places around, but they are all with fees. However, you can park for free at the highest point of the pass, next to the small hotel Maria Flora. I have seen many people sleeping there in their motorhomes, cars, and vans. I myself slept there a few nights.
Route description
You can start the route from various points, but this is a large area with many routes around, and if you are new to the area it may be difficult to know in which direction to go.
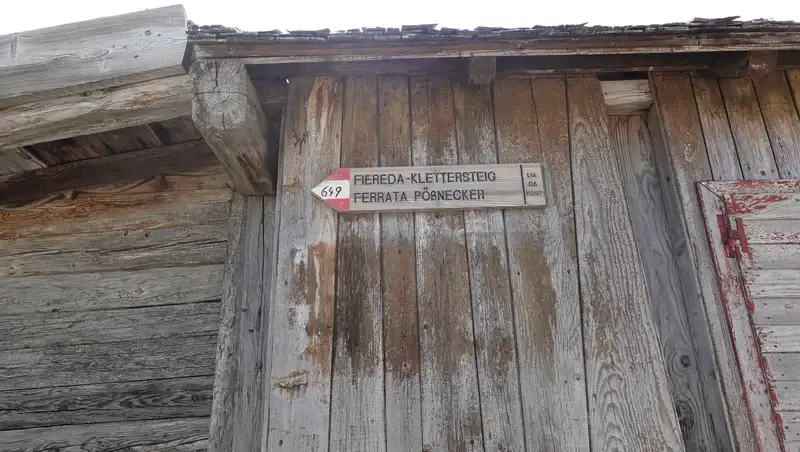
If you are at the free parking mentioned above, you will see the sign for the route as shown in the picture, it is on the wall of a wood cabin close to the hotel.
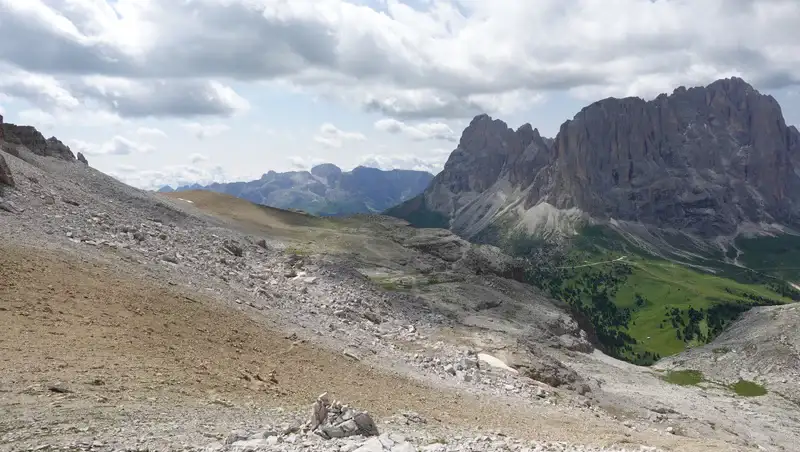
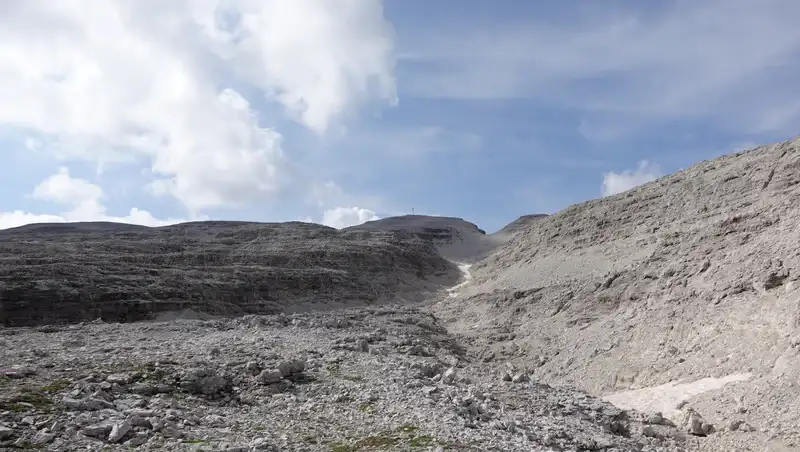
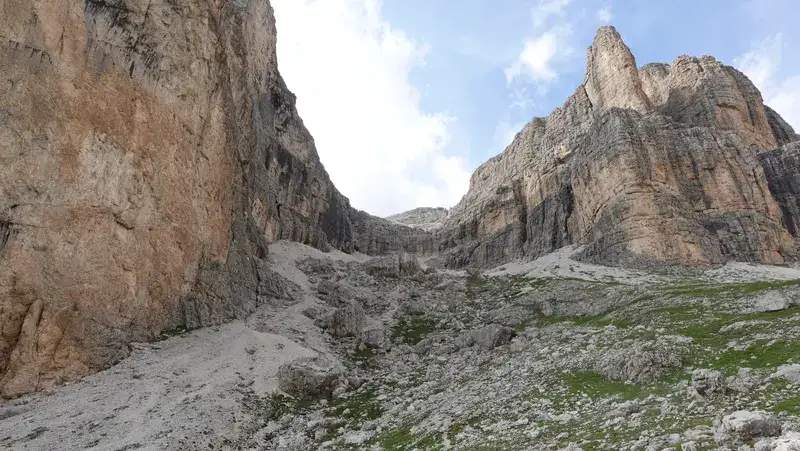
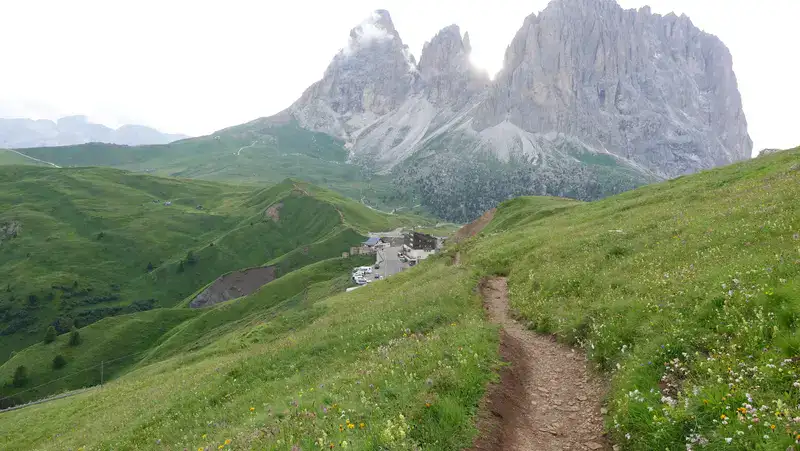
So follow the path in the north-east direction underneath the cliffs that will be on your right side. This part is more or less flat, you walk without gaining elevation at the altitude of around 2200 m. Very soon you will be at place where the ferrata begins (the marker 2 in the map above).
The picture below is my view back in the direction of the pass. On the right is the Sasso Piatto group.
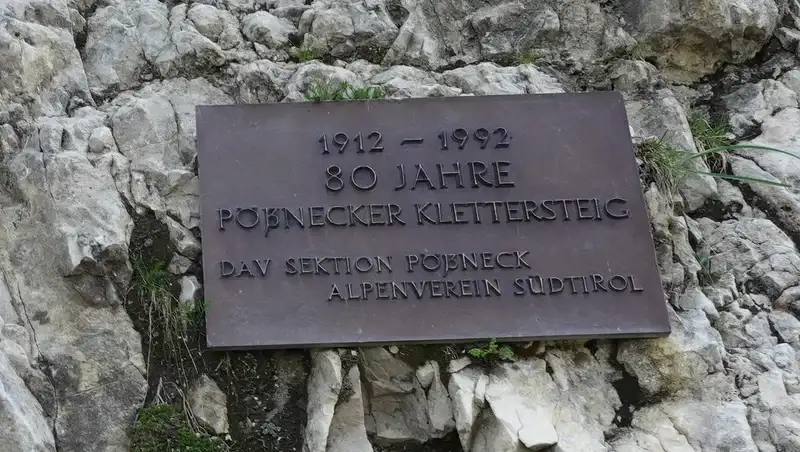
This ferrata Possnecker was built in 1912 by Austrians for military purpose. There is a table on the rock wall, the picture below. From what I know, this makes it one of the oldest in the Dolomites.
The first ferrata section
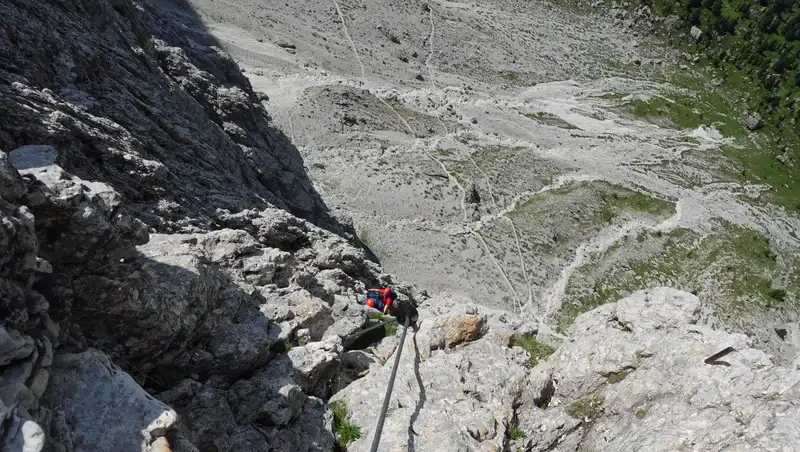
Already at the start, the cables go almost completely vertical, and with a maximum exposure, see the picture below. The red dots are two climbers from Germany whom I passed as they were taking a rest.
When I started climbing the cables, my first thought was “who on Earth needed a route on such a steep wall?”.
But you have already seen the answer, it was built for the WWI purpose. It has been rebuilt not so long ago, so the cables and pins are in excellent state.
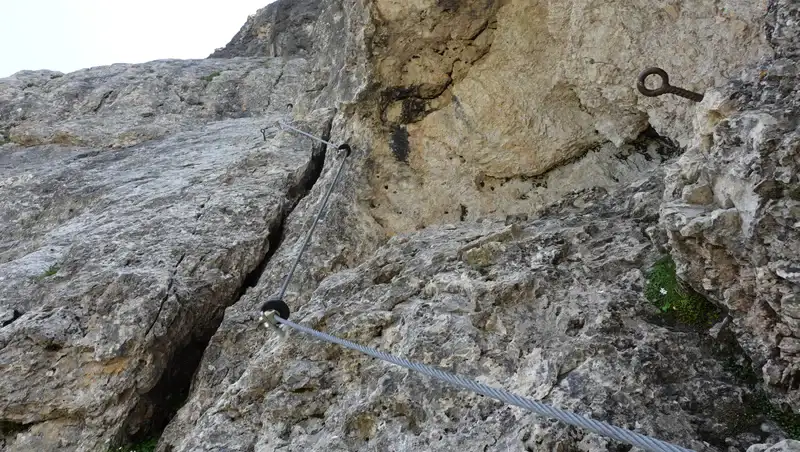
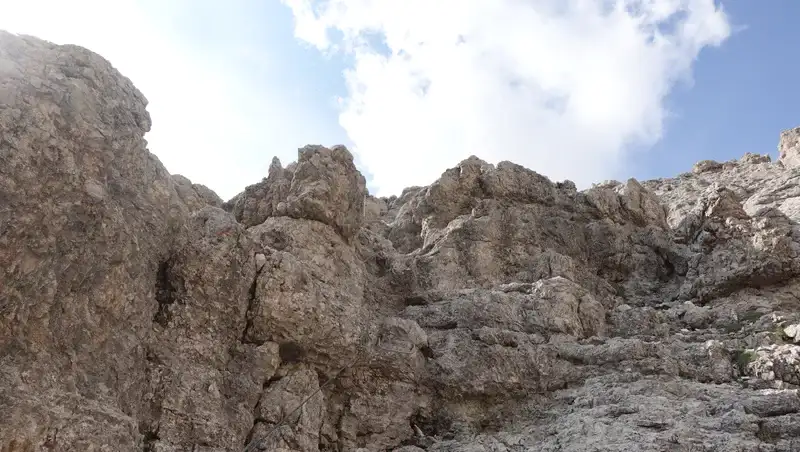
Here, you are on the north side of the cliffs so the rock can be wet and slippery even in the afternoon. But this is a solid rock, and the route is generally in a very good state.
This is one of the ferratas where hands are not used only to attach yourself to the cables. There are many hard sections with little place for feet support, so you will have to rely on your arms’ muscles to pull yourself up.
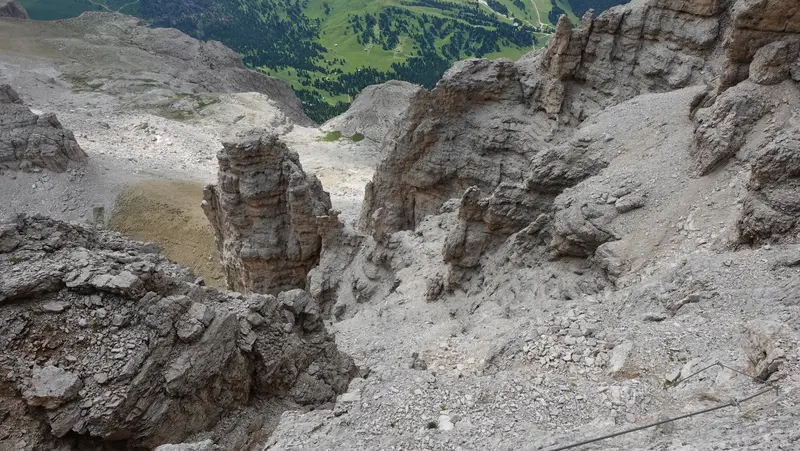
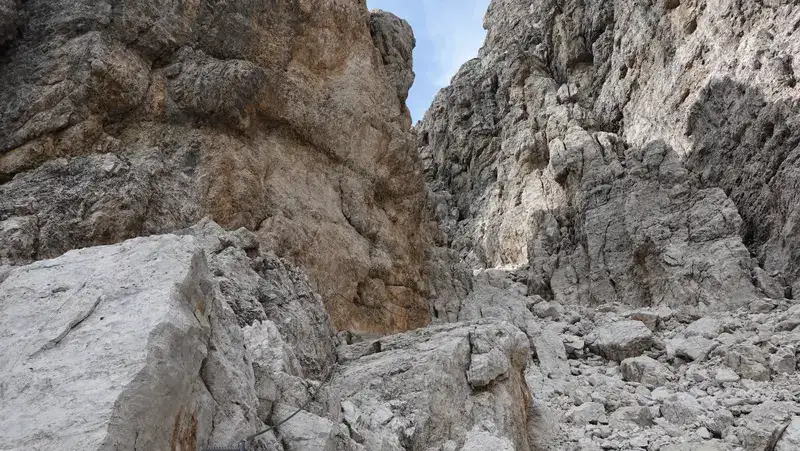
There are hard narrow passages where you will realize why it is best to go with a small backpack, see one here:
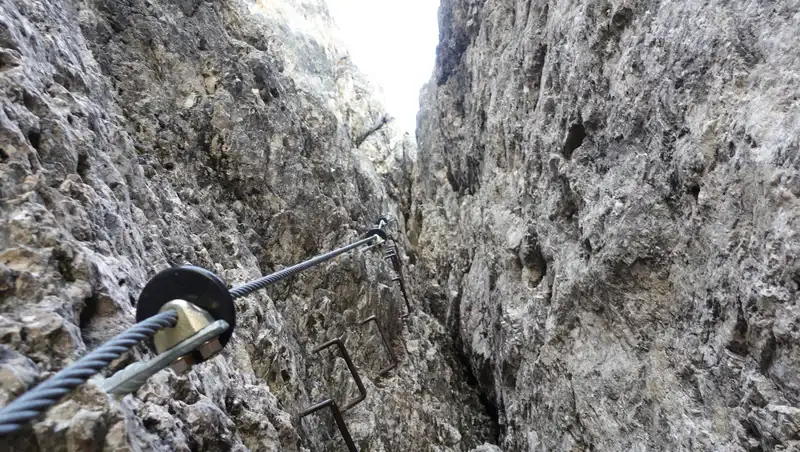
Do you see the narrow passage through the rock wall below? Well, you might want to know that the ferrata goes through it.
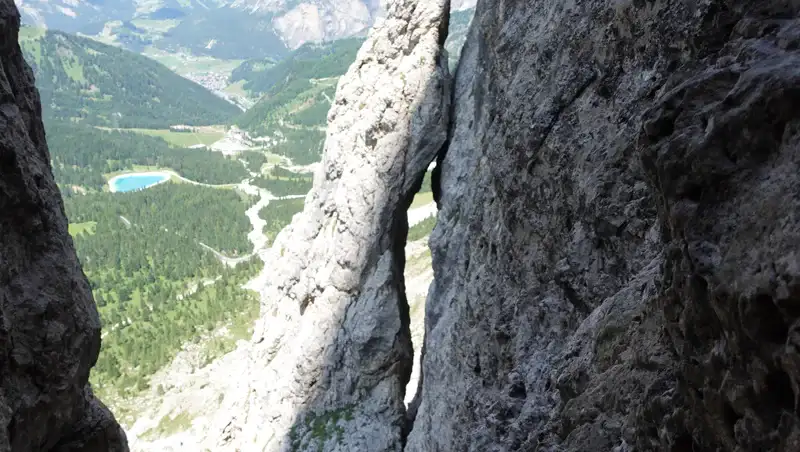
At some points you will even have airy ladders. But later, the route becomes easier, and you will get to a pleasant plateau with excellent views of the Sasso Piatto group.
The picture below shows how the plateau looks, elevation here is around 2700 meters. But remember that you have a huge vertical drop below it on the right, some 700 meters or so.
The second ferrata
What follows now is a rather easy ferrata with little exposure, below you can see some details from my way up.

Below is view back from the second ferrata towards the plateau. Far below is the Sella pass.
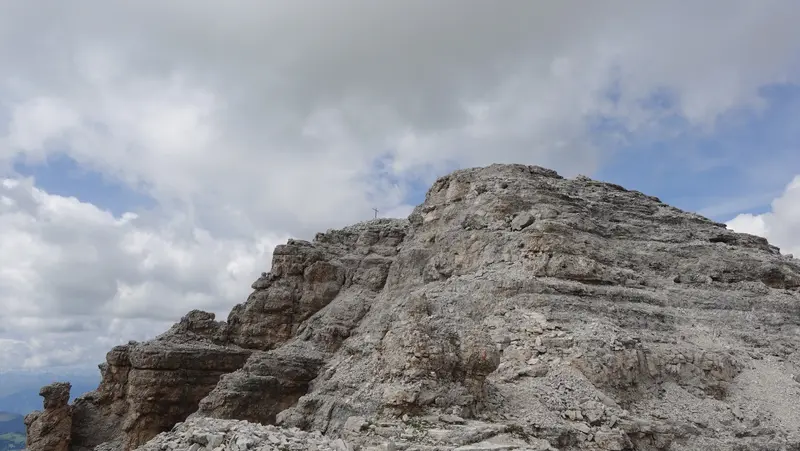
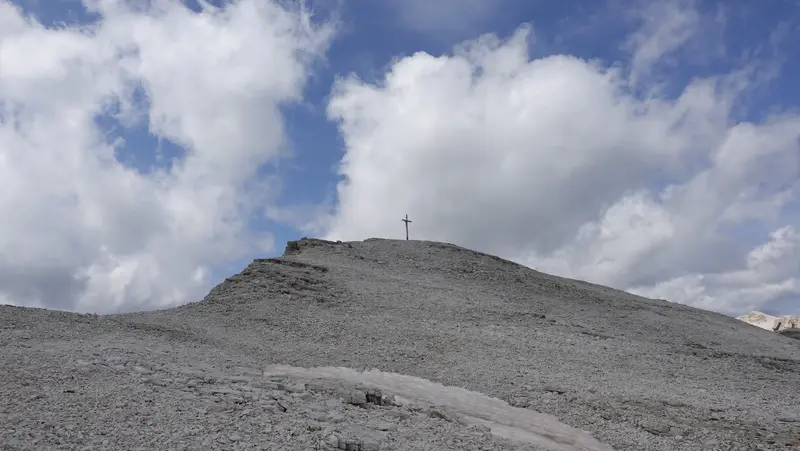
Very soon you will see the broad and flat summit of Piz Selva above you, here is my view of the summit cross:
At the summit, you have plenty of information for directions:

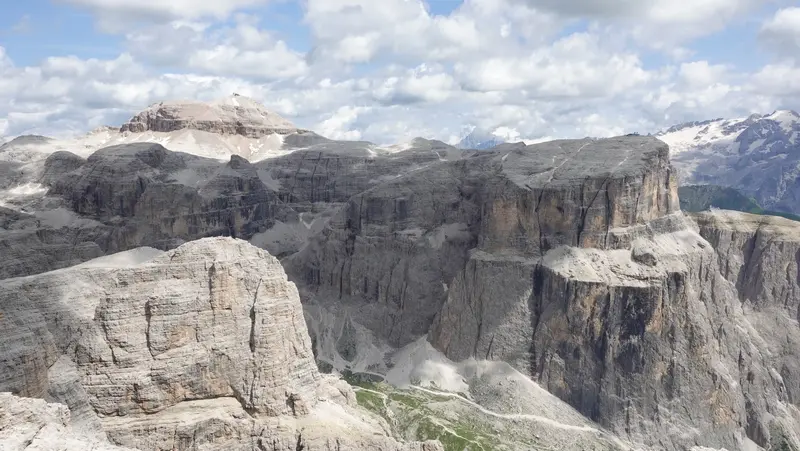
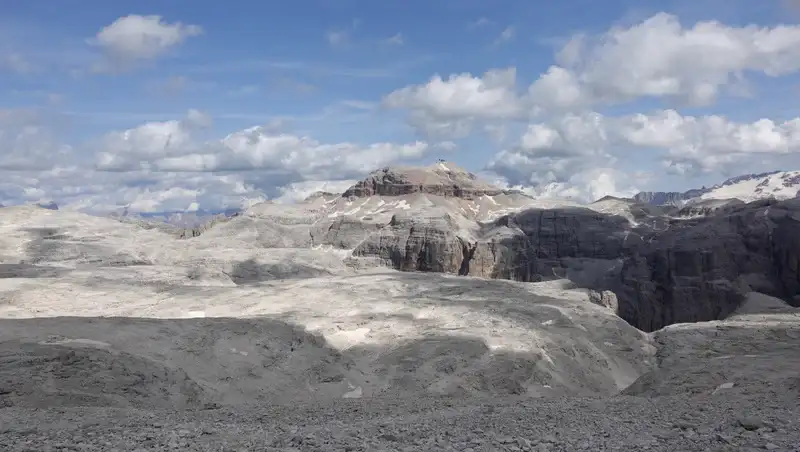
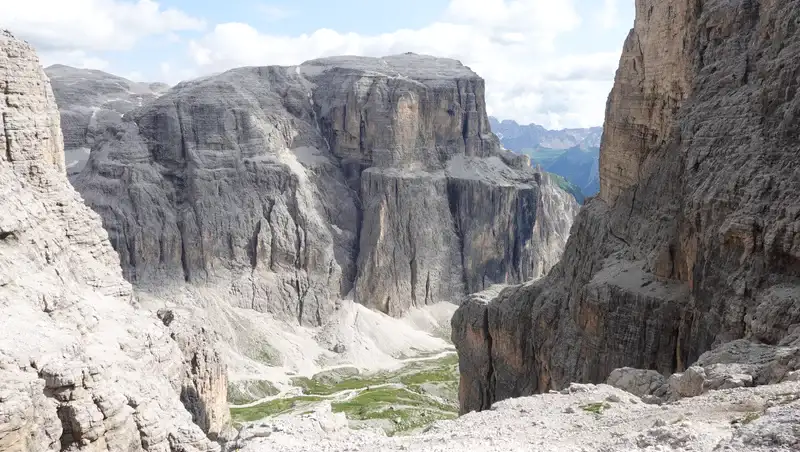
The views from here are hard to describe. It is best to show what you have in the east direction, this is Piz Boe on the left and Sass Pordoi on the right:
The remaining part will depend on what you plan to do next. Assuming that you will do the round tour, you will continue along the high elevated area that connects several summits.
They are all very high, but getting from one to another is a pleasant and easy walk, and you would not want to miss any, see the pictures below.
So the following peak will be Piz Gralba (2972 m; 9751 ft) which is the highest point here, and then Piz Miara (2964 m; 9724 ft).
The latter is with the cross summit that is the largest I have ever seen anywhere in the mountains. It overlooks the beautiful Selva-Gardena valley in the north-west direction.
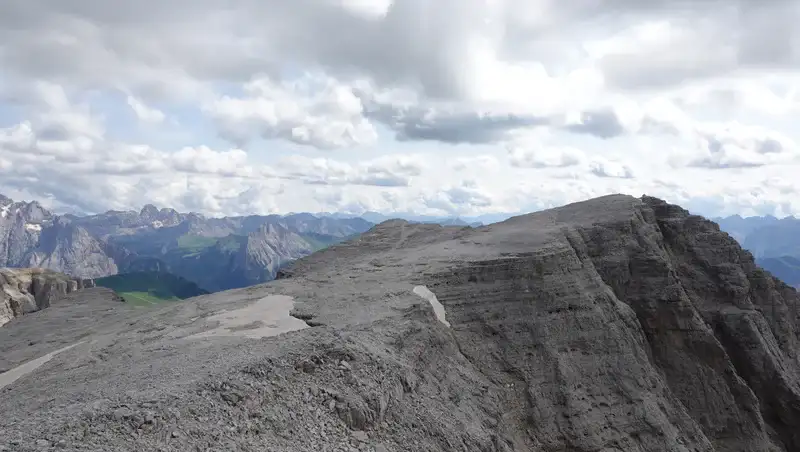
All the time you will have views that are among the best you can possibly have in the Dolomites. Below you can see my view back towards Piz Selva from Piz Miara. In between is Piz Gralba.
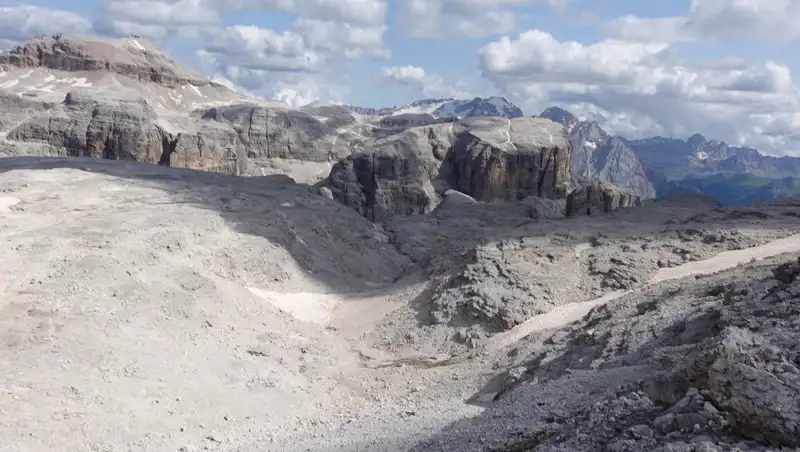
The picture below shows view from Piz Miara in the direction of Piz Boe. All this is a huge area with the mentioned peak that is over three thousand meters of elevation.
The descent and the third ferrata
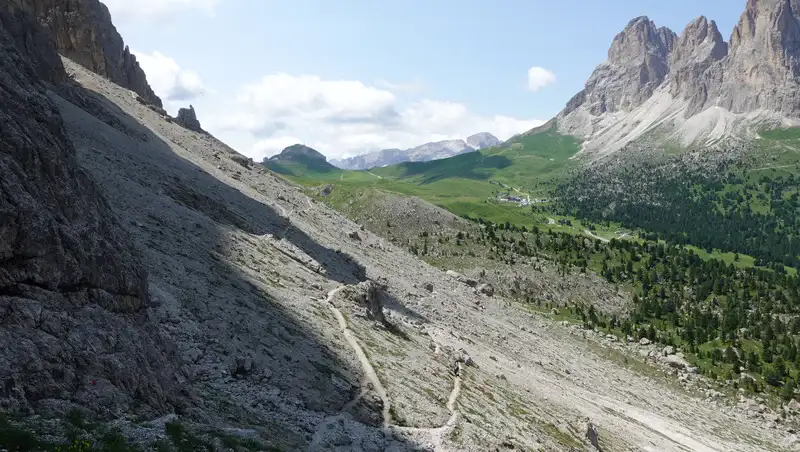
From Piz Miara you descend in the south-southeast direction. The first part is very easy and pleasant, you can see in the picture how it looks.
Next part is an easy ferrata, and at the end of it you will be above Val Lasties. All the time you will have magnificent walls of Sass Pordoi on the opposite side of the valley.
In the valley, you are on the route 647 that makes a loop in the south-west direction. After a steep grassy slope you will get to the previously mentioned third attraction of the tour, the Cascate Schiavaneis.
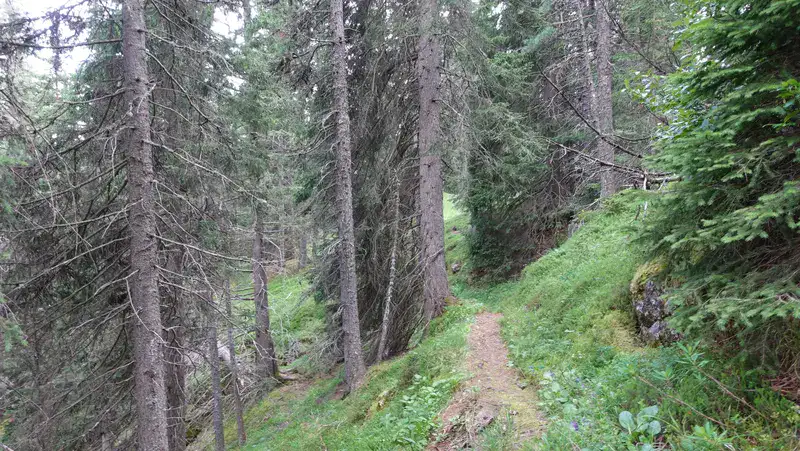
Very soon, the route turns up in the direction of Passo Sella. You are in a beautiful forest, see the picture below, but this will be a hard walk up after all you have done so far.
You may choose to walk by following the main road, or to make shortcuts through the forest. In the end, the path will take you to the area of the hotel Maria Flora and the parking.
My climb
I arrived to the Sella Pass between 11 and 12 AM, and without a really clear idea of what to do. But the weather looked great and the day was still young, so I thought I could still do the Possneker and Piz Selva tour.
After packing the necessary equipment and finding a free place for the car at the pass, I set off at 12:10. Less than half an hour later, I was at the beginning of the ferrata, and I started climbing without the delay.
I must say, I was really shocked with the exposure and the steepness of the route. But I was doing a very good progress and very quickly I passed two people whom I have seen far above me when I started the climb.
At around 2:30 PM, I was at the plateau area. The second ferrata was far easier, so I was at the summit at 3:30 PM. This means it took me 3 hours and 20 minutes.
I knew that I had a long round tour, so very soon I continued to the other two peaks, and I was at Piz Miara at 4:10 pm. Here I took a rest enjoying the views.
From there I descended in the direction of Val Lasties. The final part up through the woods was pleasant, but it was a bit hard after such a demanding climb and walk that I already had during the day.
I was back at the pass at 7:35 PM, so the whole tour took me around 7 and a half hours. The picture below shows the hotel area as I was approaching it at the end of the tour.
You can see more about the tour in my video:
My rating of the ferrata Possnecker
Below you can see how I rate this ferrata using several different rating criteria. As usual, this all makes sense only when you compare different ferratas. This is why you might want to compare this rating with my rating of ferrata Bianchi on Monte Cristallo.
My rating based on three essential criteria is as follows:
| Rating Criteria | Rating (A-E; 1-5) |
|---|---|
| Technical difficulty | D |
| Ferrata length | 3 |
| Access route difficulty | A |
| Overall Score | D3A |
The length grading is based on what I can find online regarding the length of cables which are probably around 250 meters or so, but I do not have totally reliable data.
Alternative ratings of the Pössnecker ferrata
Here are some commonly used rating systems for via ferratas and how the Pössnecker Ferrata is often evaluated within each:
1. VF (Via Ferrata) difficulty rating
- Overall Rating: D – Difficult.
Details: The VF rating system ranges from A (easiest) to E (most extreme). Pössnecker Ferrata is typically rated D due to its exposed, physically demanding sections.
This rating reflects its steep climbs, technical passages, and the endurance required to complete the entire route.
2. French (Hüsler) via ferrata rating system
- Rating: 4 out of 5.
Details: In the French system, ferratas are rated from 1 (easy) to 5 (very difficult). A rating of 4 indicates a route that demands high endurance, technical climbing ability, and confidence with exposed sections.
The Pössnecker Ferrata is therefore a high-level challenge, recommended for those who are well-prepared.
3. F (Italian) rating system for ferratas
- Rating: MD (Molto Difficile) – Very Difficult.
Details: In Italy, via ferratas are classified as F (Facile, Easy), PD (Poco Difficile, Moderately Difficult), D (Difficile, Difficult), and MD (Molto Difficile, Very Difficult).
The Pössnecker Ferrata is often categorized as MD for its high level of difficulty, with long, sustained vertical sections and very exposed climbing.
4. Physical & psychological demands rating (e.g., Bergsteigen system)
- Physical Demand: 4/5.
- Psychological Demand: 4/5.
Details: Some guides and sources, such as Bergsteigen, provide separate ratings for the physical and psychological challenges of via ferratas.
Pössnecker Ferrata scores high on both due to the long duration, technical demands, and exposure. This system is useful if you’re particularly concerned about either the physical or mental aspects of the climb.
5. Fletcher/Smith via ferrata rating system
- Overall Rating: Difficult.
Details: This rating system, popular in English-language via ferrata guides, uses terms like “Easy,” “Moderate,” “Difficult,” and “Severe.”
The Pössnecker Ferrata falls under “Difficult,” noting it’s not only physically demanding but also mentally challenging, with many exposed sections that require a high level of skill.
Summary of alternative ratings
Across these systems, the Pössnecker Ferrata consistently rates as a challenging to very challenging route, recommended for climbers with prior experience in high-altitude, exposed climbing environments.
It’s best suited for fit, confident climbers who are comfortable with steep, technical, and exposed routes.
Equipment, supplies & accommodation
For this tour I used my Osprey Stratos 24 backpack. The boots were Mammut Sapuen GTX. and I also had all ferrata equipment. This includes a climbing helmet, a harness, and a Y-rope.
I also used a pair of Komperdell trekking poles.
Regarding water, you have to carry it with you. For food, there are places to eat at the pass, but all you want to carry in the pack you have to buy in the valleys around.
As for accommodation, this is about the Dolomites, so make sure you make a reservation in time.
Final thoughts
In summary, climbing ferrata Possneker and Piz Selva was a great experience, and I have enjoyed every moment of the tour. In fact, this has been one of the most memorable tours I have had in the Dolomites.
The first ferrata is quite hard and I do not think it is for everybody. But the cables are in excellent state, and the quality of rock at the hardest passages is very good.
My guess is that not many people would descend the same way, and if so, make sure that you study the round route and be ready for its length. So carry enough water and food and have all you need for weather protection.
Thank you for reading and let me know if you have questions, there is a comment box below. For more texts about mountains in this area please check under the category Italian Alps, in particular read my text about Ferrata Tomaselli.
Please join us at our Facebook group Dolomites Visitors Hub.
Leave a Reply