Pizzo Paradisino (Piz Paradisin) is on the border between Italy and Switzerland, and it can be climbed from both sides. The climb from the Italian side is described here.
Piz Paradisin basic data
- Coordinates, latitude, longitude: 46.53147°N / 10.03464°E.
- Normal route type: walk-up & scramble.
- Elevation: 3302 m (10833 ft).
- Huts:
– Italian side: none.
– Swiss side: Refuge Saoseo 1986 m, Val Mera. - Town for supplies: Livigno.
Access, roads & routes
Two normal routes from the Italian and Swiss side merge at the Val Mera Pass (2660 m), from where you continue to the east approaching the mountain from the Swiss side. But I have climbed the mountain starting from Livigno, so only this access is described here.
The interactive map below shows details, you can zoom in and out to see all you need, access roads in the larger area, and also the route itself. The start of the route at the parking on the road, the Mera Pass, and the summit are marked by the red pointers, and the route is roughly marked with the blue line.

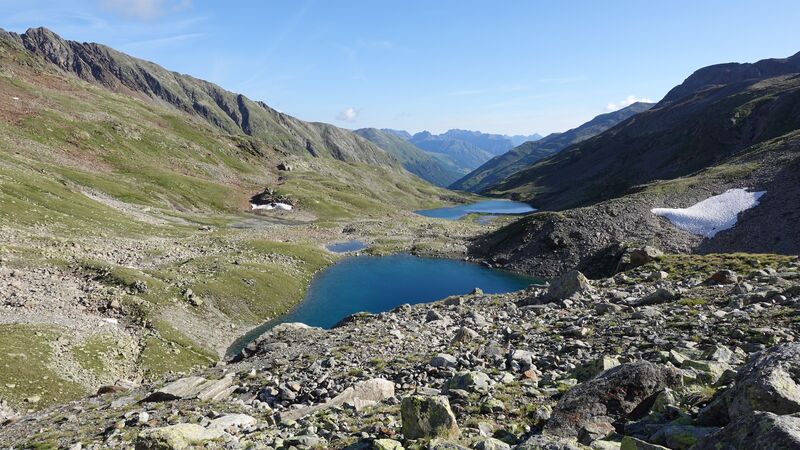
After that, follow the signs toward Valetta lakes, this is the route 113. Very soon you will be above the tree line, and after a pleasant walk along the valley you will arrive to these Valetta lakes shown in the picture.
Note that before reaching the lakes, you will have a sign to the left which is one option to continue to Piz Paradisin. However, I do not recommend it. The reason became clear to me when I was descending, more below. So continue in the direction of Val Mera Pass.
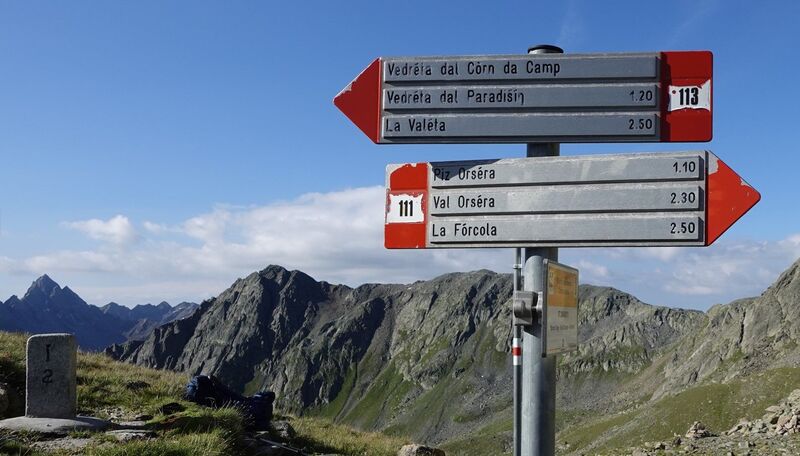
Below you can see some information at Val Mera Pass. This is the place where the Italian route meets the route from Swiss side. Note that from this place you can climb Piz Orsera as well. Observe the border stone on the left, so this is the border between the two countries.
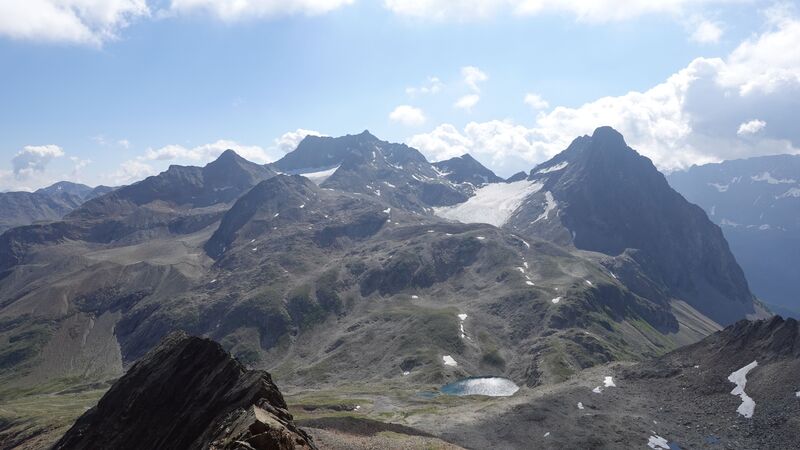
From the Mera Pass for some time you will be on the Swiss side, and you will get to a higher plateau with yet another lake shown in the picture below. The glacier is on the left. Till this area the route is marked. After that you will have to rely on cairns only (unless you carry some gadget of course). I have made a few myself on the way back.
In the picture above, you should keep on the side of the small lake opposite to the Campo glacier visible on the left.
Finding the route after that area is not so easy. But here keep walking up, and the glacier will be below on the right. So avoid the glacier and walk up on its north side. The route zig-zags up a steep area covered with boulders and rocks and the progress here is slow.
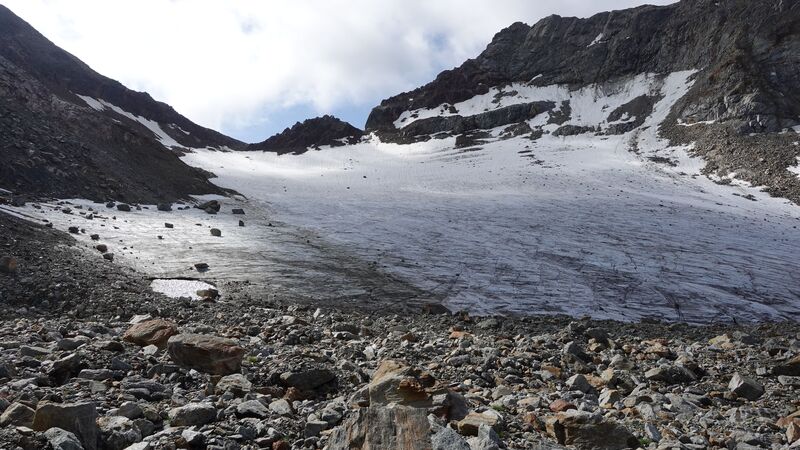
Eventually, you will get to the lake shown in the picture below, this is the last lake on the route, and the glacier will be far below you on the right side.
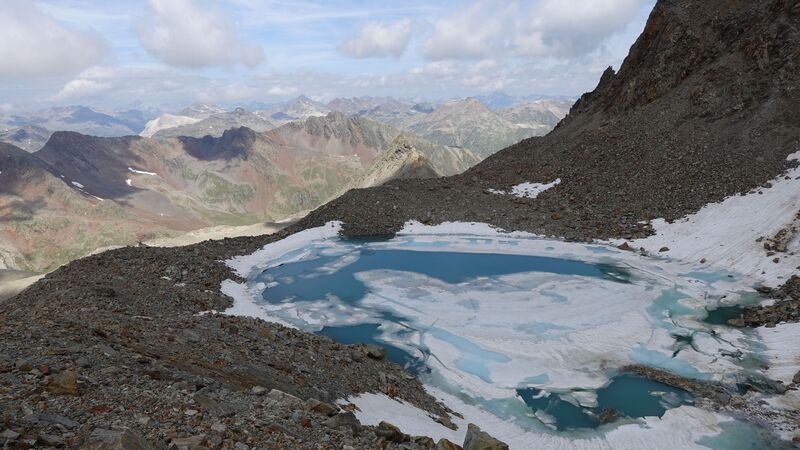
Try to remember the picture shown below. This is the area directly above the last lake shown previously. So avoid that boulders area in the middle of the picture, this all rests on an ice slab, and it is very unstable. Your direction should be far to the right in the picture, there are cairns to lead you up. The summit is above in the clouds.
In that same area below the summit I have seen a mountain hare that obviously lives there in this hostile environment. Did not manage to make a photo, pity.
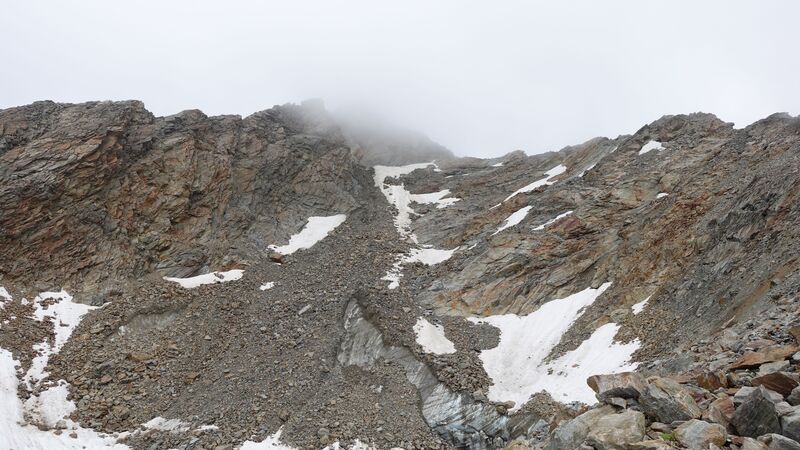
So far this is all a walk-up route. Only directly under the summit you will indeed have a short scramble section. But there are no fixed cables or ropes, and you do not have to be a Messner to climb this part. See how it looks:
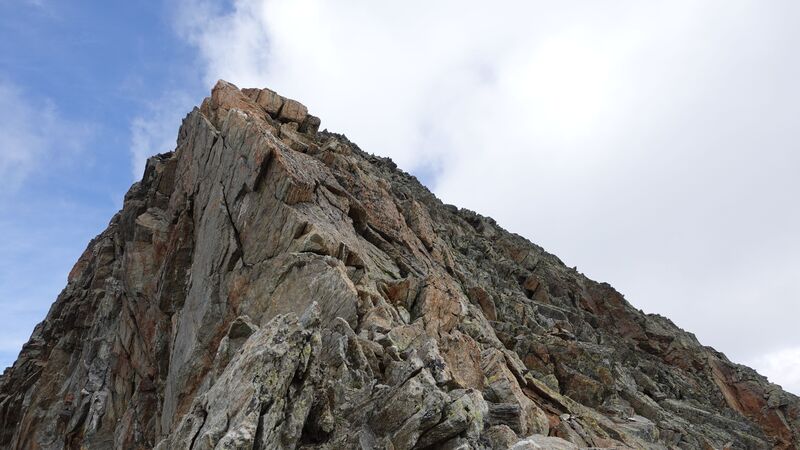
Below is the first view of the summit that appeared in front of me after that short scramble:
Glacier issue
I have seen people posting videos on YT walking over the glacier. I wish to stress that at no point the route touches the glacier.
So you definitely do not need anything for a glacier environment. This would only make the climb harder because you would have to carry crampons and use boots that fit them.
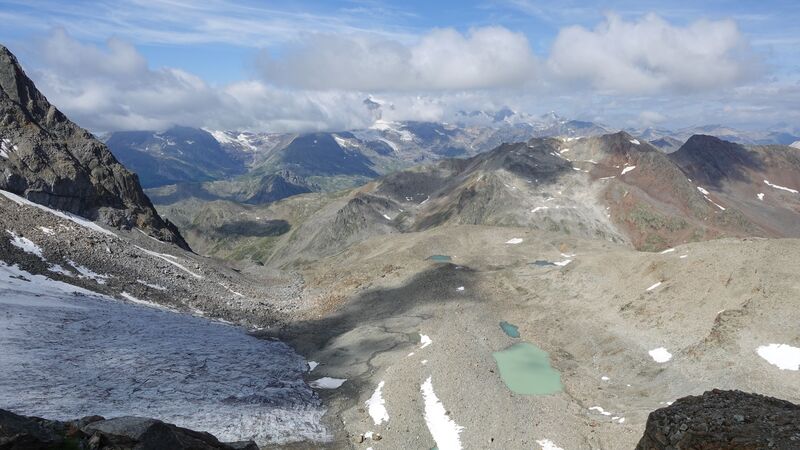
But if you do want to play on the glacier, you can do this. From what I have seen, there are no visible large crevasses, see the picture below, and it seems that switching from the upper part of the glacier to the route which I walked should not be difficult.
This is a small glacier and it is named after Corno di Campo peak (3232 m) next to it, and this is the Swiss side. On some maps it is under the name Vedreit da Camp. However, I have not walked over that glacier and cannot say more. I do not recommend this in any case.
There is yet another glacier on the Italian side, the Ghiacciaio Paradisino, on the north side of Pizzo Paradisino, but this far from the route and most likely you will not even see it.
My climb
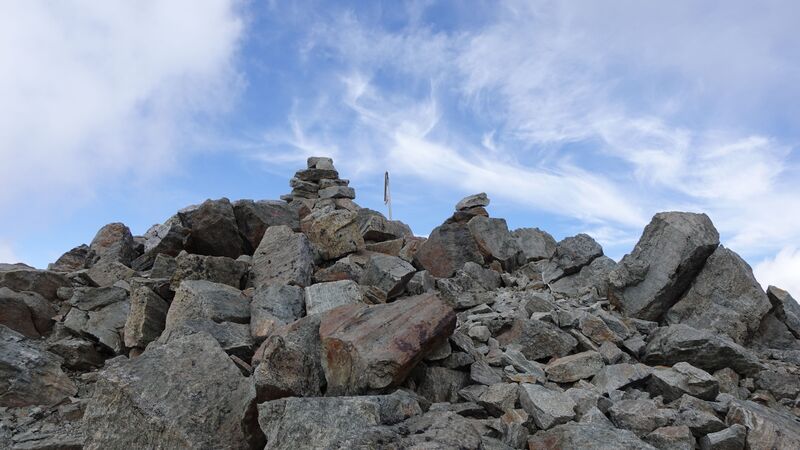
I have climbed Piz Paradisin together with Jan Schneider. You can see him here on the summit. It is rare that I have a mountaineering partner so this was a pleasant change for me (salute to Jan).
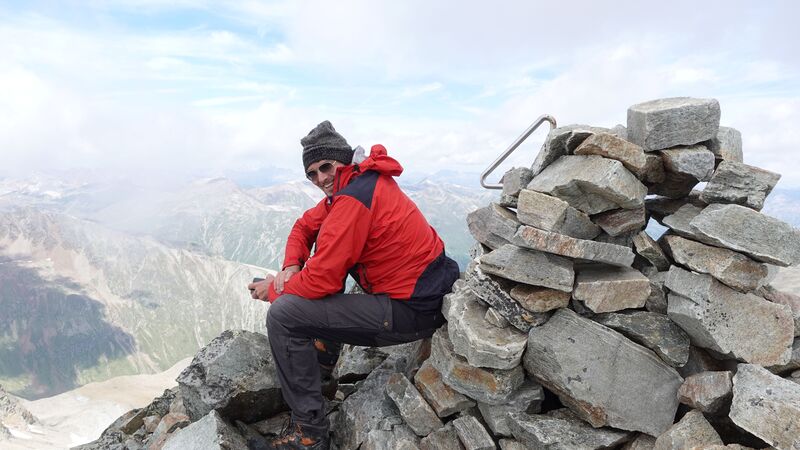
We started from the parking number 8 at 6:25 am, and we were on the summit at 11:55 am. So this was a bit longer than I expected, but I had impression that our tempo was quite good all the time. In any case, plan 5-6 hours for ascent. As for descent, see below.
Please see more in this video:
Alternative route
On the way up, before getting to the mentioned Valetta lakes, you will see a sign showing the route to Piz Paradisin.
It is best not to follow it, so just continue towards Mera Pass. We descended by following that route, and it is far from pleasant.
There are many sections over boulders, and what is worse, at some point we had to climb up before the final descent to the valley to get to the route which we followed in the morning. This was a bit annoying as we were already quite tired.
So it is best to ascent and descent over the Mera Pass and walking by the Valetta lakes.
Equipment, food & accommodation
Unless you decide on purpose to go over the glacier, you do not need any special equipment. Just a pair of good mid cut boots will be enough. I used my Salomon boots for this tour.
On our way back, at the glacier lake we have seen people in some low cut shoes that were totally inappropriate for this environment. One woman was with a dog. I told her that the dog would note be able to pass the last section below the summit, so she gave up.
As usual, I used a pair of trekking poles, but this is up to you.
I did have my coffee making equipment, so we had a coffee on the summit. This is a long tour, and there are no huts on the route, so you will have to carry food. On descent, we stopped at the glacier lake to eat something from the packs. Jan was even cooking spaghetti there.
Water is available all the way up, in lakes and in water streams. But I do not recommend drinking such water without filtration. So yes, I did carry my water filter and we refilled at the glacier lake.
Regarding accommodation, we both stayed in a camping by the road towards Forcola, there are several of them in that area. But finding accommodation in a place like Livigno may be difficult.
So make sure to book your accommodation in advance. Note also that there are free shelters relatively close to the main roads where you can sleep as well.
Maps: You can use Livigno / Bormio / Passo del Bernina map 069 by Tabacco.
Final thoughts
So if you plan climbing Climbing Pizzo Paradisino (Piz Paradisin) by following the same Italian side route, bear in mind the following:
- The tour is a bit long. Piz Paradisin is the highest mountain in the Livigno area, so this is not surprising.
- It may be difficult to find the route in the upper part.
- There is no need to go over the glacier. So in summer months the route is free of snow and ice.
Other than that, this is a non-technical mountaineering adventure but on a high elevation which you will feel, and without exposed sections. It can be done as a day tour as we did it.
But if you wish to carry a tent, you can make a camp in the area around those beautiful Valetta lakes or even higher at the Mera Pass.
If you make this a two-day tour, you can also climb Pizzo Orsera from the Mera Pass, and then descend to Forcola Pass, no need to go back the same way. My guess is that you can do this even if this all is a one-day tour. I was thinking about this, but the weather was not so great on our way back.
Let me know if you have questions, there is a comment box below. You might want to read also my report about climbing the nearby Pizzo Filone. See also my report about Pizzo Cassana which is in the same Livigno area.
Bookmark this site and keep as a reference, new texts are regularly added here. Thank you for reading and have a nice day.
Leave a Reply