If you plan climbing Pizzo Cassana (Piz Chaschauna), you can do this from Swiss side or from Livigno which is in Italy. I climbed it from the Italian side and this report is about my tour.
Plenty of names and two peaks. Which is which?
This is the most confusing mountain regarding the name I have ever seen. One of the reasons is that it is exactly on the border of Italy and Switzerland, so there are several versions of the name used on the two sides, plus local dialects.
Regarding the names, you will see on maps the names Pizzo Cassana, Piz Casana (with one s), Monte Cassana, and Piz Chaschauna.
But there is more; there are two peaks close to each other, separated by a beautiful ridge. The lower is on maps named Punta Cassana (3007 m; 9865 ft). But here too there are more names, so you will see it on maps under the name Piz de Rin and Piza di Rin.
There may be some confusion here as well. I have seen the name Piza di Rin used for Pizzo Cassana. Which is correct? Frankly, I do not know.
About Punta and Piz or Pizzo; this is used for neighboring peaks with a height difference. The same is what you have in the case of Piz Orsera and Punta Orsera that are also close to Livigno. From what I understand, the term Punta is always used for the lower peak of two.
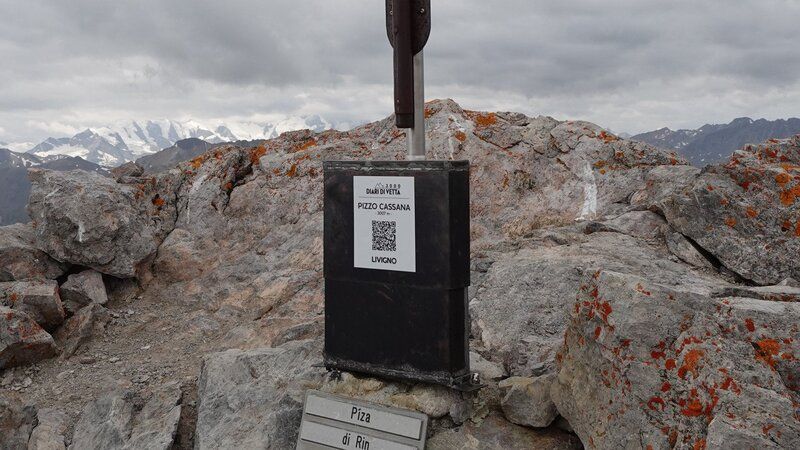
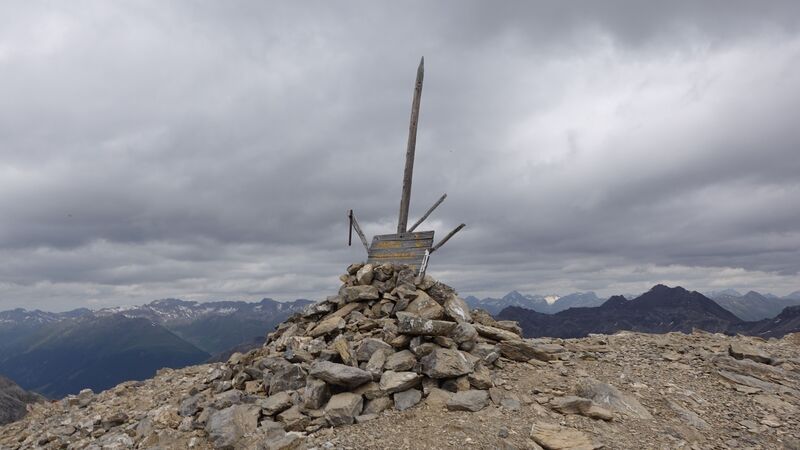
But wait, there is more to add to the confusion. When you get to the peak which is on maps Punta Cassana, you will see the cross with the name Pizzo Cassana, see the picture below. Observe the elevation 3007 m; so this is supposed to be the lower peak, and this would mean Punta Cassana:
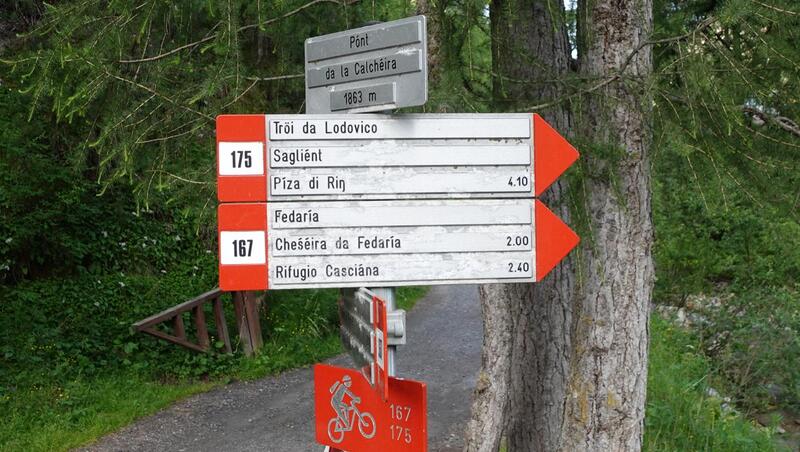
Anyhow, this is a 3000er closest to Livigno, and you can climb the mountain directly from the town, or you can park the car at the beginning of Fedaria valley (1863 m; 6112 ft) where you have a free parking and where the route starts.
Note that there is no Cassana mentioned there, see the picture, so make sure to follow the route to Piza di Rin. Now you realize why it was important to mention the issue of multiple names.
Did you see the name Rifugio Casciana in the picture? Well, this Casciana refers to Cassana, just to know if you see the mountain where this version of the name is used. So this would make it the 5th version of the name for the same mountain. Very remarkable.
By the way, there is no rifugio there. There is a building that used to be a military object below the border. I have been there a few times in the past and it has always been closed.
Pizzo Cassana – basic data
- Coordinates, latitude, longitude: 46.574999 °N/ 10.078697 °E.
- Normal route type: walk-up.
- Elevation: 3070 m (10072 ft).
- Elevation difference from the start: 1207 m (3960 ft).
- Huts:
– Italian side: none.
– Swiss side: none. - Town for supplies: Livigno.
Access, roads & routes
The interactive map below shows access roads to Livigno. You can get there from three sides, through the tunnel La Schera from the Swiss side, from Forcola pass, and from Bormio over Passo Foscagno.
- The yellow line is the route from the parking to the saddle between the two peaks and then to Punta Cassana.
- The blue line is the part from the saddle to Pizzo Cassana.
- The pink line is my descent route.
- Also marked are Punta Cassana (yellow), Pizzo Cassana (red), and Rifugio Cassana (which is closed).
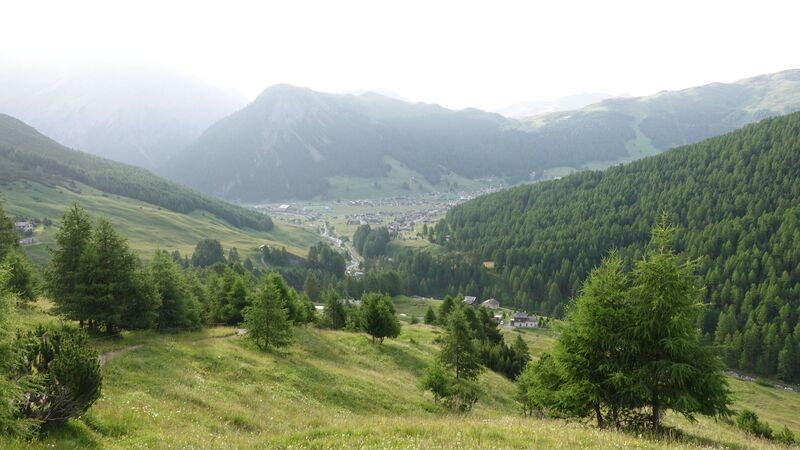
From the mentioned parking (Pont de la Calcheira) you will be walking through the forest for a while, but very soon you are above the tree line, and you will have Livigno visible:
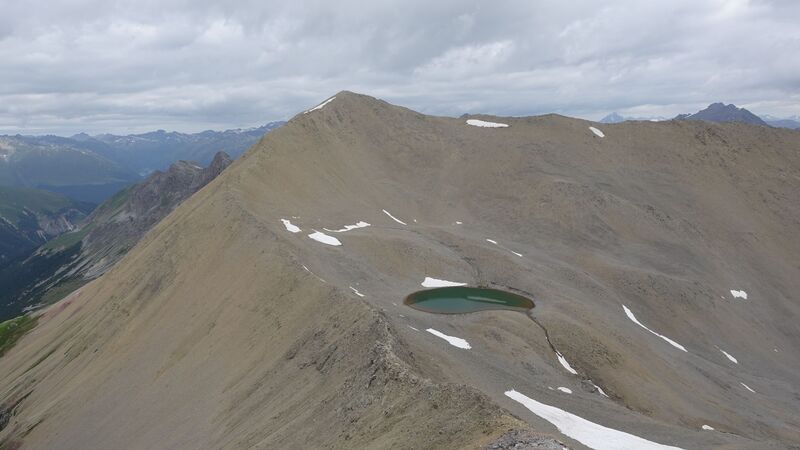
After that you will walk over meadows in the north direction, and at some point you will get to a small lake. See how it looks:
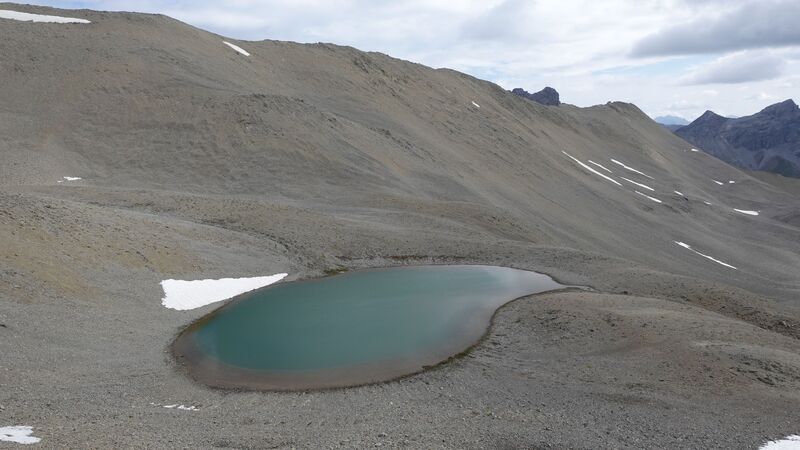
Note that before getting to the lake, there is a route to the left. So you can follow it if you want to go to Punta Cassana directly.
There is a saddle above the lake, see it below, so this is your direction. You are on the Italian side, so Punta Cassana will be on the left (visible in the picture), and Pizzo Cassana on the right.
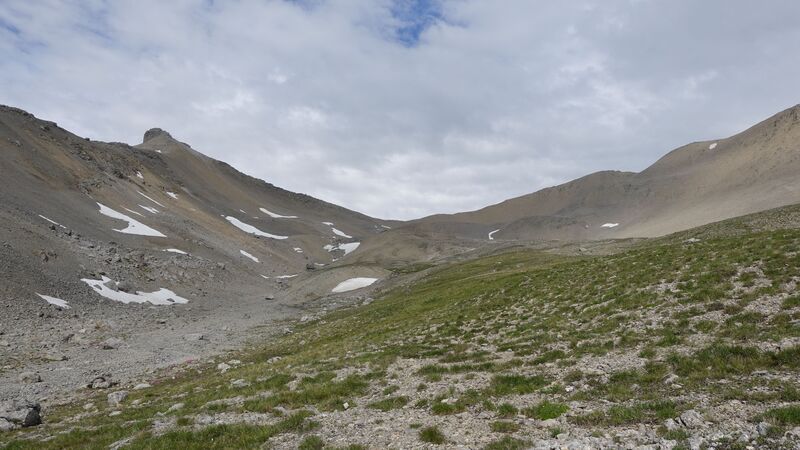
Once you get to the saddle, it is up to you to decide which of the peaks you want to climb first. Note, Pizzo Cassana (to the right, north direction) is a very simple walk.
This is not so if you go to Punta Cassana, more below, and see also the picture. It may look simple, but is a bit more exposed when you see it in reality.
My climb
I told you about confusion regarding the names. So to be sure, I have climbed both peaks.
I started from the car parking at 6:40 am, and after passing the mentioned lake I was soon on the saddle which is on the ridge that connects the two peaks. This line is in fact the border between the two countries.
At 10:20 am, I was at what I think is Punta Cassana. Well, you have seen the picture above, the name on the cross was Pizzo Cassana. Go figure.
So it took me 3 hours and 40 minutes to Punta Cassana (but was it really Punta?). The table at the trailhead was showing that one needs 4 hours and 10 minutes, so my timing was good.
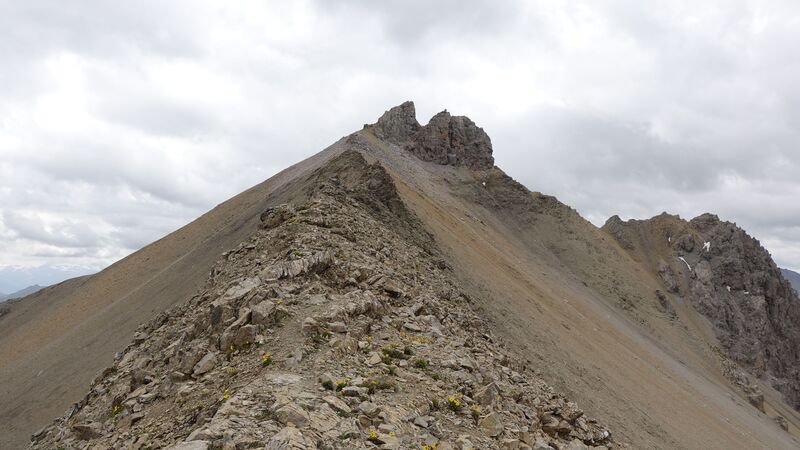
Note that there is one section on the ridge which is a bit exposed. It is best to stay exactly on the top of this rocky part. If you try to avoid it by going on any of the two sides, you might get in trouble. On the left (when you go up) you will have exposed cliffs, and on the right you have a very steep and unpleasant scree slope.
Exactly below the summit, there is yet another short passage with a bit of scramble, but this is easily done. I stayed on the summit for half an hour or so. There was nobody around.
After that I descended the same way towards the saddle, and then continued along the beautiful ridge to what is supposed to be Pizzo Cassana. This is a very easy walk without any exposed place. I was on the summit exactly at noon.
The picture below shows the summit, so this is supposed to be the main peak, but there is no cross here, as compared to Punta Cassana, just a wood pole.
I spent lots of time on the summit, had breakfast there and then my coffee. Meanwhile, somebody came from the Swiss side, that was a man from Germany. I was watching his progress before that, he came to the same saddle point on the ridge and then joined me on the summit.
I was preparing to leave, so that he could enjoy the views in solitude, but he joined me back immediately. At the saddle, I descended down the Swiss side, this was not so pleasant steep scree part.
He continued to Punta Cassana summit. I told him to stay exactly on the ridge in the part with cliffs because this was the easiest way although this passage look sharp and exposed.
But as I was descending to the valley, I saw him getting back all the way to the saddle, and then around the ridge over the scree area which is on the Swiss side.
I was watching from the valley, he was still trying to get to Punta Cassana, but in a wrong and harder way. Do not know if he managed, he was struggling on the scree. I was soon on Cassana Pass, and could not see what he was doing.
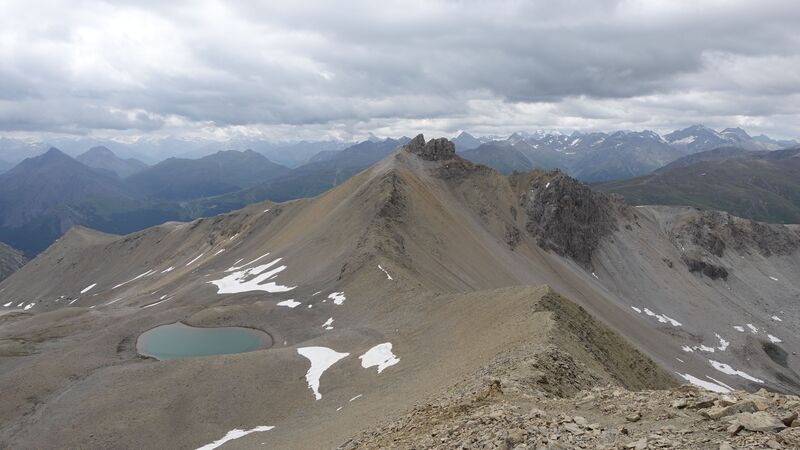
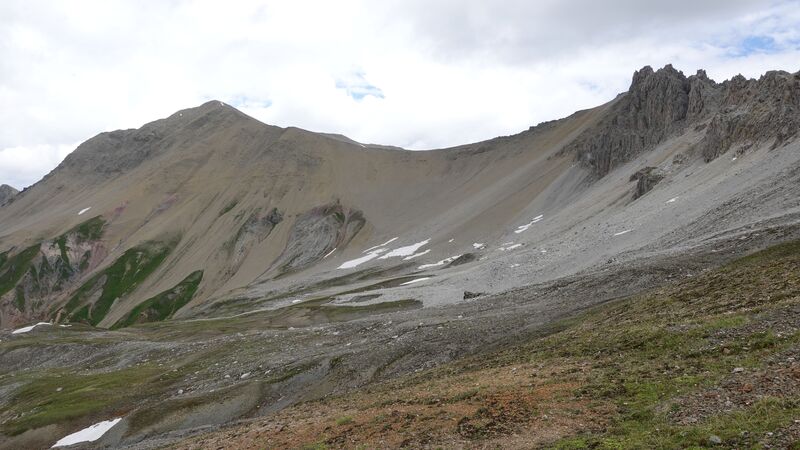
The picture below shows the two peaks from Passo Cassana. The scree slope is the Swiss side of the mountain. Pizzo Cassana is now on the left and Punta is on the right.
Final thoughts
So climbing Pizzo Cassana (Piz Chaschauna) is not complicated, this is not a technical tour, and finding the route is easy.
You do not need any special equipment. A day pack and a pair of good hiking boots are enough, but you might want to consider also trekking poles, I always use them. I had my Komperdell poles with me. If you do not plant to descend over the scree slope on the Swiss side, then you can do the tour even in good hiking shoes.
But the confusion with names is a fact. I am lost with all this. If you think you know the true answer, let me know in the comment section below.
You might want to have a look also at my book Livigno Peaks with the collection of my tours in that area.
Thank you for reading and let me know if you have questions, there is a comment box below.
Leave a Reply