If you what to know how to lace hiking shoes and boots this text will be a great starting point, you have several typical lacing options described, so keep reading.
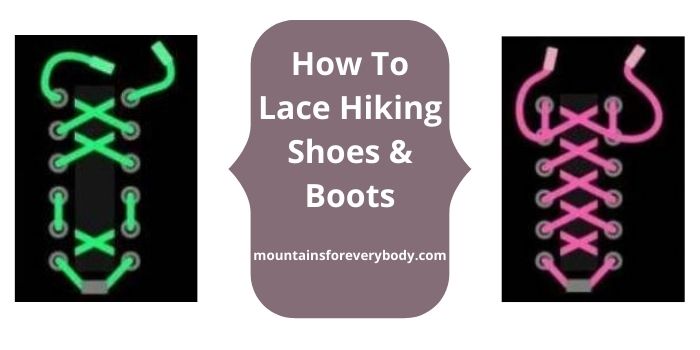
I guess it is best to start with a clear statement that there is no right and wrong way when this is about lacing hiking shoes and boots. There are several reasons for this:
- This all depends on the shape of our feet, and we are all built differently.
- This also depends on the shape and design of the boot/shoe, and on its purpose.
My own collection of such outdoor footwear is quite large and they are all different, with a different purpose, different designs, etc. To see what I mean, it is enough to check my text about Scarpa Triolet Boots, and compare it with my Lowa Renegade Boots or perhaps with my Merrell Men’s Moab 2 GTX Hiking Shoe.
For example, the mentioned Lowa Boots are quite wide for me on the front, so I lace them differently from the Scarpa boots. But again, this is about my feet and this may not apply to your feet.
Here are a few quite typical situations:
1. How to lace hiking boots and shoes if you have wide forefeet?
If you have wide feet, or if your boots/shoes are built narrow, you will want to avoid too much pressure in the midsection of the lacing system. So one way of dealing with this issue is to pass the laces as shown in the picture:
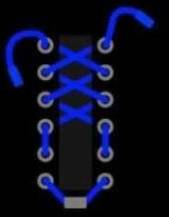
So you realize what effect you have here: when you pull laces and tighten the boot, this does not happen in the critical area where you feel pressure, this is because in this area the lace goes longitudinal and you do not have its X-shaped profile. You can experiment with this, perhaps move this section up, or even extend it to yet another pair of eyelets.
2. What if you suffer from black toenails or just have a toe pain?
It may be that your feet are narrow for the boot, and it may be necessary to tighten the front section of the boot/shoe. This is done as the picture shows:
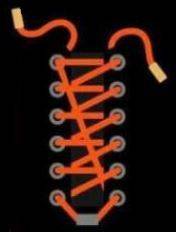
In this case, when you pull one of the two ends of the lace (on the left in the picture), this tightens the area between the first pair of the eyelets.
3. What if you have high arches or the boot insole is built so that you need more volume?
This is typically my case as I have high arches. So what you do here is that in the central area of the lacing system you pass the lace longitudinal between the two adjacent eyelets, similar to the first case above. If this is not enough, you may try to extend this setup for yet another eyelet.

4. What if the boots or shoes are too tight?
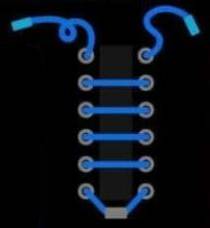
When you are in the painful process of breaking the boots in, they might feel too tight. If so, one way of dealing with the issue is to pass the lace as shown in the picture below, this might help:
5. Lacing to avoid heel blisters
Heel blisters are usually due to heel slipping. So one way of dealing with this is to do what is shown in the picture below:
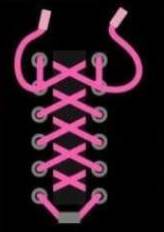
So you lace with the usual X-shaped profile, but when you get to the top, you go back for one pair of eyelets and this is where you make the final knot. This will depend on the lacing system and the number of eyelets. With one of my boots, I go all the way to the middle and then make the knot. The idea behind this is to tighten the foot in the middle and to prevent the heel from moving up and down.
In summary, these are some of the ways of dealing with the lacing of hiking boots and shoes. You can combine some of them, but perhaps you have invented your own way. If so, please share it here, there is a comment box below.
Hussain says
Thanks for sharing all this helpful information Jovo. Fabulous Post!
Jovo says
Most welcome and thank you.