All normal routes to Monte Civetta are ferratas. Recently, I climbed the mountain by following one of them, and here is my first-hand report. Keep reading.
There are three ferrata routes to the summit of Monte Civetta, and all of them are on the east and south-east sides of the mountain, and this means above Zoldo valley. There are lifts from both east and west sides to help getting to a higher ground, but even with that you should plan around 7 hours to get to the summit.
Monte Civetta coordinates, numbers & details
- Elevation: 3220 m (10564 ft).
- Nearest place for supplies: Pecol.
- Mountain group: Dolomites, Italian Alps.
- Coordinates: 46.3801303 N, 12.0533469 E.
- Route difficulty: ferrata, up to medium rating passages.
- Elevation difference from the car parking: 1520 m (4987 ft).
- Parking coordinates: 46.4187272 N, 12.0942939 E.
- Hardcopy map for the tour: Dolomiti di Zoldo Cadorine e Agordine, Tabacco 025, 1:25000.
- Huts on the route: Rifugio Coldai, Rifugio Torrani.
- Time needed from the road to the summit: 7 hours.
Access roads and map
Below you have an interactive map which gives all the details you need. Zoom out to see larger area with access roads, and zoom in to see details of the routes to the summit.
The markers 1 and 2 show the area where you can park the car at the highest elevation. This can be either at the main road (the marker 1) that goes to Passo Staulanza, or anywhere on the gravel road between the markers 1 and 2. I left the car at the marker 2 position.
The marker 3 is the position of Rifugio Coldai, the marker 4 is the position of Rifugio Torrani, and the marker 5 shows the summit of Monte Civetta.
Route description
If you follow what is called the normal route, you can start from the markers 1 or 2 mentioned above, or anywhere in the Pecol valley. There is a lift station across the road opposite to the Palafavera camp spot, and from there you can get to a higher ground.
If you decide to take the route that starts from Coldai hut, you will follow Sentiero Tivan that goes more or less horizontally along the east side of Monte Civetta.
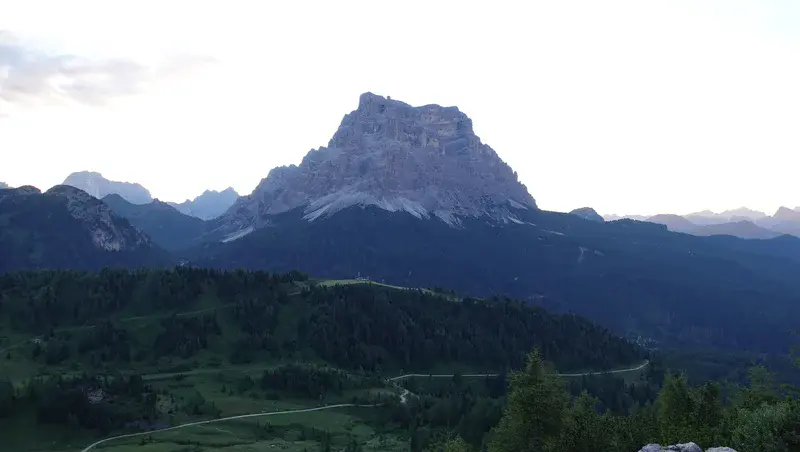
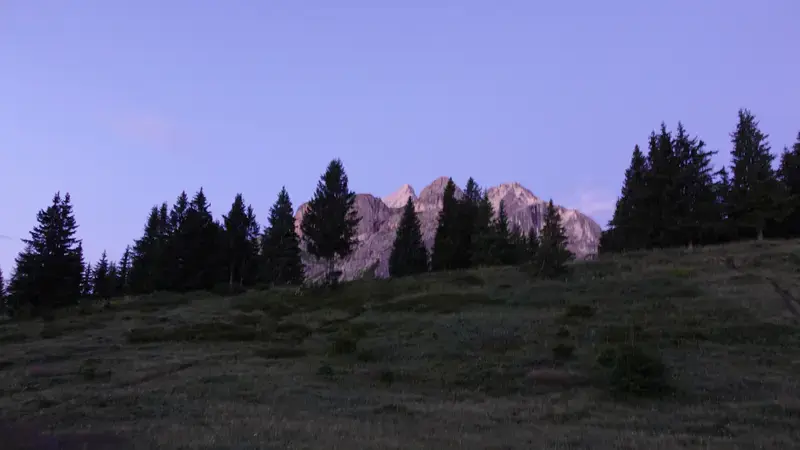
Monte Pelmo is always in sight on this tour, and here you can see how it looked in the early morning before sunrise as I was approaching Rifugio Coldai:
Rifugio Coldai
This rifugio is on Alta Via 1 (AV1), so if you plan to use it as your start point by sleeping there, make sure that you have a reservation well in advance. The place is very popular in general, there are routes to it from both east and west sides.
The hut is at elevation of 2132 m (6995 ft), and it is owned by C.A.I. Venezia. It can accommodate 88 people, plus 8 in the winter room. It is open from 20 June to 20 September. The phone is +390437789160.
Sentiero Tivan
Sentiero Tivan is a very pleasant route, you can see the beginning of it in the photo above, it is on the left behind the hut. It includes a couple of few passes like the one shown below, so if you plan to bring your tent, this is the place where you have enough flat grassy area for it.
The photo below shows one of its flat parts. But note that there are a few easy cables even here, be ready for this.
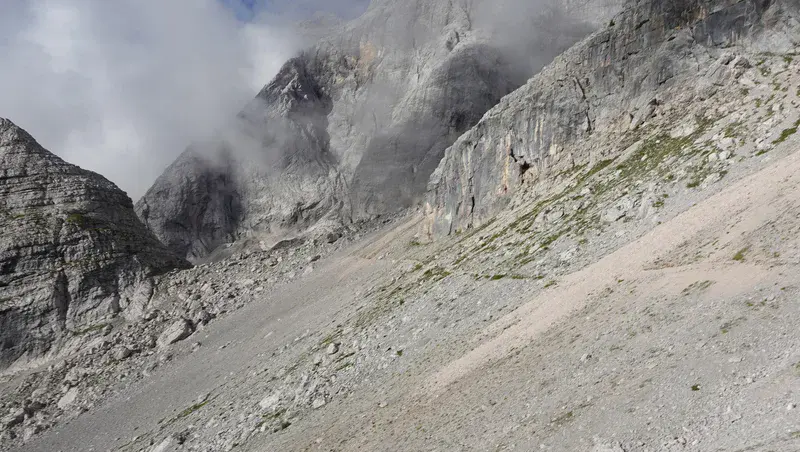
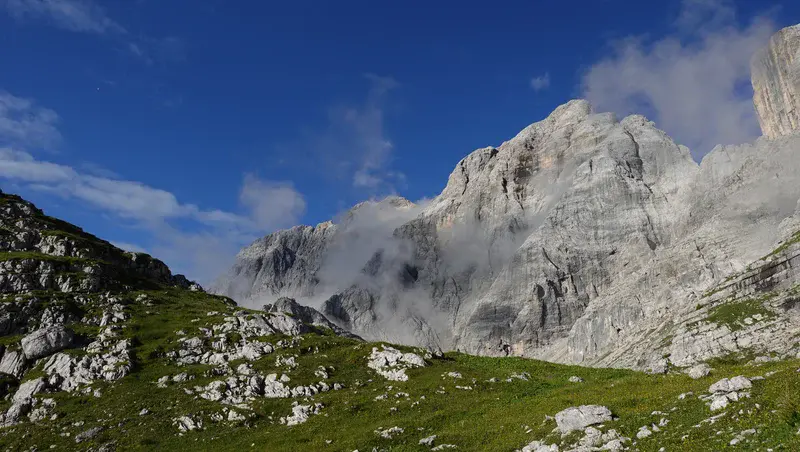
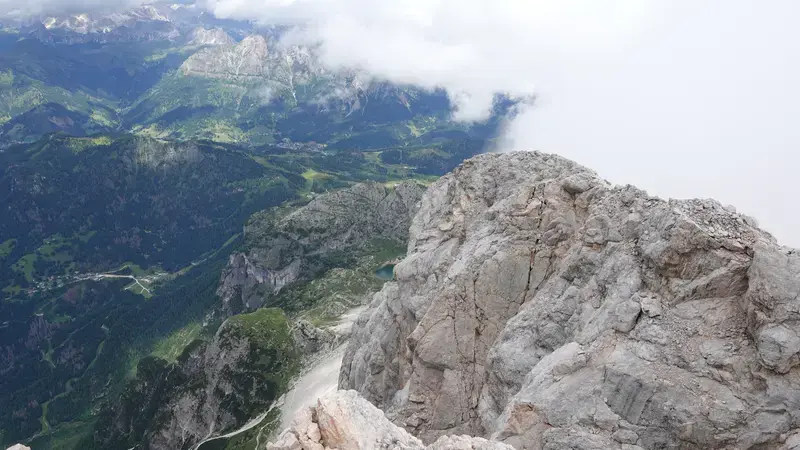
This is a long walk, it will take you several hours before getting close to the area where the actual summit ferrata starts. Huge cliffs are always close above you as you can realize from the photo below.
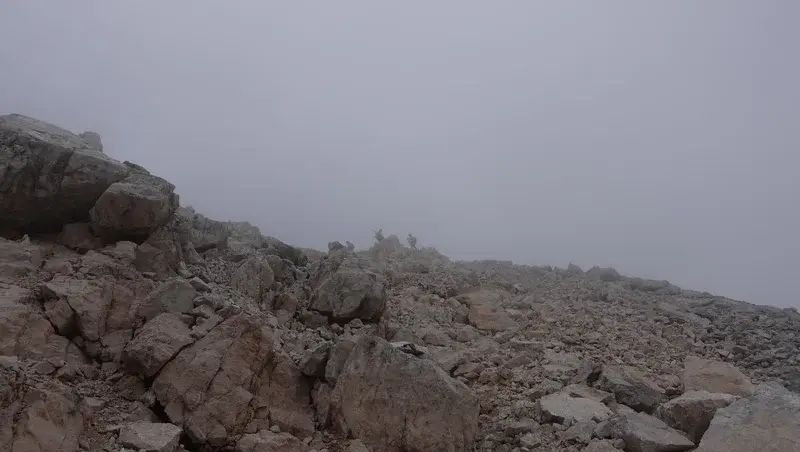
But after all this walk, elevation gain is next to none. When you are at the hard scree area shown in the photo below, your elevation will be the same as at Rifugio Coldai, and you have walked several hours already.
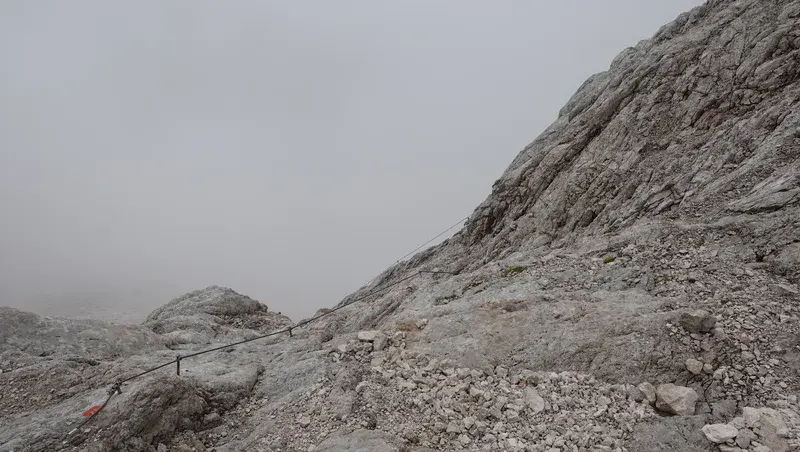
The normal route to Monte Civetta
The place in the photo above is very important because this is where the normal route actually starts. In other words, no matter where you start in the valleys around, if you plan to climb the normal route, you will get to this point.
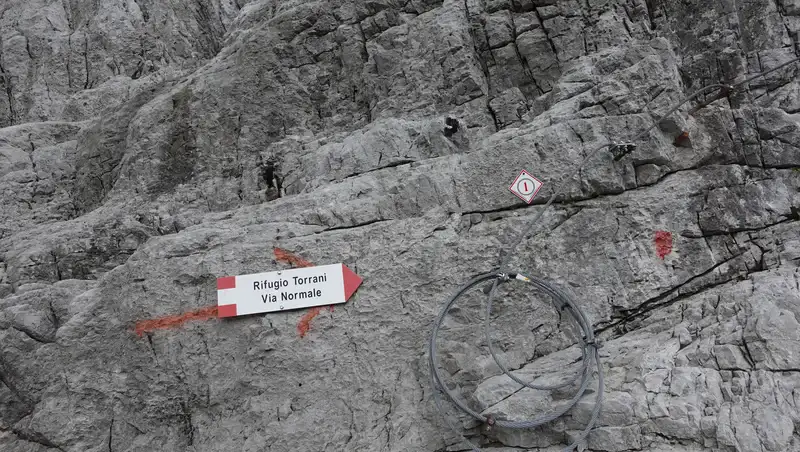
When you walk up the scree area, you will get to the first cable, and this is where you have to put your all equipment on. As you realize, the cables are numbered, and there are 22 of them in total, just to know.
Some of the cables are on very exposed passages, and there are also numerous places with scramble. How about the rating? In some places, I would say it is up to C or so.
I am sure that Monte Civetta would not be accessible by ordinary people if all the cables were removed. In fact, it would not even belong to the group of mountains with the normal routes.
Even with the existing cables, it is more demanding than Monte Pelmo where you have only one a few meters long really tricky passage which people call “passo del gatto”.
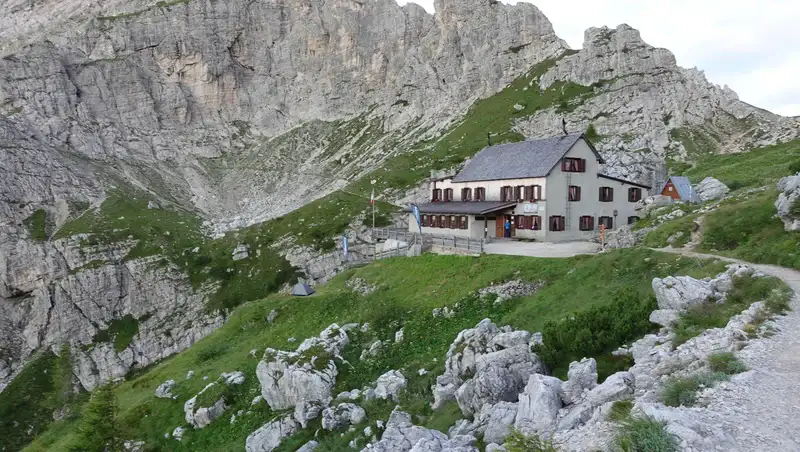
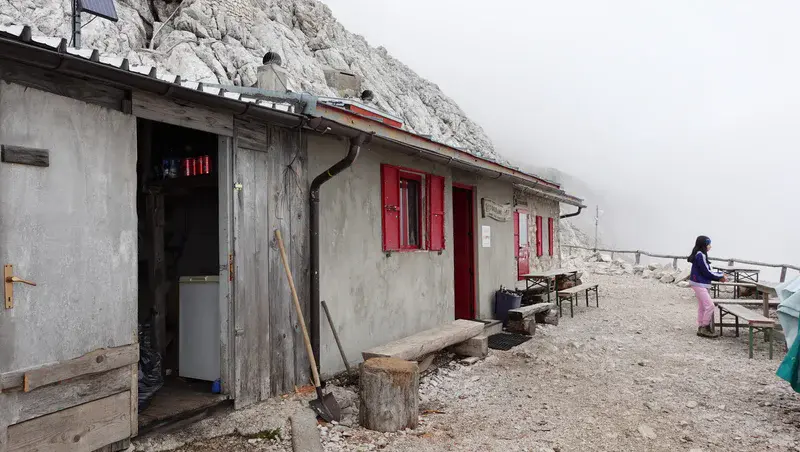
At Rifugio Torrani
After probably 20 cables or so, you get to the Torrani hut. It is at 2984 m (9790 ft) of elevation, and it is open in the interval 01/07 – 30/09. There are 12 beds, plus 4 emergency platforms.
Here are contact data:
- Phone numbers: 0437 789150, 338 6411763, 0437 772372.
- Email: vdebona@libero.it
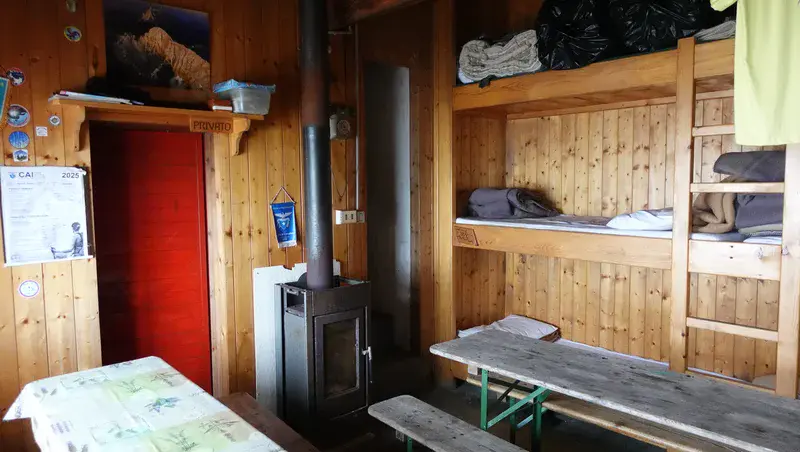
The hut is small, one room only plus private area for the guardian. The photos below show how it looks:

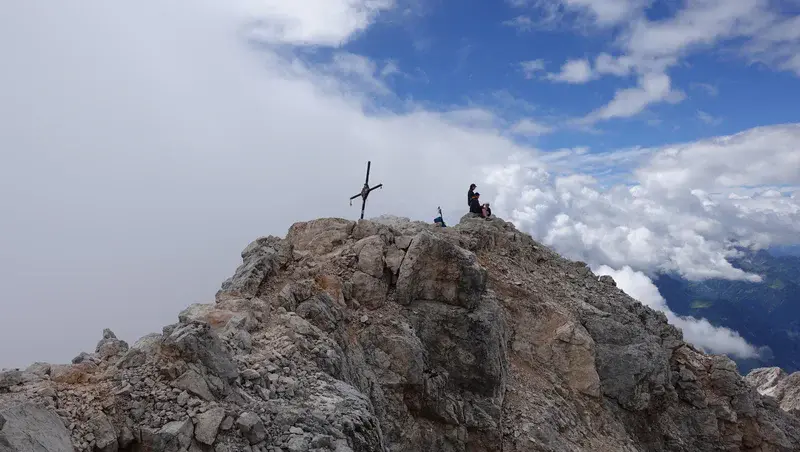
After the hut, you still have a few cables to the summit, and need up to 40 minutes or so. The summit is a bit elongated ridge without much area to sit and sprawl, and with a cross that has seen better days.
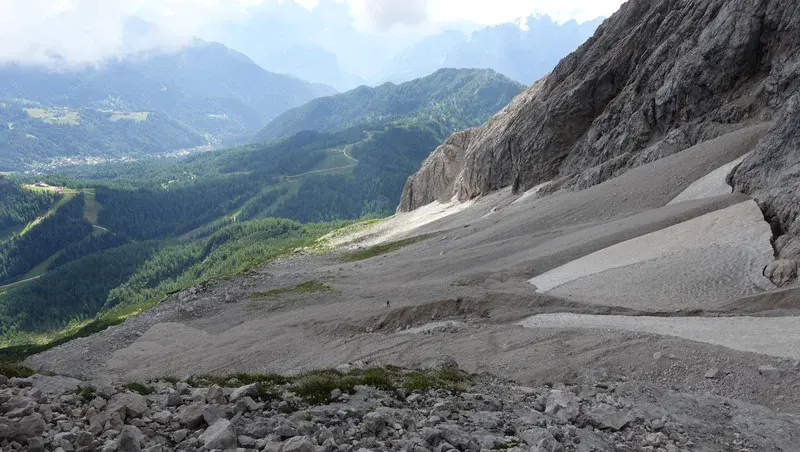
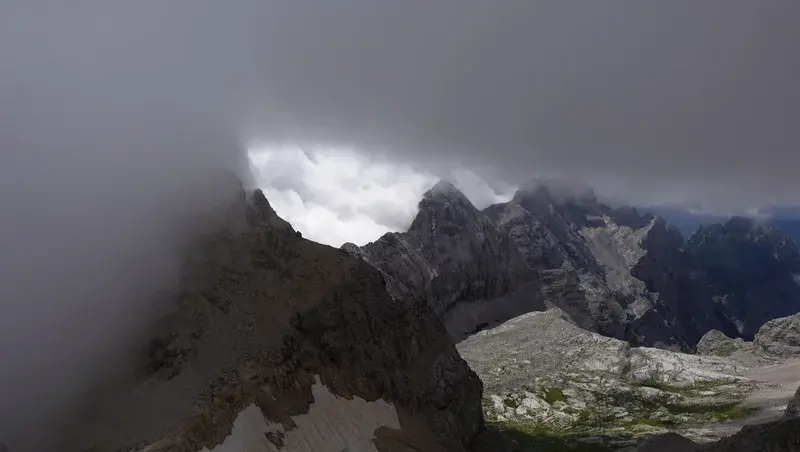
To my surprize, the west side was without much clouds and this offered great views over the Alleghe valley which is more than two kilometers elevation difference below.
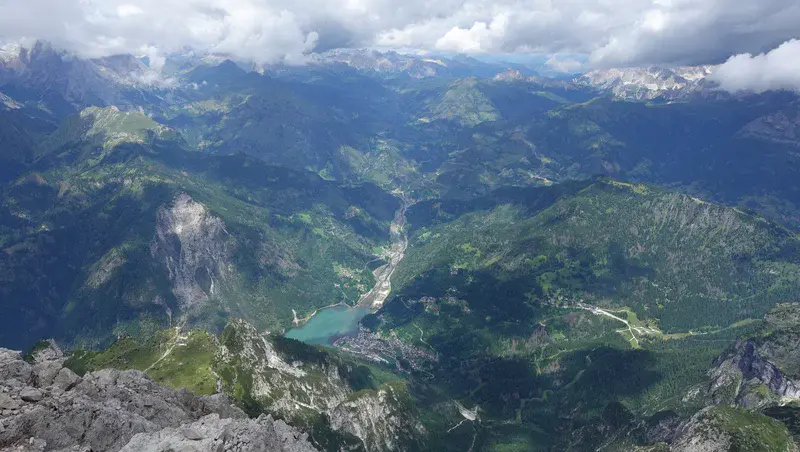
Even Coldai lake is visible if you have clear views. Here you can see the clouds on the east side only, and air streams are such that clouds do not cross the main mountain ridge line:
Please see more in my video:
My rating of the Monte Civetta normal ferrata route
I use three essential criteria published here in the site, and my rating is as follows, assuming that you walk all the way from the car parking:
| Rating Criteria | Rating (A-E; 1-5) |
|---|---|
| Technical difficulty | C |
| Ferrata length | 4 |
| Access route difficulty | E |
| Overall Score | C4E |
My guess is that most people would rate it B+ regarding technical difficulty, and they might even be right. I give it C because I rather overestimate than underestimate regarding such an important matter. It is better to be prepared for more than for less.
The length and access gradings are based on the following:
- The 22 cables are probably around 400 meters long.
- It takes more than 4 hours from the car parking to the first ferrata cable.
My tour
I have climbed Monte Civetta by following what is called the normal route described above. So this is a ferrata just like the other two ferratas, the Ferrata Tissi and Ferrata degli Alleghesi, but my understanding is that it is a bit less hard. You can see all of the routes in the map above.
My initial plan was to follow the Ferrata degli Alleghesi and to make a round tour by descending by the normal route. But due to the weather conditions I changed my plans. I am therefore describing the route which I walked myself and which I can provide reliable information for.
I did everything by book: waited for a good weather forecast, and started reasonably early, at 5 am. The weather was indeed perfect when I started, the sky was completely clear, see the photo below.
But this was changing rapidly as I walked up, you have already seen it in the previous photos. At the time when I came to the area where I had to switch to the Ferrata Alleghesi, it looked hopeless. The photo below shows the clouds.
This is why I decided to go the normal route, I knew that there was a hut on the way up, so this is something I needed if the storm comes.
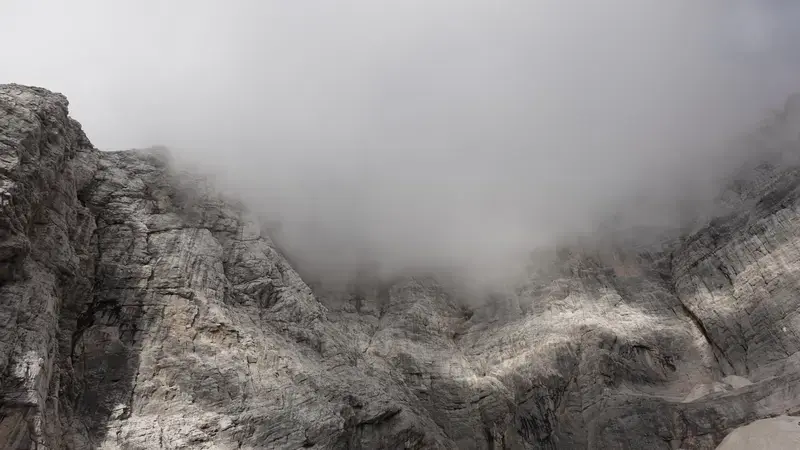
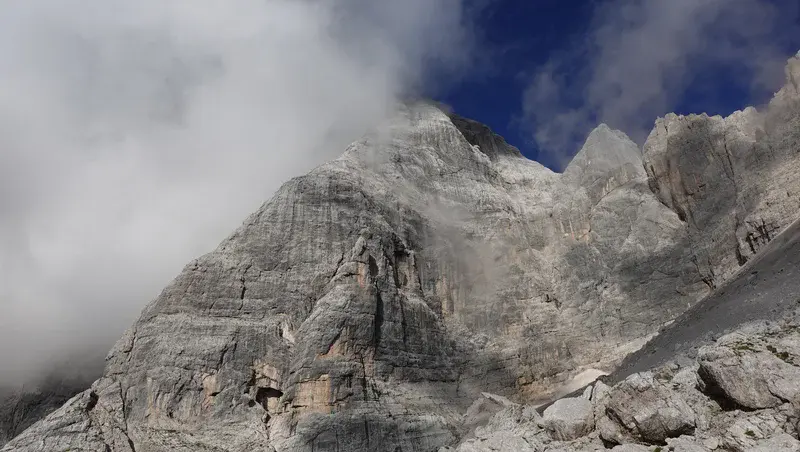
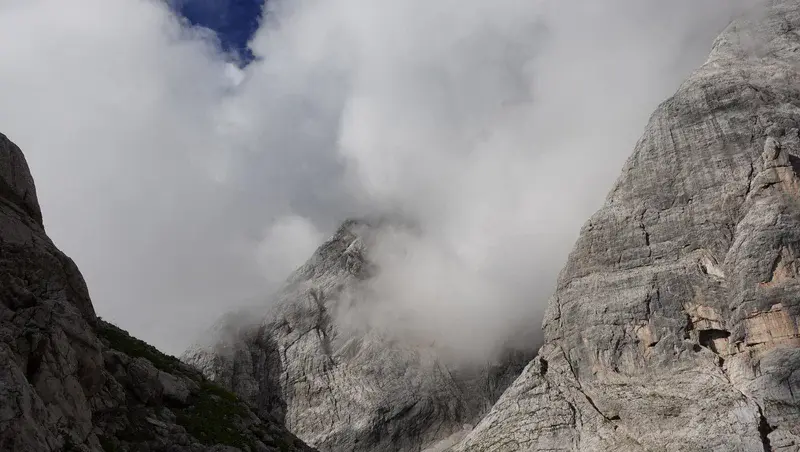
Later, I entered clouds and remained in them all the way to the summit and back. The photo here shows how serious they looked in some moments:
I was in the clouds all the time, and below you can see how the summit looked when it appeared in front of me after 7 hours of climb. It is interesting that this climbing time was the same as in my tour to the neighbour Monte Pelmo. The two mountains are indeed of a similar height, but the routes couldn’t be more different.
Even when I was back at the Sentiero Tivan, nothing changed regarding the weather, and you can see this in the following photo. But I had just a few drops of rain for all the day in the clouds.

Equipment
For this route you definitely need a full ferrata set, with a harness, Y-rope, and helmet. Do not even think of going without it.
I used Mammut Sapuen GTX boots, a pair of trekking poles, and my Mammut Lithium backpack. I also had gloves for cables, a rain poncho and rain pants, plus a rain jacket.
There are no water streams, so carry your water in the pack, or buy it at the two huts. Note that there is a water source at the parking (the marker 1 in the map above).
Final thoughts
In summary, Monte Civetta normal route is a demanding ferrata simply because it is quite long. It tests climbers with its 22 cables, exposed passages, and significant elevation gain.
The 7-hour ascent from Zoldo valley, via Sentiero Tivan and Rifugio Torrani, rewards with stunning views of Alleghe valley and Lago Coldai, weather permitting.
My climb, clouded by shifting conditions, underscored the need for adaptability and proper gear, helmet, ferrata equipment, good boots, and weather protection are non-negotiable for safety and success.
Despite weather challenges, the route’s mix of long flat paths, scree fields, and technical ferrata sections makes Monte Civetta a compelling objective for experienced climbers.
The summit’s ridge and weathered cross mark a hard-earned achievement. With reliable huts like Coldai and Torrani as checkpoints, preparation and respect for the mountain’s unpredictability are key to a safe and rewarding ascent.
Thank you for reading. Let me know if you have questions or comments, there is a comment section below. Check also my text about my tour to Sasso Vernale.
Please join us at our Facebook group Dolomites Visitors Hub.
FAQ: Climbing Monte Civetta
What is the best time of year to climb Monte Civetta?
The optimal period for climbing Monte Civetta is from July to mid-September when Rifugio Coldai and Rifugio Torrani are open, offering support for climbers, and the routes are free from snow.
However, sudden weather changes are common, so checking forecasts and preparing for rain or fog is essential. Early morning starts, as I did at 5 am, maximize daylight and help avoid afternoon storms typical in the Zoldo Valley.
Are there alternative activities in the Zoldo Valley area if I don’t want to climb Monte Civetta?
The Zoldo Valley, surrounding Monte Civetta, offers a range of activities for those not tackling the ferrata routes. You can hike trails like the Alta Via 1, which connects to Rifugio Coldai, or explore gentler paths around Pecol for scenic views of Monte Pelmo and Civetta.
The valley is also known for winter sports like skiing in the Civetta Ski Area, as well as cycling routes and cultural visits to villages like Forno di Zoldo, where you can experience local crafts and Dolomite cuisine. Lago Coldai is a great spot for photography or relaxed walks.
Do I need prior ferrata experience to tackle Monte Civetta’s normal route?
While the normal route to Monte Civetta is less challenging than Ferrata Tissi or Ferrata degli Alleghesi, it still requires some ferrata experience due to its 22 cables and exposed scrambling sections.
Familiarity with via ferrata equipment, such as harnesses, carabiners, and helmets, is crucial for safety. Beginners should practice on easier ferratas in the Dolomites, like those in the nearby Cortina d’Ampezzo area, before attempting Civetta. Physical fitness and comfort with heights are also important, as the route involves long hours and steep terrain.
Leave a Reply