Read here about a summer adventure of climbing Monte Pelmo through snow and clouds, a challenging ascent impacted by the weather, with misty views and alpine surprises.
If you plan to climb Monte Pelmo by following the normal route from Passo Staulanza, you will need at least 7 hours to the summit. Note that Ball Ledge (Cengia di Ball) is a part of the route, so this is not an ordinary mountaineering walk-up tour.
Add at least 5 hours more for descent, and you realize this is a long and hard day tour. But rifugio Venezia is on the route, so you can stay there and make the summit day route shorter and easier.
Coordinates, numbers & details
- Monte Pelmo elevation: 3168 m (10393 ft).
- Coordinates: 46.41480 °N / 12.13560 °E.
- Mountain range: Dolomites, Italy.
- Route difficulty: scramble, many exposed passages.
- Useful maps: Tabacco number 015, Marmolada – Pelmo Civetta, 1:25000, and Tabacco number 025, Dolomiti di Zoldo Cadorine e Agordine, 1:25000.
- Free parking for this tour: at Passo Staulanza (1765 m; 5791 ft).
- Elevation difference from the parking: 1403 m (4602 ft).
- Hut on the route: Rifugio Venezia (1947 m; 6388 ft).
- Total time from car parking up and down: at least 13 hours.
[Vivaldi: Double Cello Concerto in G minor RV531 movement 2]
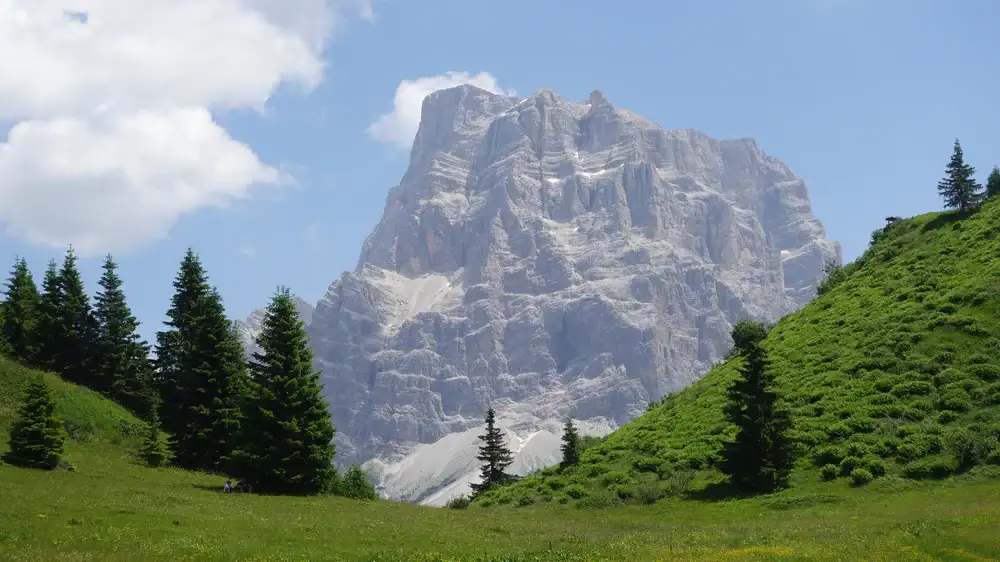
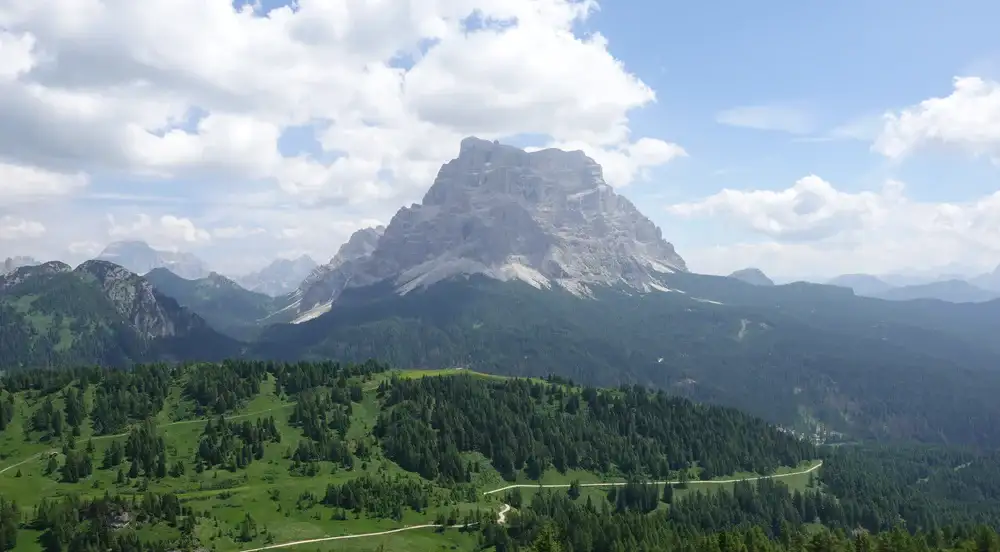
Monte Pelmo, located in the Dolomites of Northeastern Italy, is a massive, isolated block, standing distinct from nearby peaks such as Antelao and Monte Civetta.
It earned the nickname “God’s Armchair” due to its imposing and throne-like shape when you look at it from the south-east side.
John Ball, an English climber and later the first president of the UK Alpine Club, made the first recorded ascent in 1857. His route included traversing a challenging ledge which is now named Ball Ledge in his honor, and ascending through a large cirque and over the Pelmo glacier to the summit.
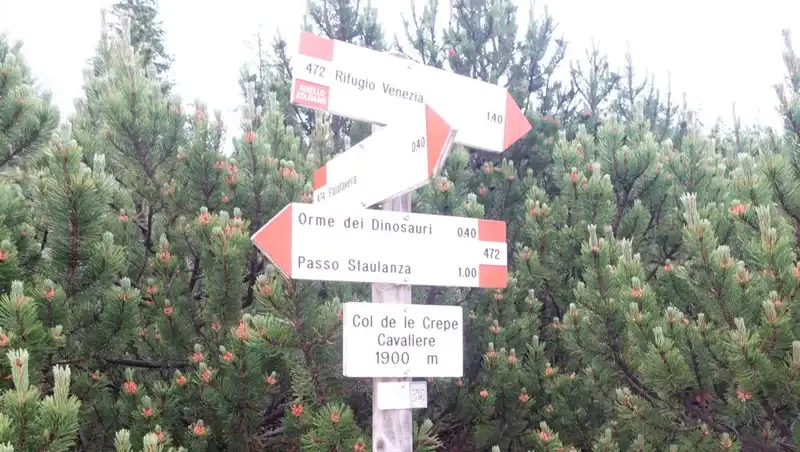
The mountain features a secondary peak, Pelmetto, and is also notable for fossilized dinosaur tracks (Orme dei Dinosauri) on its western flank, thought to be over 220 million years old.
Access roads & location
Below you have an interactive map that will help you inspect the access roads to this part of the Dolomites. Depending on which side you come from, Pecol and Selva di Cadore should be your destinations. From there continue to Passo Staulanza.
The markers on the map show the following:
- The parking – marker 1.
- Rifugio Venezia – the marker 2.
- Ball Ledge area – the marker 3.
- Upper cirques area – the marker 4.
- The summit – marker 5.
Please zoom in to see more details.
Route description
There are three very different parts of the route:
- From Passo Staulanza to rifugio Venezia.
- Ball Ledge section.
- Upper route to the summit with two high-elevation cirques, and the summit ridge.
From Passo Staulanza to rifugio Venezia
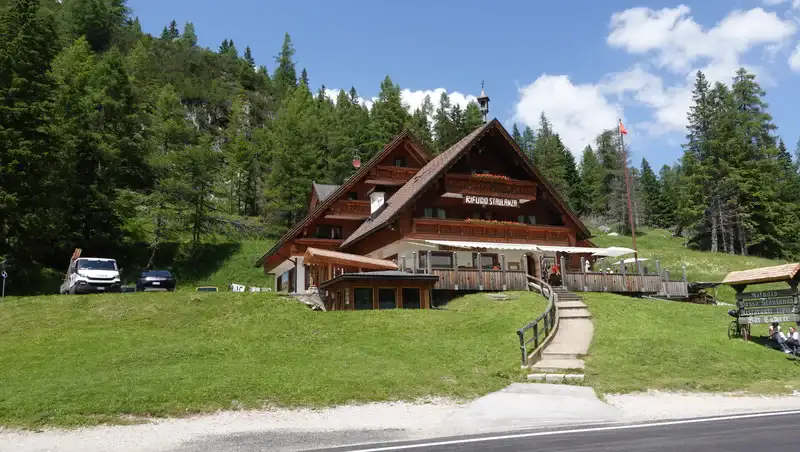
There is a free parking on the main road at the pass, opposite to the beautiful building of rifugio Staulanza which is in the picture.
Just to know, this is a place with very high top-level-hotel prices yet with simple bunk beds and dormitories like in any mountain hut. So think twice if you want to stay there. But here you can buy a map of the area if you do not have it.
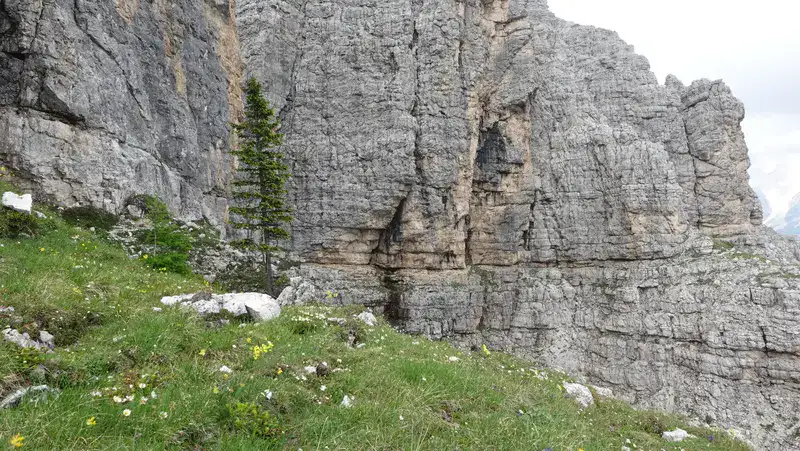
The path from there has many ascending and descending sections as it goes along the west slopes of Monte Pelmetto (2996 m). You are in a forest, so it should be pleasant if you are lucky to be there when it is dry.
But it can be very muddy, I do not remember any other place with such a sticky mud. In addition, you will have quite a few swampy passages due to water leaking through the ground from higher area on your left side.
Note that you start walking in the south-east direction, and you practically make an anti-clockwise half-circle loop around Monte Pelmo massif on its south side. You can follow the details of the route on the map above.
At some point in the forest you will have the path from camp Palafavera in the valley below joining your route, see the picture below. You can locate this place in the map above.
This is just to know that you can start from the valley directly, no need to go to Passo Staulanza. But elevation difference will be higher, bear this in mind.
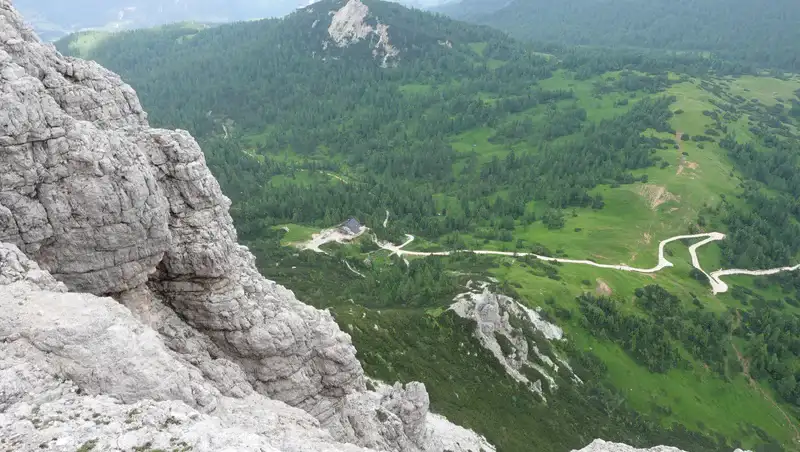
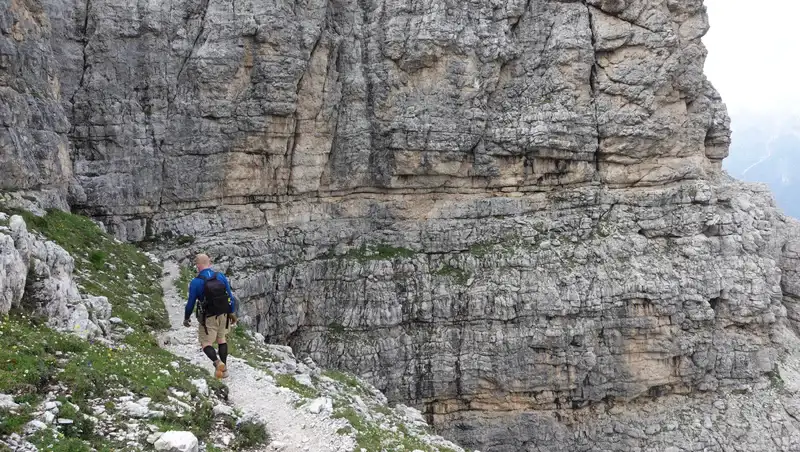
After a long walk, cliffs of Monte Pelmo will be on your left side and this will remain so all the way to rifugio Venezia. The picture below shows view back when you are already very close to rifugio.

Observe that when you are at rifugio Venezia, the parking will be exactly on the opposite side of the mountain. Plan around 2 and a half hours for this part alone.
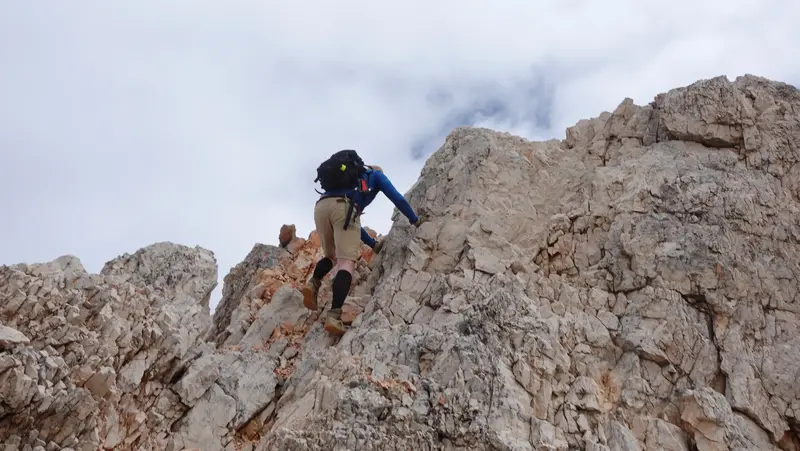
Ball Ledge: a risky passage on Monte Pelmo
This is the route used by John Ball in 1857 as the first man ever to climb the mountain. Ball Ledge (Cengia del Ball) is a crux and the most dangerous section on the route.
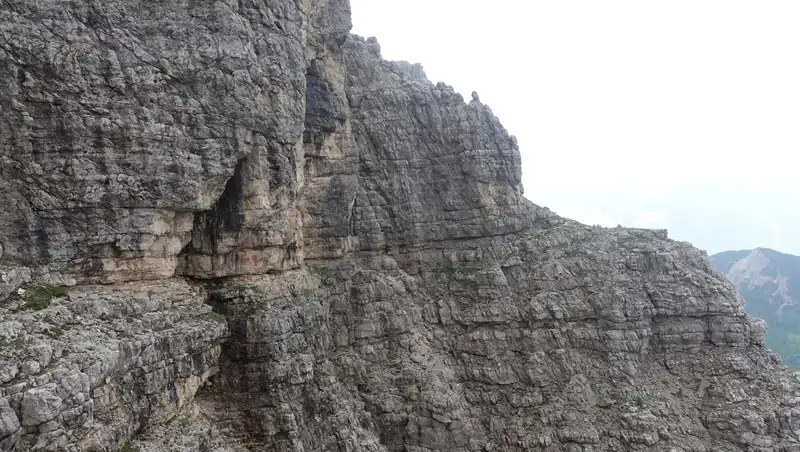
You get there by following a steep path from rifugio which is the part of Monte Pelmo round route with the number 480.
The picture above shows the area where you turn to the cliffs leading to Ball Ledge. There are exposed passages even here, but it is the Ledge which is a high-exposure section where climbers face serious risks.
Below is the beginning of the hard part, you access it from the plateau on the right side. In the middle of the picture you can see one scary passage where you will be hanging on the ropes.
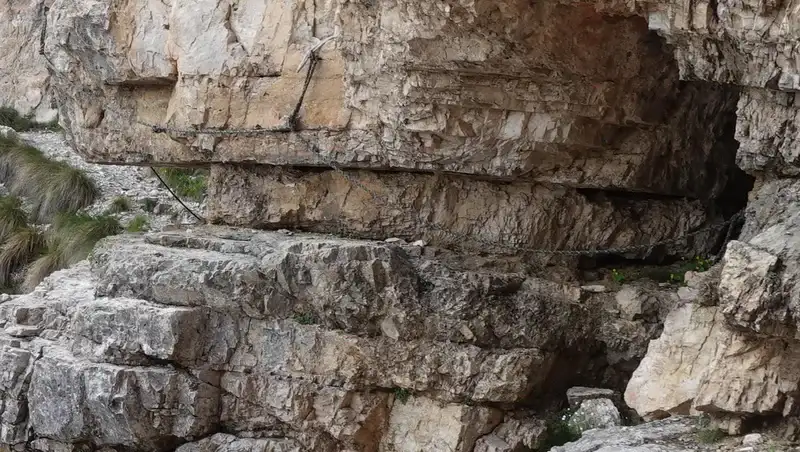
Unlike many other exposed mountain routes, Ball Ledge lacks fixed steel cables for secure clipping.
Instead, loose dynamic ropes (see the picture) of a dubious strength and quality are at several places along the ledge. They do not provide the complete security needed on such dangerous terrain.
The picture below shows yet another of the most difficult part of Ball Ledge. It goes horizontally in the middle of the picture. This is a view back, you enter the area on the right in the middle of the photo.

Dynamic ropes are normally designed to stretch under load, which absorbs force but can create extra movement on exposed sections.
This stretch can feel unstable and makes precise footwork essential. The worst thing to have in places like that is a stretchy rope.
Without steel cables or at least static ropes, climbers on Ball Ledge cannot fully anchor themselves, increasing the risk of slipping. In poor weather conditions, like rain or snow, this unprotected ledge becomes even more hazardous.
Given these conditions, I believe there is a real possibility of deadly accidents occurring on a couple of places on Ball Ledge. In my view, this is a disaster waiting to happen.
Climbers should approach it with extreme caution, as it offers limited security compared to standard via ferrata routes.
Two upper cirques and summit ridge
Once you are done with Ball Ledge where you were likely sweating because of fear, you will now be sweating due to the steep route in front of you.
There are several different parts here, but this is generally an area with two long cirques between the peaks Spalla Sud and Spalla Est.
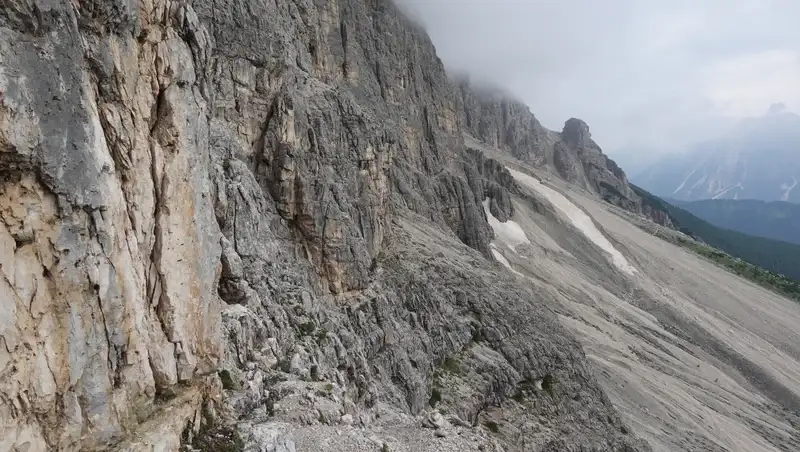
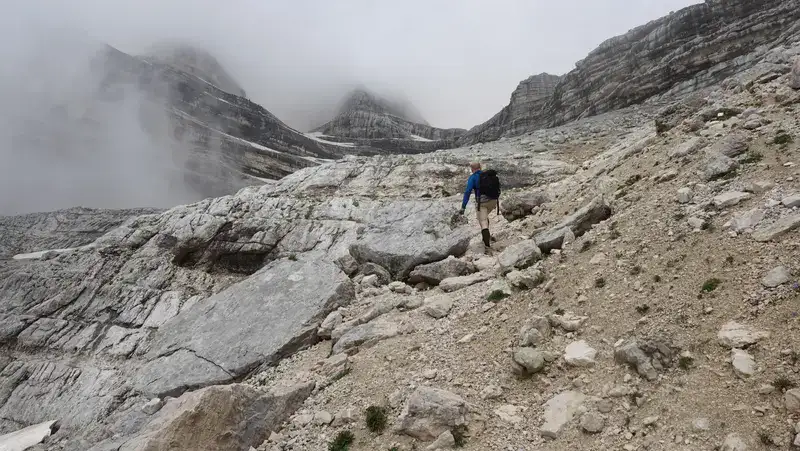
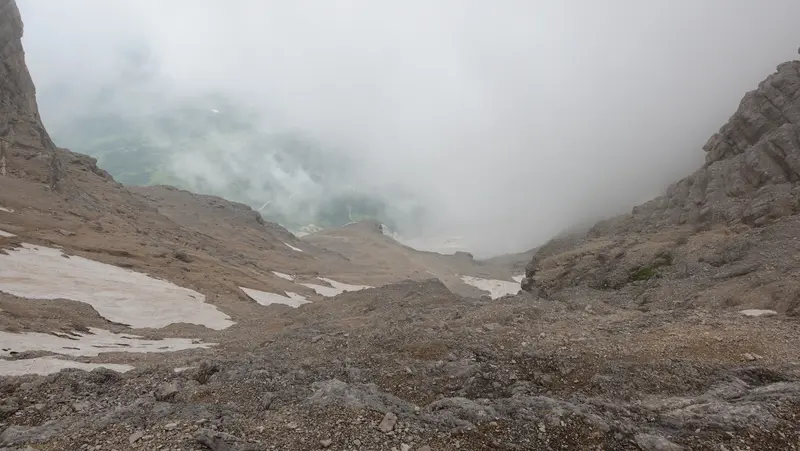
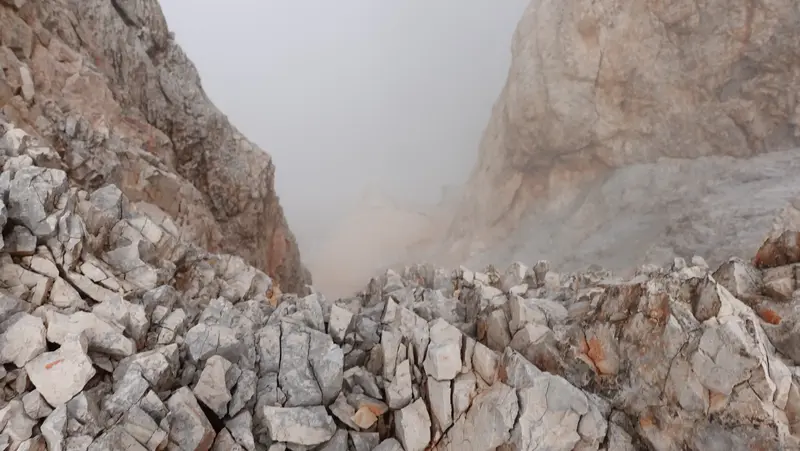
In the first part the route goes right up, it is steep and hard, with scree at some places and with ledges higher up. The photos below show how it looked, all in clouds and no views:
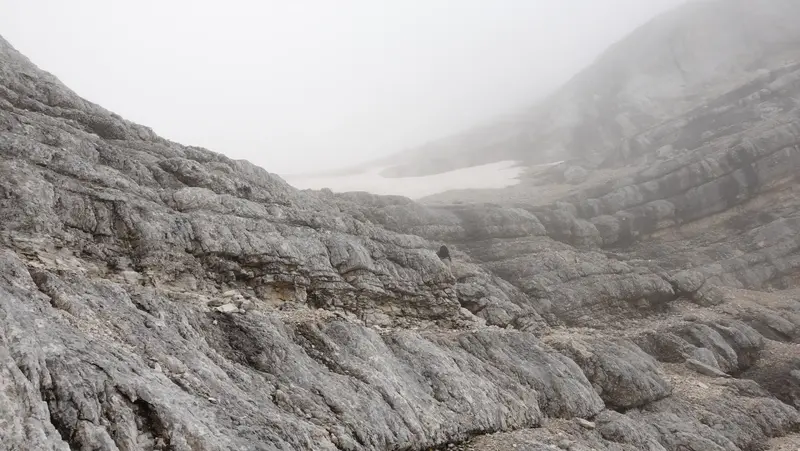
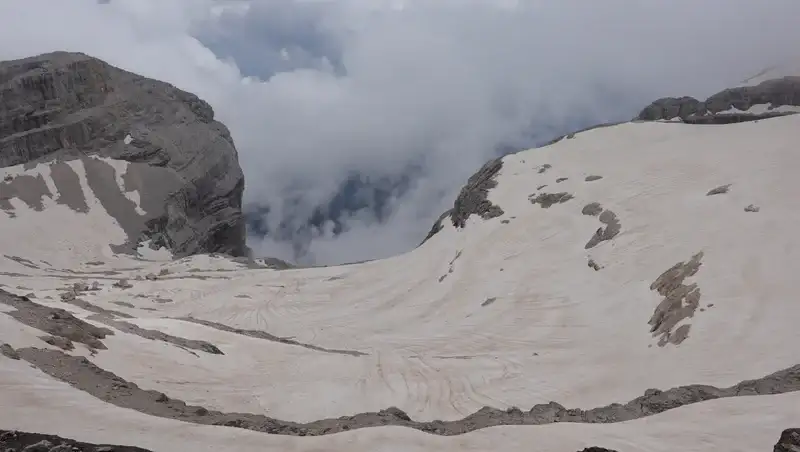
After that, you are in a wide and pleasant amphitheater, the upper cirque, where you can expect snow even late in summer. Below you can see a photo from that part in a rare moment with some views:
This upper cirque was full of ice some 160 years ago, there is a painting in a book which shows this very clearly.
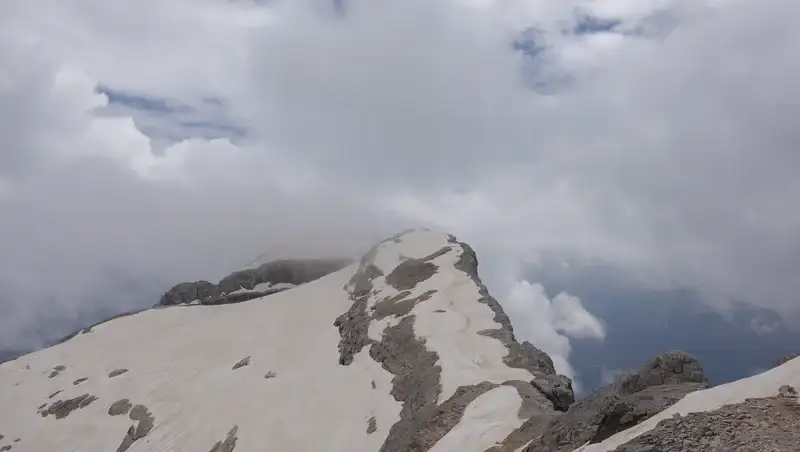
The final summit ridge is with quite a few exposed and scramble sections. Clouds around added to the thrill of the climb. Here are a few photos from the final part.
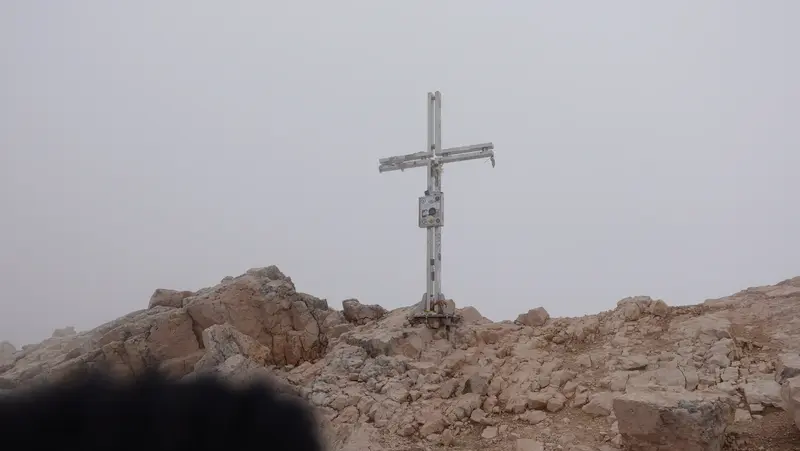
My only photo of the summit cross, and yes I know that a part of my equipment is by mistake visible in the picture, my bad.
Our climb
I climbed Monte Pelmo together with Jan Slavik (salute, my friend) from Check Republic. We met by chance at the Staulanza parking in the afternoon the day before the climb, and agreed to climb together. He knew the part of the route to rifugio Venezia from his previous hiking in the area.
We started a few minutes after 5 AM, I missed to record the exact time, and we walked through the forest for around two hours and twenty minutes before getting to Refugio. After a short rest we were on our way up.
What to say about Ball Ledge? It was quite airy, scarry, and exciting. It seems we were slow because, all of a sudden, there was an Italian couple behind us on the Ledge. We let them pass and this gave me an opportunity to record them on some tricky passages on the Ledge. You will see them in the video.
They were with light packs and with running shoes, no crampons, no ice axe, nothing. I must say, they looked to me totally ill-equipped for such a tour.
We also met a man descending, he was on the mountain very early because he stayed in the hut. He told us that he had to give up because of the snow.
This, together with unfavorable weather, was a reminder that we might not manage it. But he did not have crampons, so we were in a better situation.
The Italians were not impressed with the prospect of deep snow, and they kept going much faster than we did. Very soon we lost them in the clouds. Anyhow, those were the only people on the mountain that long day.
Much later, below the summit, we met the Italians descending. In spite of all that snow, they were fine in their running shoes and with obviously completely wet feet. They encouraged us to keep going as the summit was not far any longer.
The upper cirque was under the snow, and it was far from obvious where to go. But Jan had a digital map downloaded on his smartphone (the same I added in the post above), so we knew where to go. There were cairns also on ledges that were not covered by snow, and yes, we could occasionally see the trail of the two Italians.
At one moment we had a quick view through the clouds of the nearby Spalla Sud which is a shoulder peak that can probably be easily climbed if you have time. But the weather was not on our side, so the main peak was our main goal for the day.
There is yet another 3000-er in the group, Spalla Est with exactly the same height of 3026 m, but it was in the clouds all the time and I have never seen it.
The snow was from the previous winter, compacted, heavy, and wet, so we could walk with ease, and it did not look deep. However, there was a huge boulder in the area, and the snow was melted directly around it, so we could see it was up to two meters thick.
You have seen already how it was on the summit. But in one moment we were able to see the north face, hundreds of meters high and frightening.
We did not stay long, and we descended the same way back. The feeling of accomplishment was absolute, not surprising after climbing such a magnificent mountain.
There was a wider ledge with grass just before the Ball Ledge (the picture below), so this was the place where we took a longer rest and had our late lunch. This was around 3:30 PM, and we stayed there for half an hour or so.
After that we continued our descent, and the picture below shows the moments when Jan was getting back to the Ledge.
The stuff at the hut were curious about the route and snow conditions, so we explained them during our coffee break.
I expressed my concern about the fixed ropes, but I do not think they were taking it seriously. No doubt those will remain there as they are for a long time, I guess until somebody gets killed, God forbid. Anyway, it was getting late so we had to go.
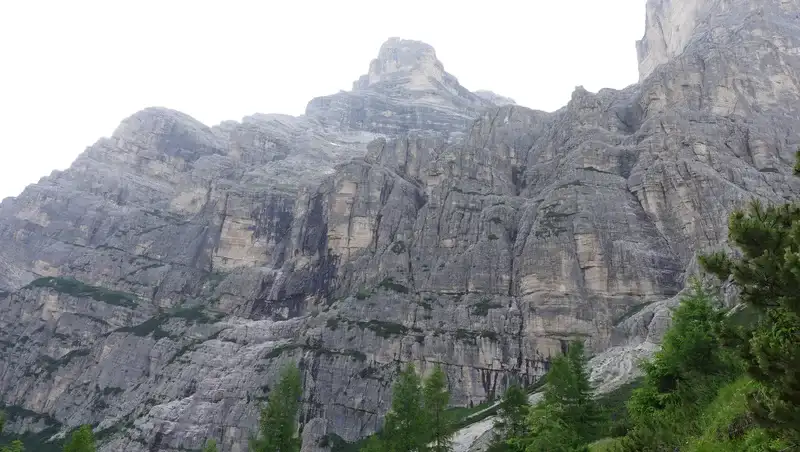
Later, we were walking through the forest from rifugio Venezia in the direction of passo Staulanza, and we were watching the mighty cliffs above, as the photo below shows. It was difficult to see where the route exactly was, and how we passed over those steep walls.
From the pass, we took the cars and drove into the valley and into the camping Palafavera to take a shower and to rest.
Please see more in my video below:
Equipment, supplies & accommodation
Equipment:
I used my Mammut Lithium 40 backpack. The boots were Scarpa Triolet, and they did a great job in that environment, the best mountaineering boots I have ever had. I used them because of my hybrid crampons that were fit for the boots’ design and vice versa.
I also had a mountaineering ice axe with me, and I used it a lot in the upper snow area in particular on the way back. A Petzl helmet was also with me, there are places on the Ledge with overhanging rock walls where you may need it to avoid bumping the rock with your head.
The rest included a pair of Komperdell trekking poles, and all the usual waterproof clothing layer which I luckily did not have to use.
But I did not bring waterproof gloves although I had them in the car. Instead, I had some simple synthetic ones, and they were completely wet several times during the day on steep snow passages where I used the axe. I would twist them to squeeze the water out, and then they would dry quickly on my hands.
The point is, whatever you touch on such a snow, it becomes instantly wet. Now, remember the Italians in their thin running shoes? Poor people! My feet were completely dry all the time, and without any pressure spot after more than 13 hours of walk.
Water & food:
The last place with water is rifugio Venezia. You can also have meals there. Good food shops are available in Pecol and in Selva di Cadore, I have been in both of them. There is a small shop also in Palafavera camping.
Rifugio Venezia contact details:
- Location: Campi di Rutorto.
- Municipality: VODO CADORE (BL).
- Section of membership: VENICE.
- Telephone: 0436 9684 (during the opening period and during the lunch and dinner service unable to answer).
- Cell. 320 0103872 Barbara.
- email: Rifugio.veneziapelmo@gmail.com
- https://www.rifugiovenezia.it/
Accommodation:
This is about Dolomites, so if you plan to stay longer, make sure you make a reservation in time. For short overnight stays, use the two huts mentioned in the text above.
But there are camps around where you can always find a place. I mentioned the Palafavera camp, and there is yet another much smaller in Pecol farther down the valley. Check the map below for more options:
Final thoughts
In conclusion, climbing Monte Pelmo is not for the unprepared or faint-hearted. The ascent requires endurance, technical skill, and proper gear, especially given the challenging sections like Ball Ledge.
The loose dynamic ropes on the ledge lack the security of fixed cables, adding a layer of danger that can feel unsettling even to experienced climbers. This challenge, coupled with snowy terrain in the upper cirques, demands a serious approach to safety and route planning.
Refugio Venezia provides an option for a shorter summit day, but climbers should still prepare for a long, strenuous tour.
Reaching the summit is a rewarding yet daunting experience, especially under adverse weather conditions that can obscure views and complicate navigation.
For those who do make the journey, Monte Pelmo’s rugged landscapes offer a sense of accomplishment and breathtaking alpine scenery, when visible.
However, the route’s difficult passages and exposure call for both skill and respect for the mountain’s dangers. Monte Pelmo is truly a climb where preparation, caution, and careful judgment are essential for a safe return.
Thank you for reading and let me know if you have questions, there is a comment box below. For more texts about mountains in this area please check under the category Italian Alps. Read my text about hiking to the nearby Lago Coldai, this is an area that offers excellent views of Monte Pelmo.
Please join us at our Facebook group Dolomites Visitors Hub. Subscribe to my weakly newsletter and stay informed, the subscription form is given below.
Leave a Reply