As you realize from the title, there are many names used for the Cima delle Nove which is its Italian name version. I climbed it solo recently, and here you have my report about this spectacular peak.
One of the normal routes to Cima delle Nove (Neuner Spitze, Sas dles Nü, Sasso delle Nove) starts from a car parking above Spescia (1549 m, 5082 ft) in Alta Badia La Valle (Wengen) area. From there you go to the Sant Antonio pass (Ju de Sant Antone, 2466 m, 8091 ft), and then to the summit.
The other normal route comes from the Lavarella and Fanes huts, and it joins the previous route at the mentioned pass.
Most of the time this is just a physically demanding walk-up route, but there is also a very exposed ferrata ridge section where ferrata equipment is necessary and highly recommended.
Cima delle Nove (Neuner Spitze) – numbers & details
- Coordinates, latitude & longitude: 46°37′54.59″ N; 11°58′58.35″ E.
- Elevation: 2968 m (9738 ft).
- Normal route difficulty: ferrata & walk-up.
- Height difference to climb from the car parking: 1419 m (4655 ft).
- Useful map: Tabacco 07 – Alta Badia – Arabba – Marmolada, 1:25000.
Access roads & location
Here you have an interactive zoomable map which I prepared for you. The normal route which I followed is roughly marked. Please zoom in and out to see more.
Note that there are several small parking places above the hamlet of Spescia, where you can leave your vehicle for free. When you start walking, you will have at least one place to fill your bottles with water.
The other possible car parking place and start point is at the Rifugio Pederü, which implies an access from a separate valley. From there you have to walk in the direction of the Lavarella and Fanes huts that are in the Fanes plateau area, and then towards the Sant Antonio pass.
There is yet another possibility to get to the mentioned huts from the road above Cortina, it is described in detail in my separate text. If you explore the zoomable map above you can clearly see all these options.
This peak is in the Fanes National Park area, so it should not be mixed with the Cima Delle Nove which is also in the Dolomites but in the Sesto area.
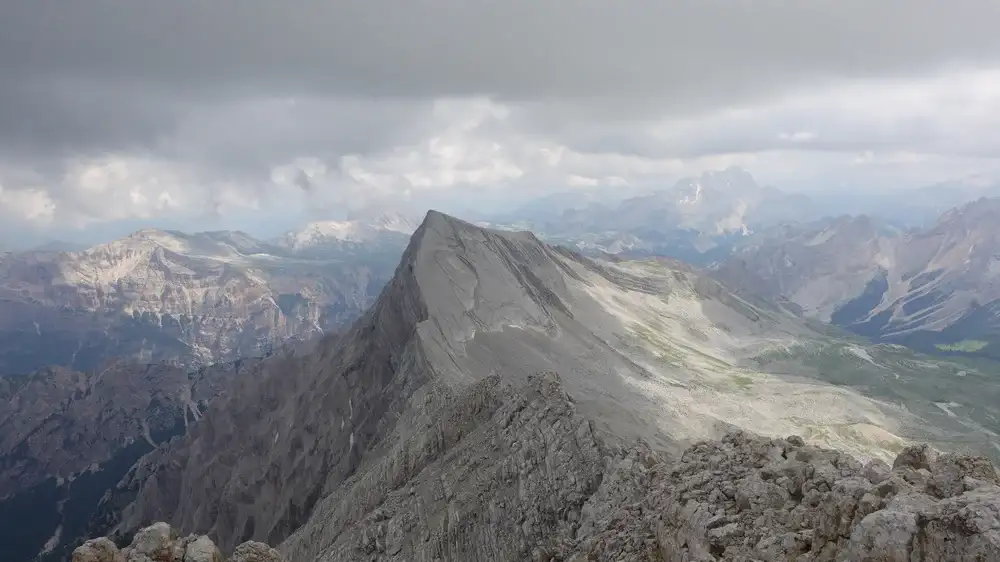
The peak is very unique with its incredible and spectacular smooth southern slabs, see the picture below.
When you watch it from the Fanes plateau, it looks like a glass and it reflects the light in a sunny day. It is lower than the nearby Sasso delle Dieci, but it is far more attractive.
Its slabs are so challenging that in the 60s no lesser persons than R. Messner and his brother were opening some new climbing routes on them. Without the fixed cables that are now present on the critical ridge above the slabs, the summit would not at all be accessible to ordinary mountaineers.
My climb
I made this an overnight tour, and this means I was carrying my sleeping equipment. This was partly on purpose to test some equipment, and partly due to the weather forecast, but the mountain can be climb in one day as well.
However, note that you have around 1400 meters (4593 ft) of elevation difference, plus the ferrata part where you are slow, so this would be a long day tour.
So after parking the car above Spescia, I followed the narrow road for a while and then entered the pleasant valley with a forest, and continued in the direction of the Passo di Sant Antonio.
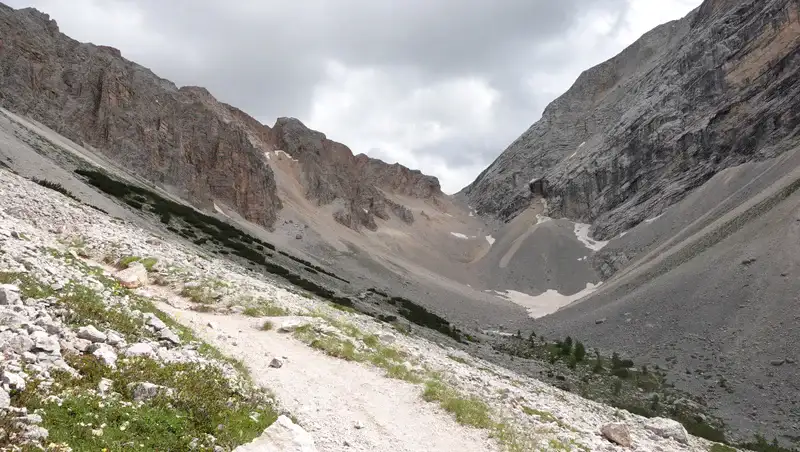
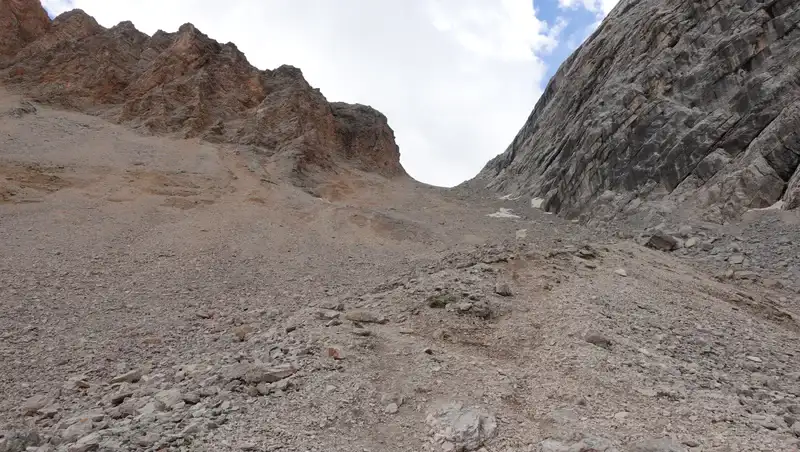
The picture below shows the view towards the pass, and as you realize, it looks so inviting. But you will sweat a lot in the final part below the pass.
My initial plan was to set the tent up in the area above the tree-line, and when I was there it was indeed easy to find a suitable place.
But there was a German woman descending the mountain, and I asked her if there was a good place to pitch the tent at the pass. She told me there was a tiny chapel with two walls and roof, where I could put the tent.
So I kept carrying my equipment up the steep slope with lots of loose rock. The picture below shows the area just below the pass. This was a late afternoon and there was nobody around.
It took me two hours and thirty minutes from the parking to the pass, and I was pleasantly surprised with my speed in view of the heavy backpack with all the stuff in it.
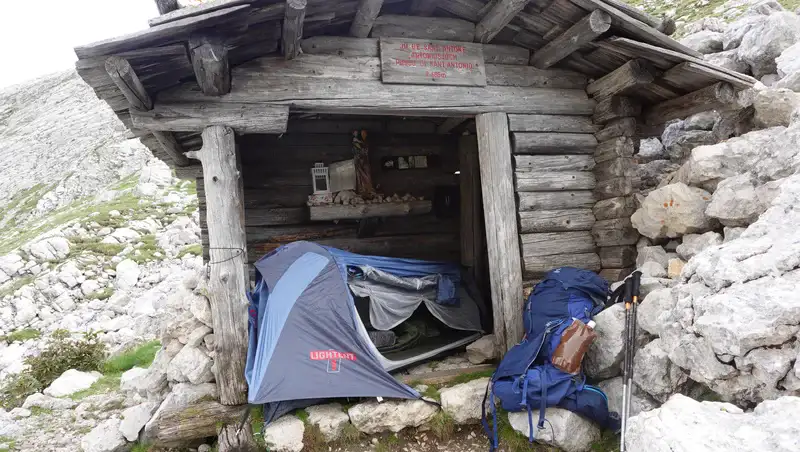
The chapel is a tiny space, and I hardly managed to place my tent there, it was positioned more or less diagonally. Below you can see how it looked.
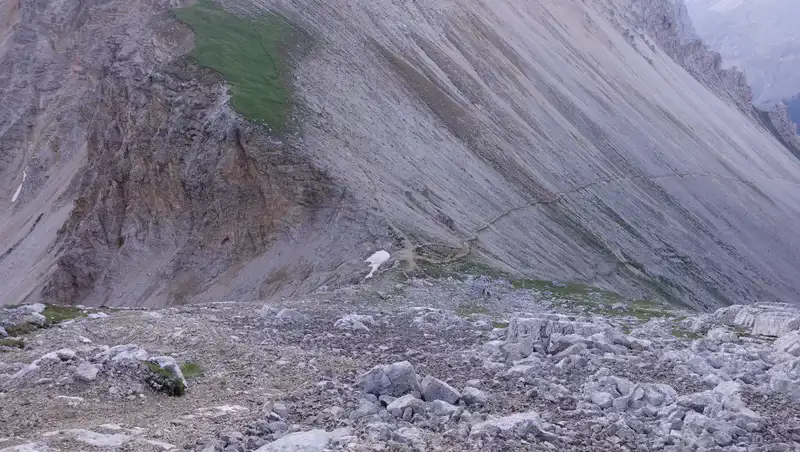
Note that the previously mentioned route from the Lavarella hut and Fanes hut comes to the same place. The picture below shows the view in that direction. It looks a bit easier than the route on the opposite side of the pass which I followed.

Very soon clouds came, so the atmosphere was very strange, complete silence, no views, and you could feel the vapor in the air. The elevation is high at the pass, 2466 meters (8091 ft), and it was a bit cold during the night.
In the morning, I packed my heavy stuff and stashed it all at some place close to the chapel, and continued to the summit at around 5:40 AM. Below is a view back towards the pass, the Fanes side is on the right.
After this steep part, there is a far more pleasant and mild section. But at the ridge that followed after that, I realized that I made a big mistake by not bringing my ferrata equipment.
I was again in the clouds and this made the atmosphere even more scarry. The ferrata is in a perfect state, but trust me, you do not want to be here without a harness and a Y-rope.
The cables are sometimes at one side of the ridge and sometimes on the other side. Either way, without a proper equipment, you will not feel safe here.
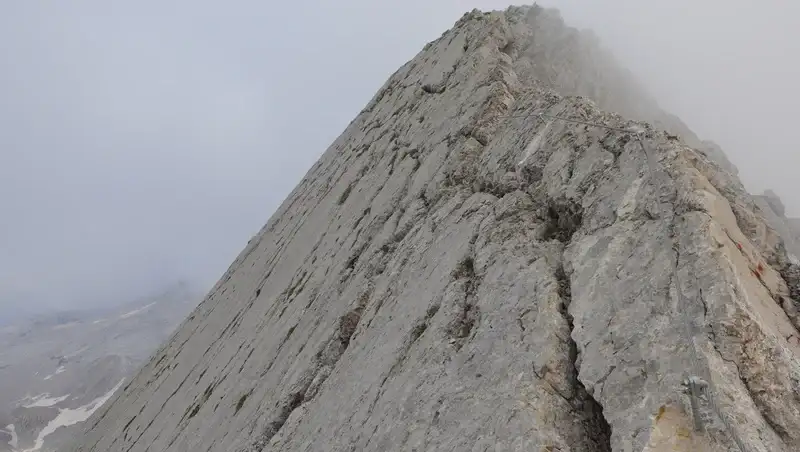
But after that scarry part, you can relax on the part that follows, and this remains so all the way to the summit. Here is how that area looks:

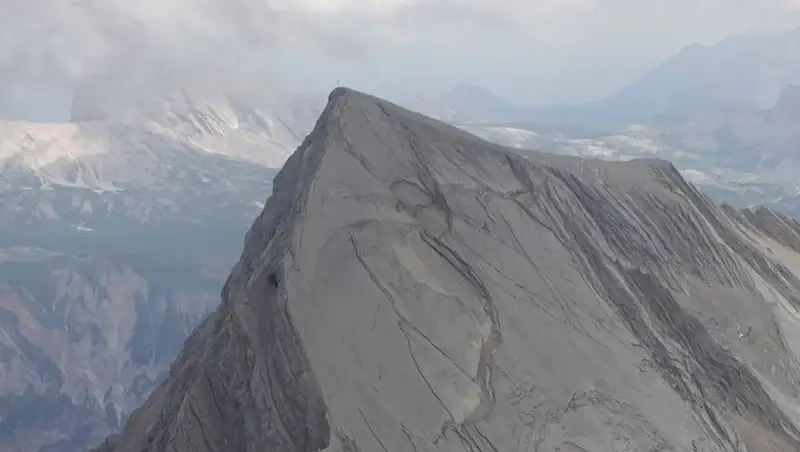
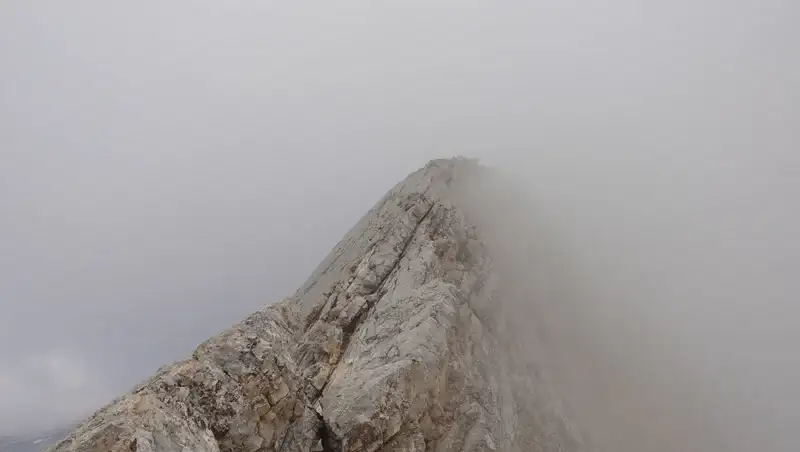
Very soon you will have the summit cross in sight. This is how it looked when I was close to it. It took me around 80 minutes from the Passo di Sant Antonio:
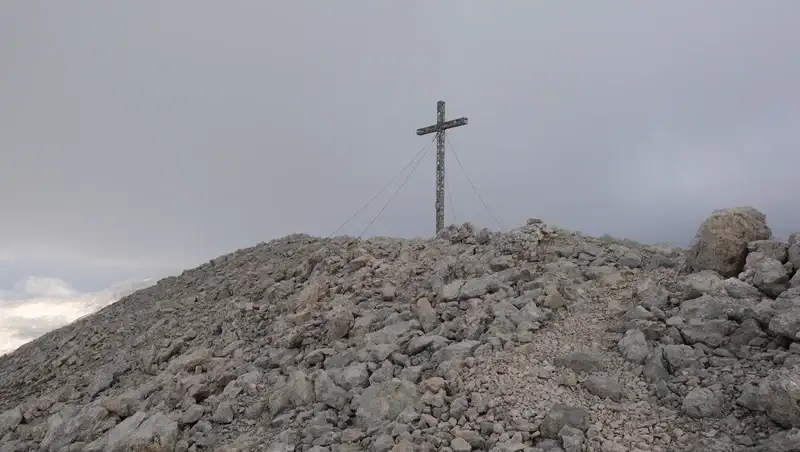
There was nobody around, and I did not stay on the summit for a long time. The weather did not look great, and it was a bit windy.
On my way back, I met one person in the area below the ferrata. The man was probably even older than me, and those are quite rare in the mountains nowadays.
At the Pass, I had my breakfast, packed the stuff, and descended the same way back.
In my video below you can see more about this tour, please have a look:
My rating of the ferrata
Below you have my rating for the ferrata based on three essential criteria, assuming that you walk all the way from the car parking:
| Rating Criteria | Rating (A-E; 1-5) |
|---|---|
| Technical difficulty | B |
| Ferrata length | 3 |
| Access route difficulty | E |
| Overall Score | B3E |
The rating is based on the following facts. The length of the cables is likely over 100 meters, no reliable information is available. To get to the cables from the car parking you need more than three hours, and this includes walking a very steep and hard scree slope.
Equipment, supplies & accommodation
As you have realized from the text above, I managed without ferrata equipment. Namely, after watching some videos on YouTube, I wrongly assumed it was not necessary.
But this was a mistake, I do not think I would do the same tour again without equipment. The ferrata is not particularly long, but there are many very exposed passages. One mistake and you are no longer, so make sure you are properly equipped if you go there.
I had my Ferrino Lightent solo tent, you have seen it in one of the pictures above.
For the purpose of testing, I was using my new Sea to Summit Camp Plus sleeping pad, which I bought just before going to the mountains. This is a thick pad, and I did not feel the rock on the ground which you can see in the picture:
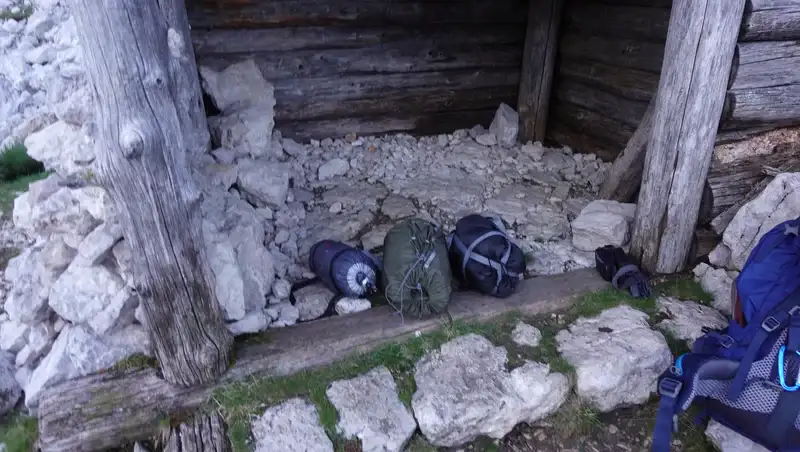
I was also using the Crua Graphene sleeping bag, it is on the right in the picture above which shows the tent, the pad, and the bag. This all I was carrying in my Deuter Futura 50+10 backpack.
The boots I used were my Mammut Sapuen which I can strongly recommend to anybody. I also always use a pair of trekking poles, on this occasion I had a pair of Komperdell poles.
Note that there is no water at the higher elevation there, so make sure you carry enough of it. For food, do not miss the supermarket in the village La Villa (Stern) which is on the main road in the Alta Badia valley.
Accommodation: Dolomites are a popular area, but there are many options to rent an apartment or you can choose any of the camping spots around.
Final thoughts
In summary, in my view, Cima delle Nove (Neuner Spitze) is the most attractive peak in the Fanes National Park area. I have climbed almost all of them, and I am pretty sure about that.
If you plan to climb it, make sure you have the ferrata equipment with you, and enjoy this beautiful mountain. It can be done as a day tour, and with a small backpack you could be on the summit within four hours from the car parking.
My guess is that it may also be of interest for people that are on the Alta Via 1 route; the previously mentioned two huts are an important area on that route. But this also means that you should not count on accommodation in these huts, they are always fully booked many months in advance.
For more texts related to the same area, please see in this list, in particular my text about the Bivacco Buffa di Perrero. I have been there a number of times, and there will be many more texts added. So bookmark this site and come again.
Please join us at our Facebook group Dolomites Visitors Hub. Let me know if you have questions or comments, there is a comment box below. Subscribe to my weakly newsletter and stay informed, the subscription form is given below.
Leave a Reply