In my first attempt, I could not find Bivak za Akom, but I tried again and it was a success, so here is my first-hand report about the shelter and the tour.
The Bivak III za Akom is an old shelter for true alpinists who climb nearby rocks of Široka peč, Dovški križ, Veliki Oltar, Velika Ponca and other steep walls. It was built in 1946, and it offers up to 8 places for sleeping.
Although there are signs for it in the lower part of the route, it may be difficult to find it. This is on purpose, the bivouac is not really a tourist spot. Plan at least two hours to get there from the valley.
Bivak III za Akom coordinates, numbers & details
- Elevation: 1340 m (4396 ft).
- Coordinates: 46.459131°N / 13.837009°E.
- Route difficulty: walk-up with a few fixed cables.
- Places to sleep: 8.
- Equipment: wood burning stove, mattresses, blankets, pillows.
- Elevation difference from the valley: 640 m (2100 ft).
- Time needed to the bivouac: 2 hours.
Access and map
The interactive and zoomable map below will show you all access roads from the broader area. Your destination should be a small village Gozd Martuljek which is along the valley in the east direction from of Kranjska Gora. This is the marker 1 in the map below. The remaining markers are described later in the text.
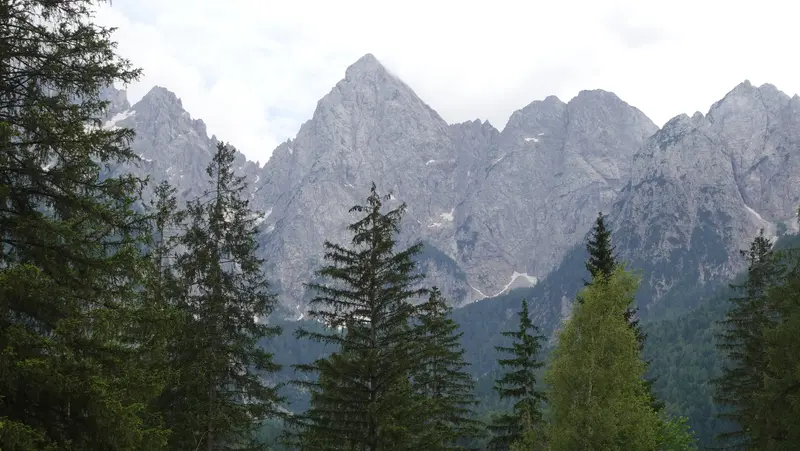
The village cannot be missed, you will see the incredibly sharp peak of Spik (Špik) above it, see how it looks:
This all area is the best part of all Julian Alps, and, in my view one, of the most beautiful parts of the Alps in general.
But OK, I admit that I may be biased, this area used to be a part of my unlucky disintegrated motherland, and this is where I climbed my first higher mountains some 40 years ago.
About parking
One important thing to bear in mind, and which I dislike a lot; there is no free parking around. In fact there is hardly any parking in the village.
On the other hand, this is a national park, and you are not allowed to park and leave the car overnight anywhere within the park even if there are obvious free parkings by the road.
I stayed at the camp Spik, the picture below, and I know that they have a few places to park before you enter. So if you ask, they might allow you to leave the car there even for free.
This was so with me initially when I arrived and decided to go to another bivouac in the same area and to sleep there for one night. Later, I came back and registered in the camp for the rest of my stay in the country.

Route description
If you are in the camp mentioned above, just cross the bridge and start walking in the direction of the forest that raises above the village on its south side.
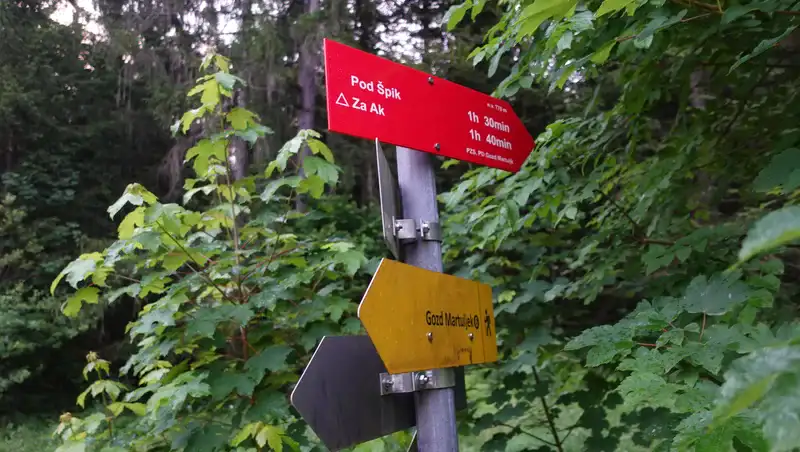
Very soon you will see plenty of signs for various directions. The one shown below directs you to the Bivak III za Akom. Note that there are several bivouacs of that type around, you will find them all in my separate text about huts and bivouacs in Julian Alps, with a location map for all of them.
You start gaining elevation immediately, but this is a pleasant walk through the forest. There are several fork points on the route, so be careful not to miss your direction.
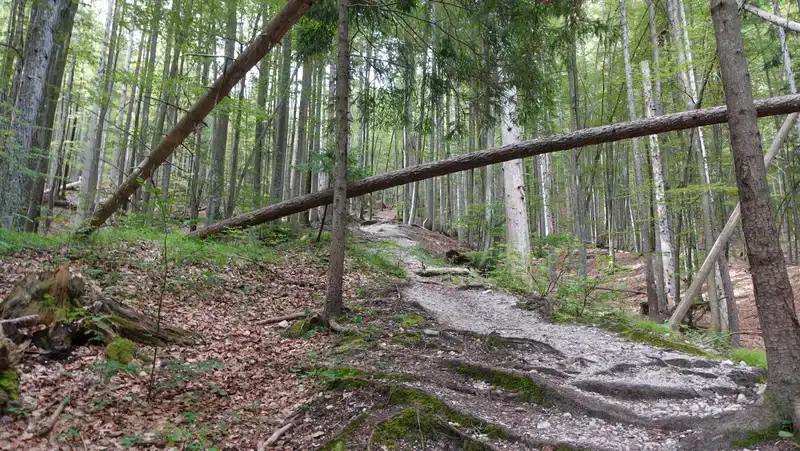
Below is one point with a view back towards the village, and you get an overview of the forest which you just passed:
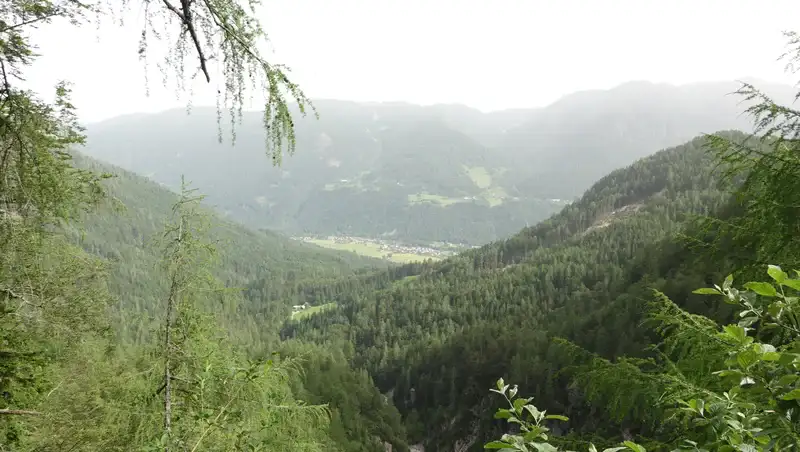
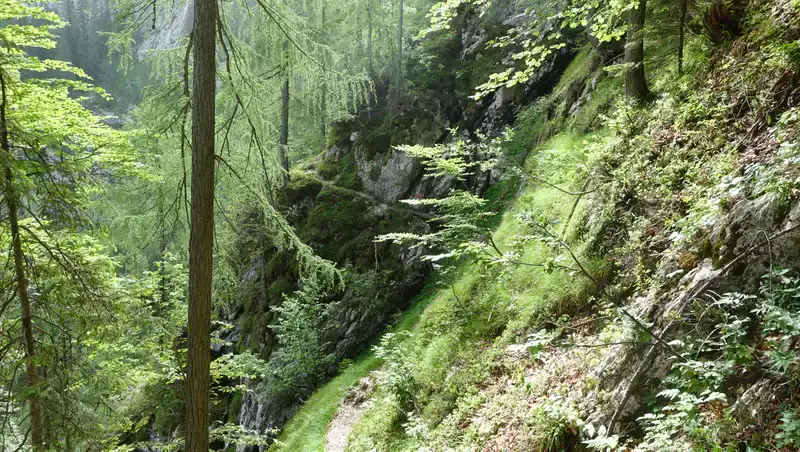
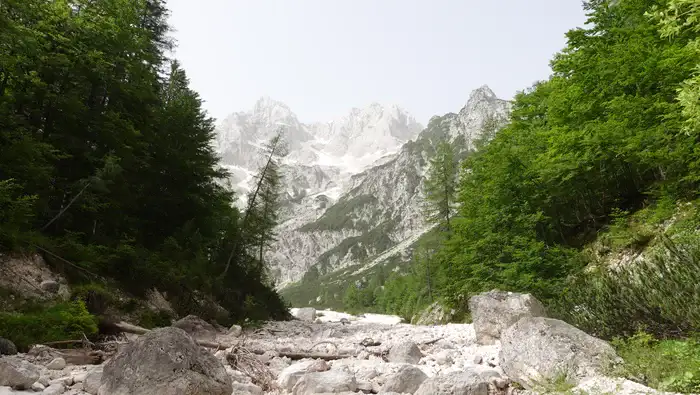
The higher you go, the steeper the path, so be ready for sweating and struggle here. But see how beautiful this area is, and you will hear a noisy water stream most of the time, it will be below you on the left:
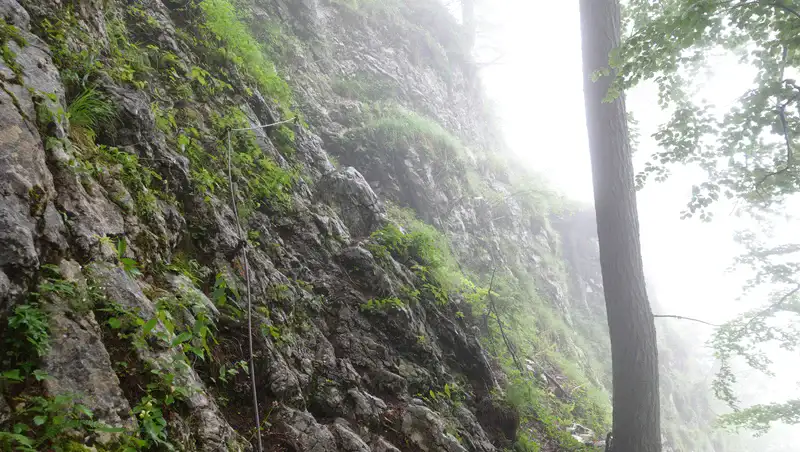
There are quite a few passages with fixed cables. One is shown in the picture, and this is from my second tour so it was quite slippery as you may realize from the picture. But, in principle, you do not need ferrata equipment.
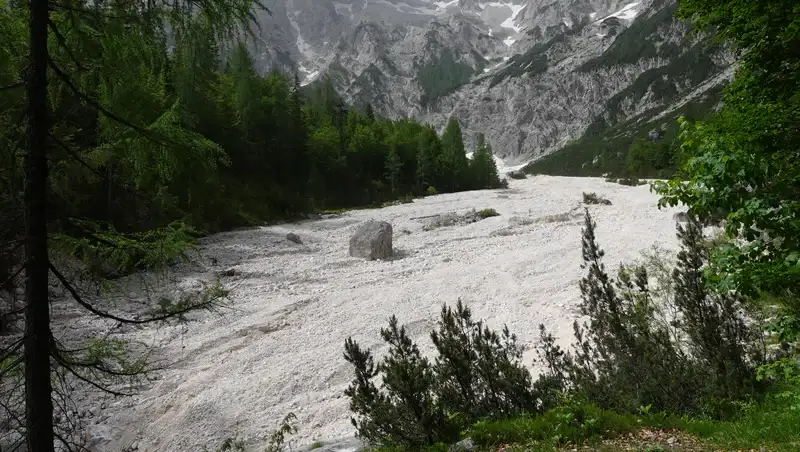
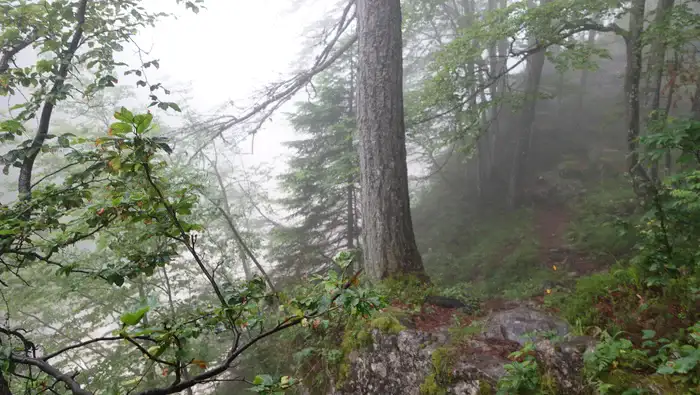
Here is one important photo as you will realize from the text below, a huge empty and dry wash, a water channel which is probably very different in early spring. Just to mention, when you are here, the bivouac is to the right behind you, around 200 meters in the forest. But it is not visible at all.
Hidden bivouac: two ways to find it
If you are one of those who use modern electronic tools, you may not need this part. But if you are an old horse like the author of this text, then keep reading, you will need this.
Even when you are just 150 meters away from the bivouac, it may be very difficult to locate it as it is hidden in the forest and there are no signs for direction.
In my first attempt, I made a mistake and crossed the empty water channel that you see in the picture above. I walked up for another 40 minutes, and searched in various directions in the forest above, yet finally I had to give up.
But later in the camp, I watched carefully somebody’s YT video. This time I already knew the area well, and from the video I realized that I could find it. So…
Do not cross this dry water channel! The bivouac is not on the opposite side.
One way: If you are on the dry channel, keep walking along it up, in the direction shown in the picture below.
Then, after some 50 meters or so, you will have one cairn on the right (the marker 3 in the map), and next to it you might see a tiny path, so follow it to the bivouac. You will locate the path in the zoomable map above.
The bivouac will be some two hundred meters or so above, on the top of a small hill in the forest.
Another way – a secret shortcut: Yet another way is the following. When you get to the point where you can see the mentioned dry water channel through the woods without getting too close (the picture below) you will be able to make a shortcut.
This is the point 2 in the map, I show a part of it here below. You can walk directly from the point 2 to point 4 perpendicular to the isolines that are visible in the map.
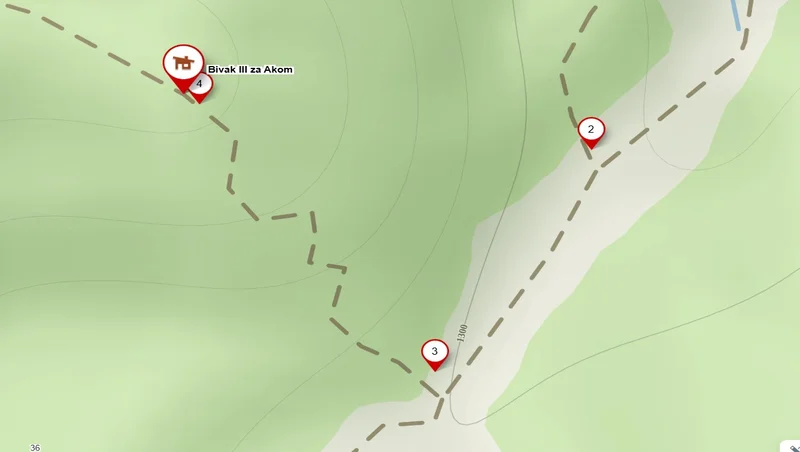
The picture below shows your direction, there is no real path here, but you might see that this is the direction where people occasionally go.
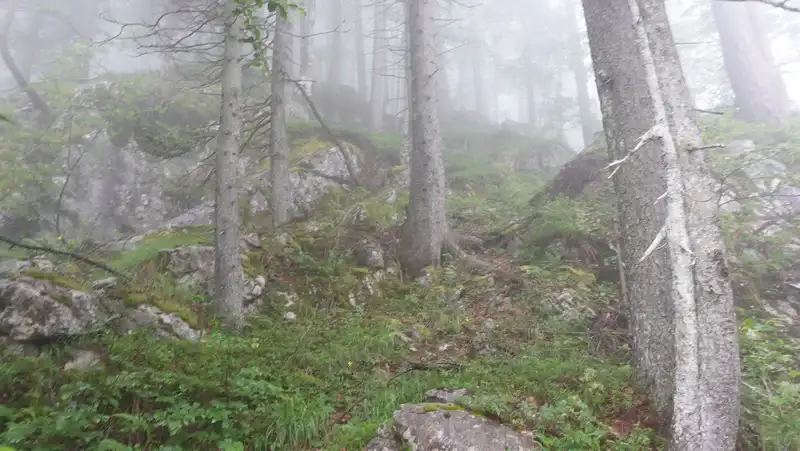
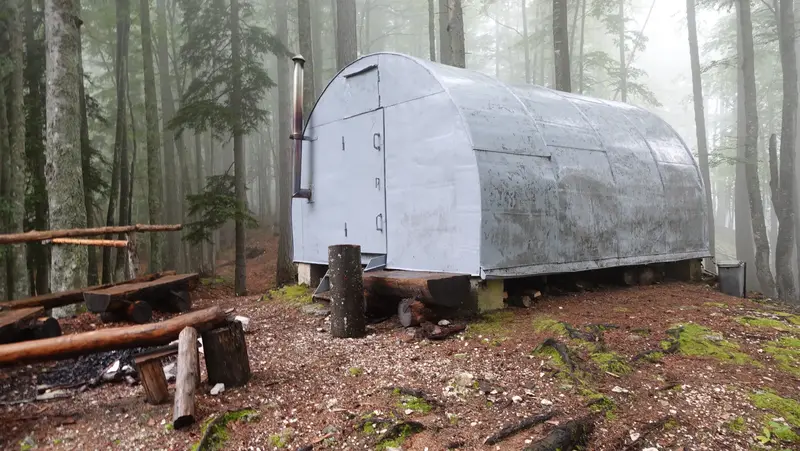
Very soon you will see the bivouac above you, the picture below. It was raining and misty during my second attempt, so make sure you do not get lost if you have the same weather conditions.
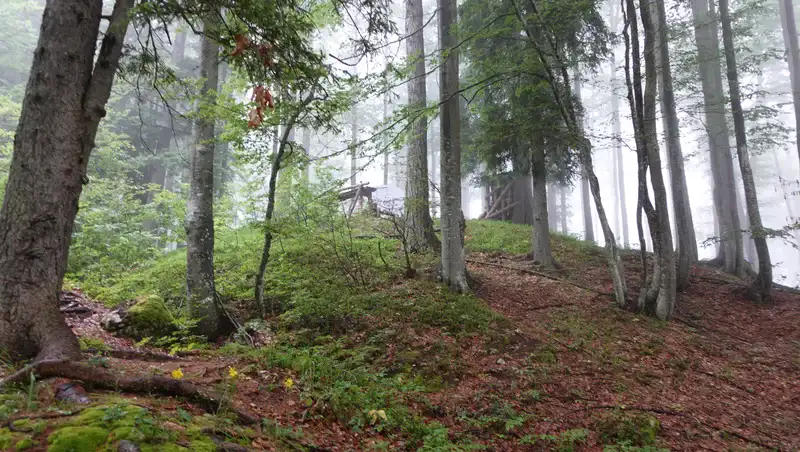
This was my approach route, and later I descended the other way described above, by the path to the marker 3 in the map which shows the position of a tiny cairn next to the empty rocky channel.
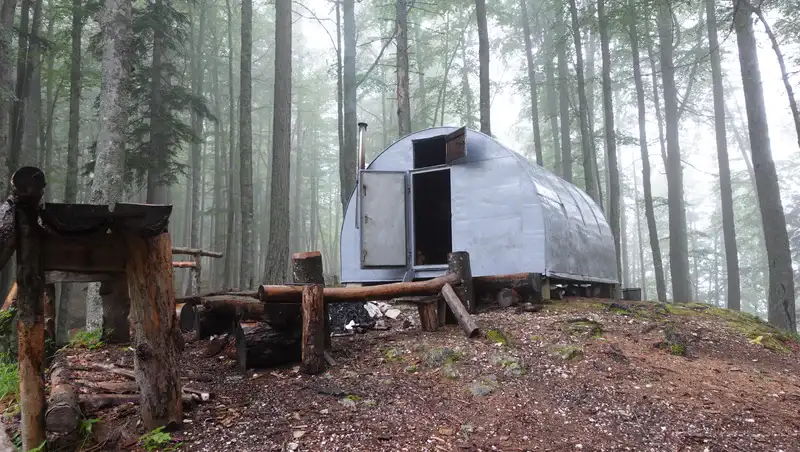
In the bivouac
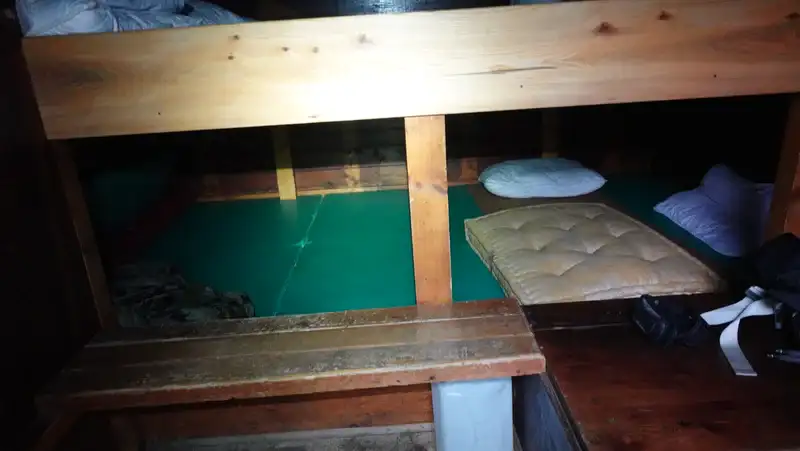
As I mentioned above, the bivouac is very old and you will feel this when you get inside. But it is still quite cozy and pleasant. The inner is all wood as you see from the picture.
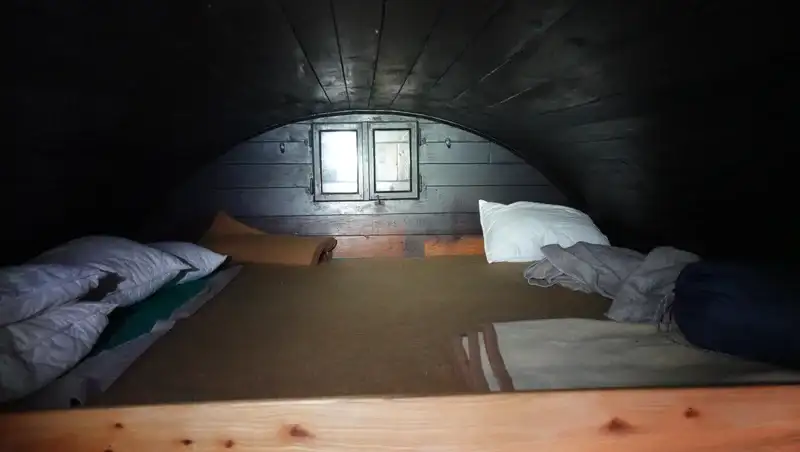
There are two platforms for sleeping, the upper is shown above, and here below is the lower one. The space is enough for 8 people, with mattresses, several blankets, and pillows.
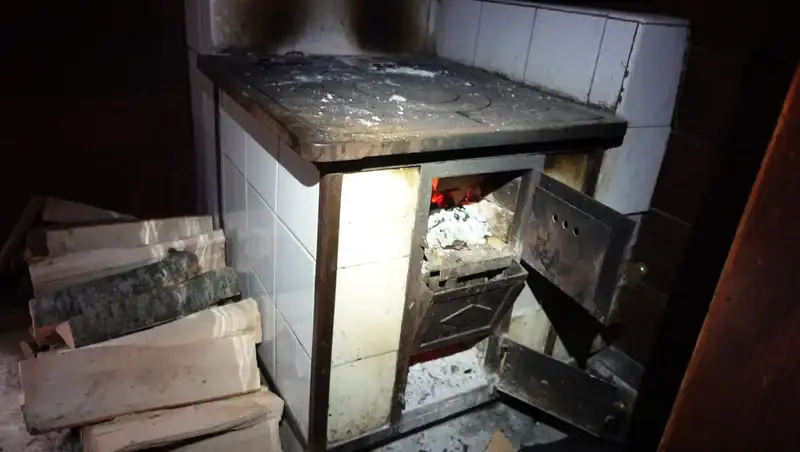
The wood burning stove works perfect, plenty of ready and dry wood was available outside:
My two hikes
During my first hike the weather was perfect, sunny and pleasantly warm. But I did not manage to locate the shelter. From the camp in the valley I could see the area, and I could not resist and decided to go again.
This time the weather was far from perfect, it was raining but I did not mind. I had all equipment needed for a rain tour, and the area was not exposed and dangerous regarding lighting.
So I started around 5:30 in the morning, and knowing the route from my first attempt, I walked fast. Then at the critical area I managed to find the passage to the shelter, and I was truly happy when I noticed it above me. I was there at around 8 AM.
There was nobody around, so I stayed there for at least two hours as I did not have any other plans for the day. So I used the wood and made fire, and simply enjoyed the quiet atmosphere. The mist made it perfect.
Later, I had my breakfast there, and made me coffee as well. After a nap on the sleeping area behind, refreshed and happy, I descended the same way back. This was a beautiful day in a complete solitude.
Please see more in my video, it combines rough recordings from both hikes:
Equipment
The bivouac is at a low elevation, and this is a technically simple tour so you do need much stuff. I used my Osprey Stratos 24 day pack, and Mammut Sapuen GTX boots. I also had a pair of Komperdell trekking poles.
The rest is up to you. But you should always have a rain protection layer or at least a rain poncho. Having sun protection is not compulsory, you are in the woods all the time.
If you plan to sleep there, it is best to have your own sleeping bag and a sleeping pad as well.
For food and other supplies, Kranjska Gora is the nearest town, and what a beautiful town it is!
Final thoughts
In summary, the Bivak III za Akom is a true hidden gem in the Julian Alps, offering a quiet retreat for experienced hikers and climbers. The journey to reach it requires some navigation and determination, but the reward is a peaceful mountain shelter surrounded by stunning alpine scenery.
Whether you plan to visit for a short break or an overnight stay, proper preparation is essential, especially given the shelter’s remote location and minimal signage. This is not a typical tourist destination but rather a place for those who appreciate solitude and the rugged beauty of the mountains.
If you decide to make the trip, be mindful of the route details and access restrictions, especially regarding parking.
The bivouac itself is simple but functional, providing warmth and basic comfort for those who seek shelter. My experience of finding the Bivak III za Akom was both challenging and rewarding, proving once again that the best places in the mountains are often the hardest to reach.
Thank you for reading and let me know if you have questions, there is a comment box below. For more texts about mountains in this area please check under the category Slovenian Alps, in particular about the nearby Bivak pod Spikom and also about Bivak pod Luknjo.
Subscribe to my weakly newsletter and stay informed, the subscription form is given below.
Leave a Reply