The route from Santa Cruz to Pico del Ingles is attractive because you start from the main city, no need for a car or bus.
The reason for describing the route here is because of questions I had from readers. You can see some in the comments about Anaga mountains. Those who come to Tenerife for hiking want to start as soon as possible, so this is one way of doing so. I have passed the route many times in all its variants and in both directions, so it is time to put it ‘on paper’.
Start point and the beginning of the route
You start from the sea, literally, and from the capital city Santa Cruz, and in no time you will be in a completely rural surrounding, nothing similar to what you would expect from such a highly touristic island.
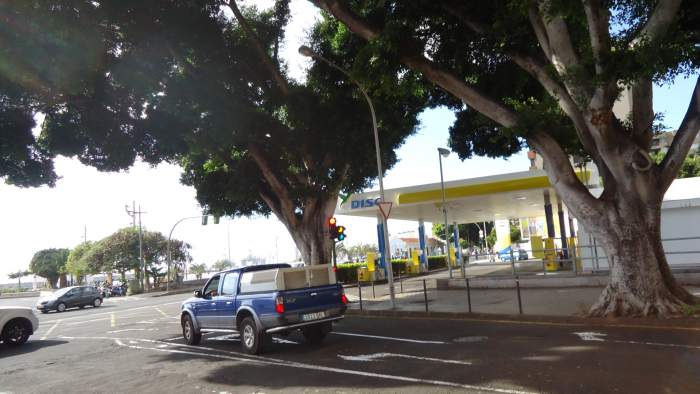
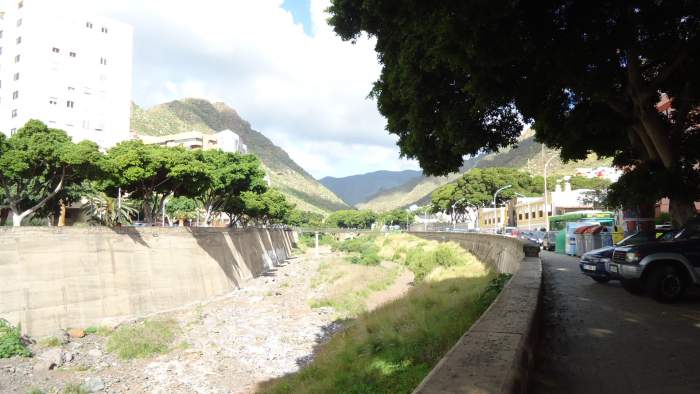
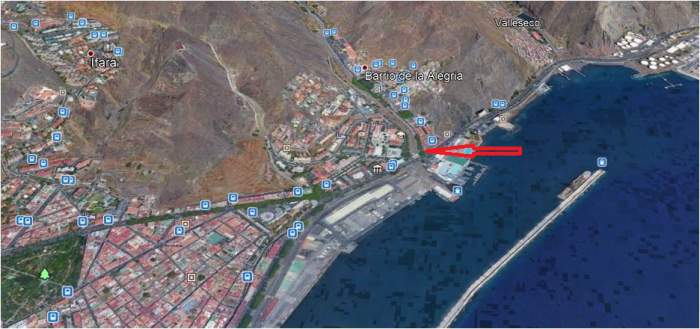
So walk along the main walking avenue parallel to the sea (Avenida Francisco la Roche), the port will be on your right side. Close to the end of the walking area, on the left, there is a petrol station, this is your start point, see the red arrow in the picture below. This is convenient also if you come by car, it is easy to find parking around, free of charge of course. From here, walk along the river bed which is usually empty and follow the Avenida Jose Marti shown in the picture above.
Note, this is the city area, so naturally, there are no hiking signs here, so just follow the river bed on its right side (as seen from the sea), i.e. its east side.
This is the entrance point to Valle Tahodio, so just follow the street and walk for some 2 kilometers or so. At some point, the road makes a sharp turn in front of a few houses that are above the road, see the pictures:
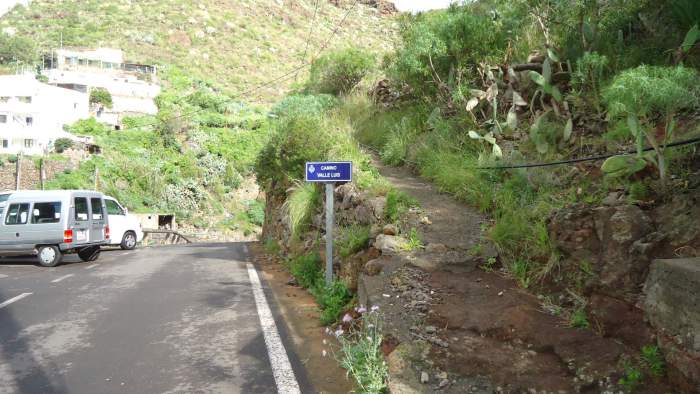
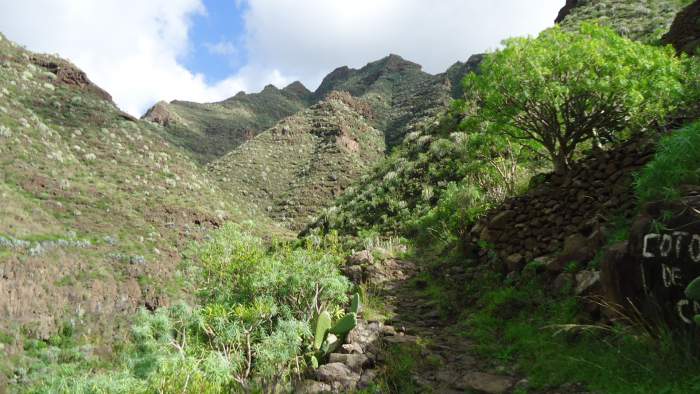
At this same spot, you will have to decide about two possible variants.
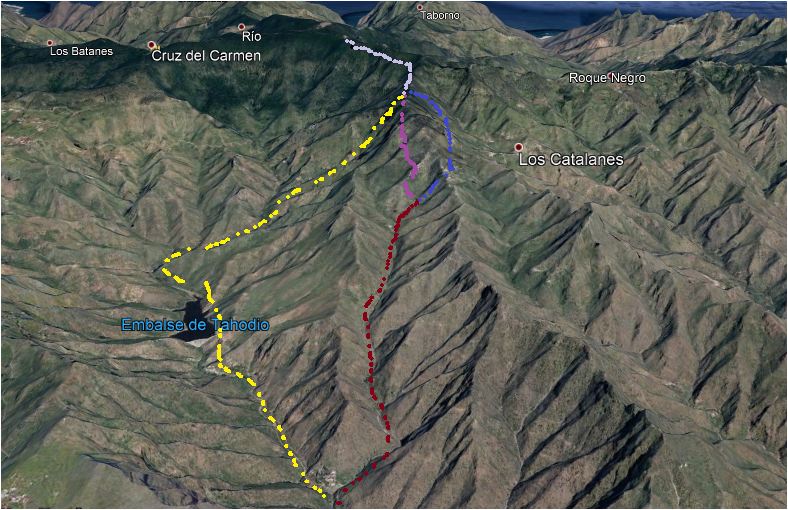
- One variant is to take a tiny walking path which is on your right side, see the picture above, and which will take you to the Valle Luis, the red dots on the map below. This is one variant which has two sub-variants. More below.
- Yet another option is to continue until the end of the road (the Lake route from now on, the yellow dots on the map), and from there take the path which leads along the right side of the lake.
Note, for tourists and hikers, these are ‘routes’, but there are people living there in those deep valleys, some in cave houses; and for them, these are the only access paths. I wish to stress that after passing all that was available in those areas, I have never seen any garbage around, so please keep the routes clean and don’t leave anything around.
Valle Luis route
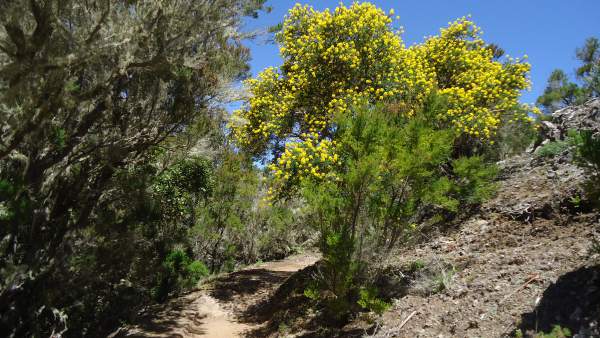
In this case, you will continue walking for almost 2 kilometers. The valley is deep and attractive, you will be alone, there are no houses around, this is just a narrow path but clearly visible all the time.
At some point, you will see a couple of houses at the end of the valley, and far above them a few more on the top of the hill. So when you reach these first houses in the valley, you have two options mentioned above.
- In one sub-variant, (L1 from now on) you continue to the right by following a path which you will see zig-zagging all the way towards the houses on the top. This is marked by the blue dots on the map.
- The other option (L2) is to climb more to the left, towards a couple of houses that are visible high above you. The path is obvious, it goes along a ridge, no problem to follow. This is marked by the pink dots, see the map above.
L1 sub-variant
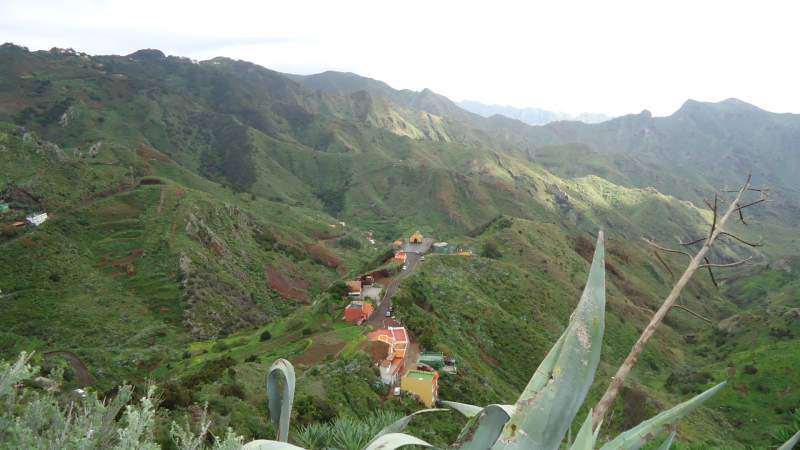
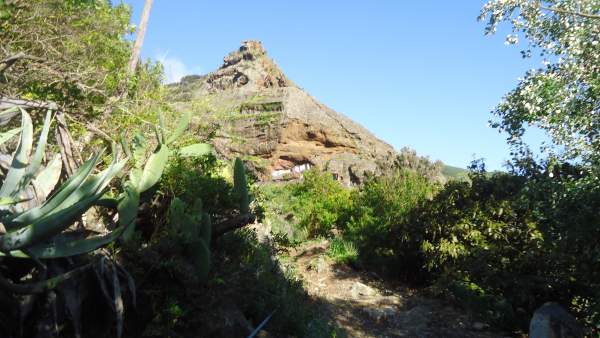
So you rich the top of the hill, there are a few houses around (the blue dots on the map). Then continue to the left, and the path will start descending a bit. On the right below you, there will be Los Catalanes houses visible, with a beautiful church in the center of the tiny village (see the picture below). On the left, you will have a hill with eucalyptus trees on the top.
Very soon, the path will start climbing again to the point on the ridge of the hill which, and there it will meet the route L2, and also the Lake route.
L2 sub-variant
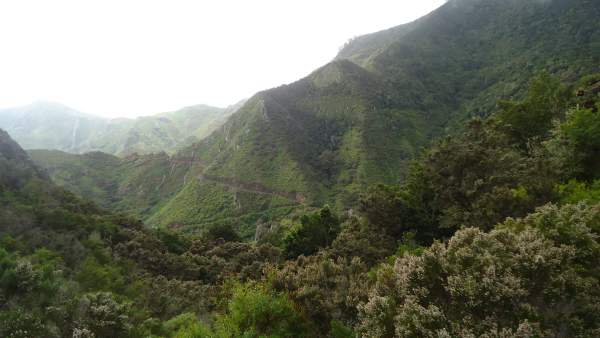
In this variant, you are going clockwise (the pink dots), around the same eucalyptus woods hill mentioned above. Far below on the left, you will have Valle Tahodio and the lake. This route joins the L1 route as mentioned above.
From this meeting point, you follow the wide path through the woods towards Pico del Ingles. You will be there in 20 minutes or so. This is marked by the gray dots on the map.
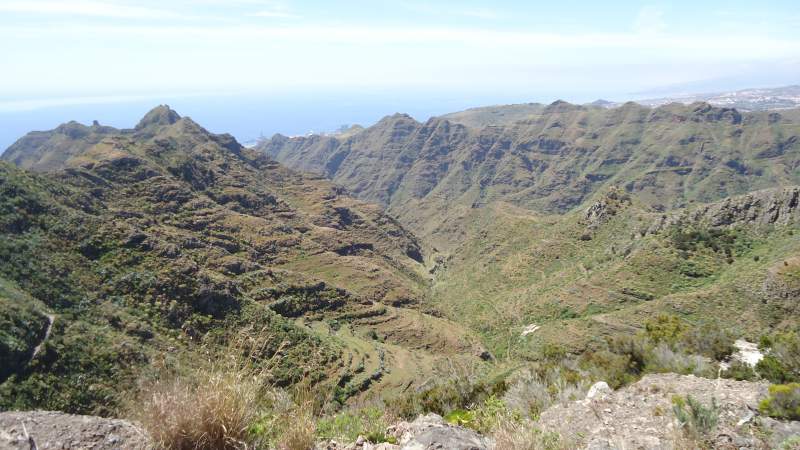
Here a few more photos from the L2 variant, pink dots in the map:

Lake route
You cannot miss it because you will see the dam in front of you. So climb to the dam and just continue along the right side of the lake towards the North. This route also has some variants but I have roughly depicted the route which will join the other routes described above, see the yellow dots on the map.
From the dam, you walk for more than one kilometer by following the water flow, it was there when I was passing the route for the first time, but later in another period, all water was gone.
Anyhow, it was beautiful, the sound of water all the time around, some small waterfalls along the route. This is Barranco Tahodio, just to know.
I missed adding that this was my long, all-day tour and it was raining heavily all the time. Nothing was dry on me at the end (and I had everything waterproof, in theory). I love rain (yes, I know the sentence from that movie, “nobody is perfect”), so I did it on purpose. It wasn’t cold and I did not care. The only problem was that my camera became wet and many photos were useless.
Back to the route story; at some point, the path starts climbing up through the dense forest in the north-east direction. So just continue, you will not have any views, the path can be muddy, but this is rainforest already so what else to expect. When you reach the top of the hill, your route will join the other routes described above.


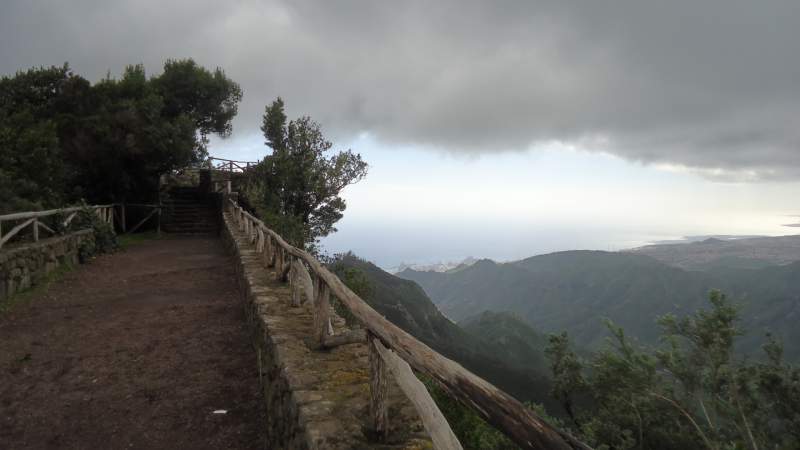
From Pico del Ingles
Here you have any of the described options to go back to Santa Cruz. You will be there in 2 – 2.5 hours, dependent on your stamina.
Yet another option is to hit the road towards Cruz del Carmen. There, you can get a bus to La Laguna, or continue walking all the way to La Laguna. Then take the tram back to Santa Cruz.
This is not all. The described routes are the part of the south-north (or the north-south) route described in my another text. So yes, you can continue all the way to the north coast and Punta del Hidalgo, and then take a bus to La Laguna.
Equipment
Here is a short summary:
Recommended
- Good hiking boots/shoes.
- A day pack.
- Sunglasses.
- Sun protection hat.
- Trekking poles.
Essential
- NA
As for the water, there are water flows around, dependent on the season, and you will be crossing them many times, but you should better carry your water with you unless you have a reliable water filter.
Timing & elevation
This will depend on your physical conditions but plan around 3 hours from Santa Cruz to Pico del Ingles. You start from the sea level and the Pico is at around 995 meters above the sea, so the route is demanding.
Thank you for reading. Please share your thoughts in the comment box below if you have walked this route or if you have questions. I have an open invitation for guest authors, so your own text about this or any other route will be welcome. Have a nice day.
Laura says
Many thanks for this, I really want to try it when I go next week. Do you have the route saved as a Google maps or Wikiloc file at all?
Jovo says
Hi Laura, there are several sub-variants so I did not include an interactive map in this post. But one of the sub-variants is a part of a longer route across the island, you can see it in this post.
I have an invitation for guest authors, so why would you not add something to the site? People will find it useful, share anything. In any case, let me know if you need more info about any route in the Anaga area, I have passed them all multiple times.