• Home
  • ABOUT
  • HOW TO START
  • ALPS
    • Austrian Alps
    • German Alps
    • Italian Alps
    • Slovenian Alps
    • Swiss Alps
    • Huts and Shelters
    • Roads and Passes
  • TENERIFE TOURS
  • ABOUT EQUIPMENT
  • FAQs
  • WRITE FOR US

Mountains For Everybody

Site about mountaineering, climbing and equipment, for those who love mountains

  • Outdoor Sleeping
    • Tents
      • Solo tents
      • Tents for 2 People
      • Tents for 3 People
      • Tents for 4 People
      • Tents in general
    • Tarps and Shelters
    • Sleeping Bags
    • Sleeping Pads
  • Backpacks
    • Day Packs
    • Mid-Size Packs
    • Large Packs
    • Kids & Youth
    • Packs FAQs
  • Clothing
    • Men’s
    • Women’s
  • Footwear
    • Men’s
    • Women’s
    • Insulated
  • Gear
    • Camp stuff
    • Lamps
    • Poles
    • Filters
  • Newsletter subscribe

What Is the Easiest 3000er in the Dolomites?

Last Modified: 01/13/2025

Getting to a summit that is 3000 meters high is never easy, but there are factors that make some peaks in the Dolomites easier than others. Piz Boè is one of them.

According to Unesco, there are 18 peaks in the Dolomites that are above 3000 meters of elevation. But this probably depends on how a peak is defined related to its prominence. In my separate post you have an interactive map with 24 of them.

In any case, I would say that Piz Boè is the easiest of all, and my reasons for saying this are the following:

  1. High car access.
  2. The normal route is a non-technical walk up.
  3. Easy orientation.
  4. Presence of lift.
  5. There are several huts around. 
This is Piz Boe seen from the area close to the lift station.

High car access

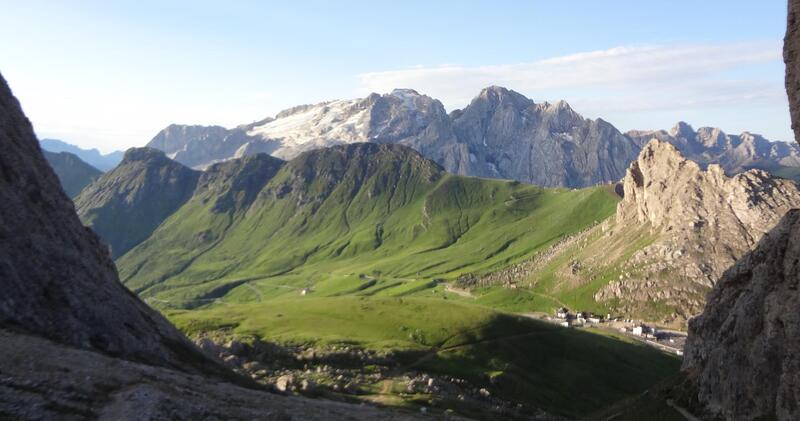
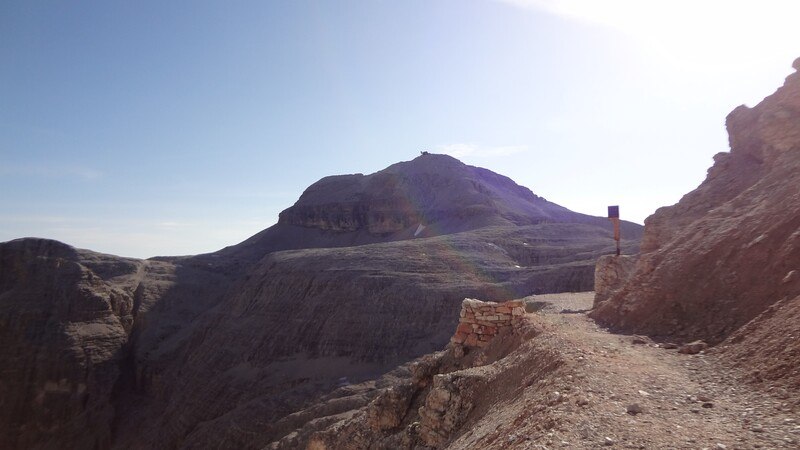
Piz Boè 3152 m (10341 ft) is highest peak of the huge Sella Group (Gruppo del Sella). This area is surrounded by several high passes with good roads and car access.

The most convenient climbing route and the highest car access point is from the Pordoi Pass 2239 m (7346 ft) shown in the picture below. So this gives 913 meters (2995 ft) of elevation difference to climb. This is still a lot but completely doable as a day tour for anybody in normal physical conditions.

Pass Pordoi as seen from my walk up.

Observe that this is about high elevation and there is no doubt you will feel it. The oxygen level at such altitudes is several percent lower compared to the valleys around.

More precisely, at 3000 meters it is around 14%, as compared to around 21% at the sea level. At the pass where you start it is 16%. You can see how the oxygen percentage in the air changes with elevation in this file.

So listen to your body, and if you feel effects of altitude, do not continue. Trust me on this. I have been over 4000 meters without elevation sickness, yet I have experienced it numerous times at 2000 meters.

There is no rule for it, you can never know. The only way is to get acclimatized, but this takes time, and tourists in the Italian Alps do not have it enough.

Non-technical normal route

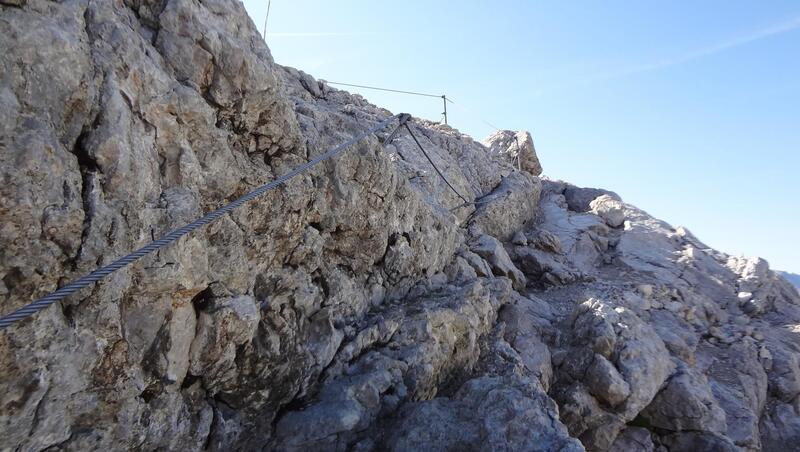
I climbed Piz Boe from the mentioned Pordoi Pass, and I can confirm here from my own first-hand experience that the route is of the walk-up type. There are no exposed sections anywhere.

Below the summit there are several passages with fixed cables, see the picture, but they are there just for some extra protection, and you do not need any ferrata equipment.

A few sections with cables below the summit.

So all you need for this mountain is a pair of comfortable hiking boots and desire and stamina to walk. More details you can see in my text about the climb.

Easy orientation

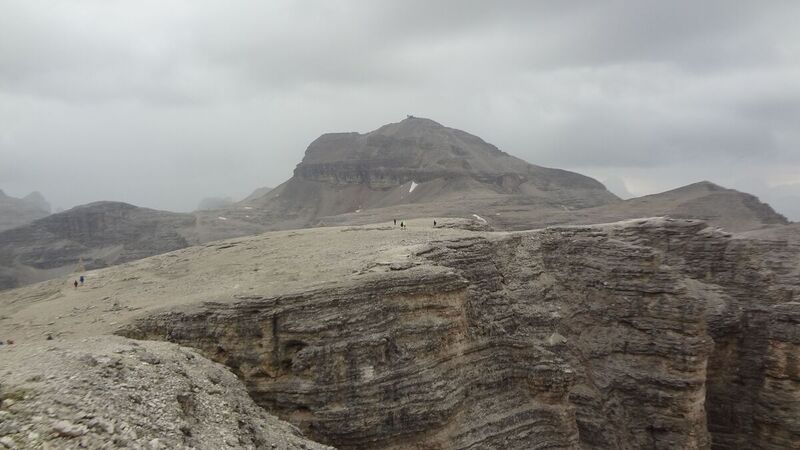
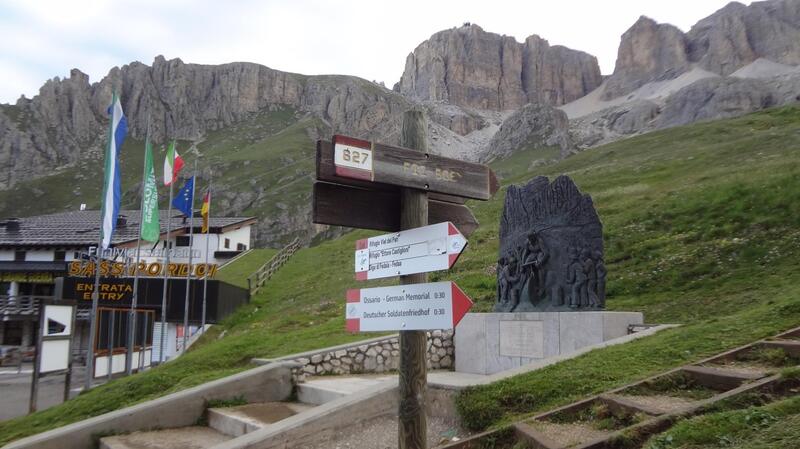
When you start from the Pass, you will have signs showing the direction, see the picture below. Your direction will be the passage in the rocks that you see on the top, it is on the right above the direction table.

Signs at the start of the route at Pordoi Pass.

So just follow the route to the Forcella Pordoi hut (2848 m, 9344 ft). It is almost impossible to miss it. Here is how it looks when you get up through the mentioned narrow passage through the rock wall before you get to the large plateau above:

Forcella Pordoi hut is half-way up the route.

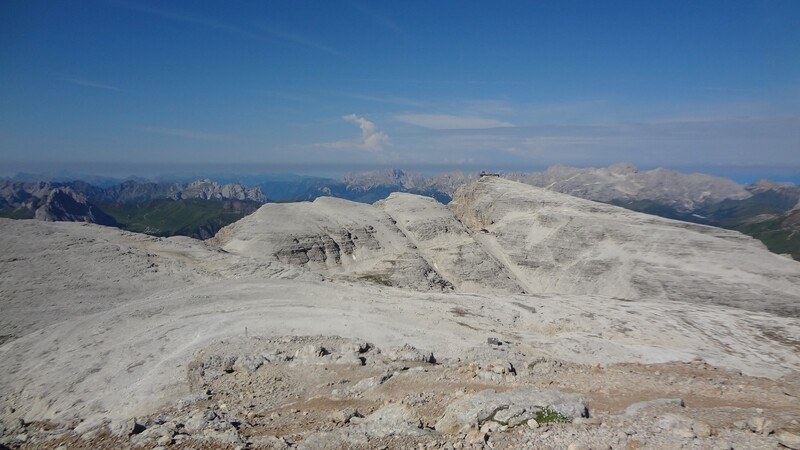
Here you cam have a well-deserved stop and you can also have your meal. After that you will continue to the right from this hut, and soon after that you will have the summit in sight, this is how it looked when I was there:

The first view of the summit
The first view of the summit.

The path is marked and the direction is obvious, there is nothing to guess. There is a pleasant and more or less flat section in front of you.

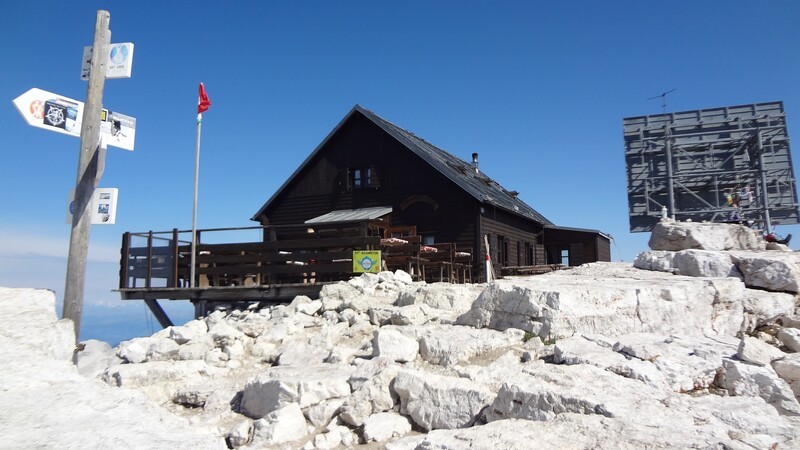
Note that there is yet another hut exactly on the summit, the Capana Piz Fassa, when you get there, you will see this:

Capana Piz Fassa is exactly on the summit.

Lift access

If you have no time, or if you are with small kids who cannot walk the mentioned elevation difference, no worry. You can take the lift from the Pordoi Pass that will take you to the summit of Sass Pordoi (2950 m, 9678 ft).

The lift station is shown in the picture, and you can even see the mentioned Forcella Pordoi hut, it is a few hundred meters below it:

So from the lift station you descend in the direction of the mentioned Forcella Pordoi hut, the path is easy to follow, and then continue to the summit.
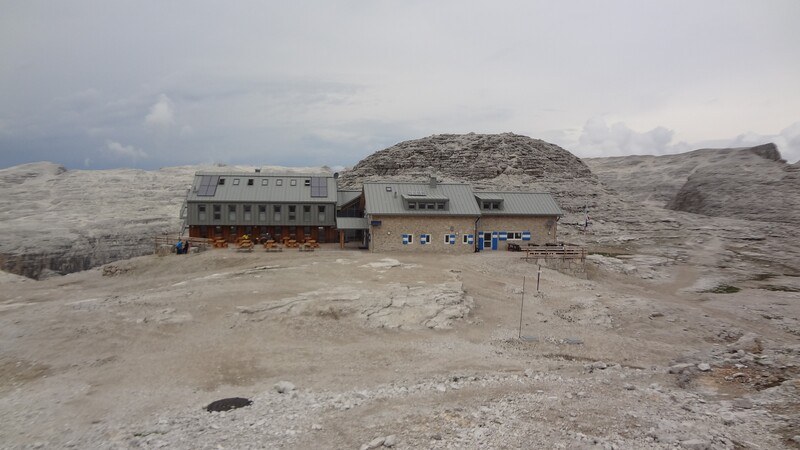
Lift station as seen from the route to summit.

Three huts around

I already mentioned two huts, but there is one more, this is the Rifugio Boè, it is off the route to the summit, so you do not have to go there. But you can make an easy round tour. See how it looks:

Rifugio Boè.
Rifugio Boè.

This means you can descend from the summit of Piz Boe towards Rifugio Boè, and then walk back towards Forcella Pordoi hut. From there you can walk up to the lift station that will take you back to the car parking, or walk down to the pass.

In all three huts you can have meals and drinks, and this holds also for the lift station, so no need to carry anything. You can also stay the night in any of the three huts.

All in all, the route from the car parking to the summit of Piz Boe will take around 3 hours and 30 minutes. If you use the lift, then you will be on the summit probably in one hour or so. I have not used it so cannot be exact here.

Thank you for reading. Please use the comment box below in the case of questions or comments.

This site is all about mountains and equipment, so bookmark it and keep as a reference. Please join us at our Facebook group Dolomites Visitors Hub. Thank you for reading and have a nice day.

Spread the love

Mountains for Everybody site is reader-supported. This means that some of the links in the text are affiliate links, and when you buy products through our links we may earn some small commission to keep running the site. Filed Under: FAQs, Italian Alps Tagged With: Dolomites

Leave a Reply Cancel reply

Your email address will not be published. Required fields are marked *


My photo on the summit of Jalovec.Hi everybody and welcome to my site which I nurture with love and passion. Here I describe my own climbs and give reviews of equipment. I hope you will enjoy it. More about the site and about me here.

Categories


Cookies Statement

In this site we do not have any cookie tool. But we do use services by third parties that either use cookies or may be doing so, yet we do not have any control of it. This is covered in their privacy policies. For more details please check in our Privacy Policy page.


  • Contact
  • Privacy Policy
  • Affiliate Disclosure

My Most Memorable Tours

  • Magic Moments On Mount Teide Tenerife
  • Climbing Weissmies solo
  • Climbing Mount Fuji
  • Climbing Zugspitze solo
  • Lagginhorn my first 4000er

Recent Posts

Differences Between Men's and Women's Osprey Backpacks featured picture.

Differences Between Men’s and Women’s Osprey Backpacks

How Do You Attach a Sleeping Bag to a Daypack featured picture.

How Do You Attach a Sleeping Bag to a Daypack?

Can an Overweight Person Go for a Trek featured picture.

Can an Overweight Person Go for a Trek?

The Physiological Impact of Thru-Hiking featured picture.

The Physiological Impact of Thru-Hiking: Body’s Response and Effects

Are Canvas Backpacks Good for Hiking featured picture.

Are Canvas Backpacks Good for Hiking?

Affiliate Disclosure

I am a participant in the Amazon Services LLC Associates Program, an affiliate advertising program designed to provide a means for sites to earn advertising fees by advertising and linking to amazon.com. So when you buy something from this website, I may receive an affiliate commission. These are my opinions and are not representative of the companies that create these products. My reviews are based on my personal experience and research. I never recommend poor quality products, or create false reviews to make sales. It is my intention to explain products so you can make an informed decisions on which ones suit your needs best.

Categories

  • About mountains in general (33)
  • Alps (138)
    • Austrian Alps (5)
    • German Alps (3)
    • Great mountain roads and passes (10)
    • Huts and Shelters (27)
    • Italian Alps (84)
    • Slovenian Alps (25)
    • Swiss Alps (21)
  • Backpacks (249)
    • About Packs in General (77)
    • Day Packs (63)
    • Large Packs (79)
    • Mid-Size Packs (52)
    • Packs for Kids & Youth (2)
  • Clothing (22)
    • Men's Clothing (11)
    • Women's Clothing (8)
  • Equipment (61)
    • Camp stuff (37)
    • General Stuff (3)
    • Headlamps (8)
    • Trekking poles (3)
    • Water filters & purifiers (9)
  • FAQs (127)
  • Footwear (22)
    • Insulated Footwear (4)
    • Men's Footwear (17)
    • Women's Footwear (6)
  • Guest Author posts (5)
  • Hiking tours (22)
  • Sleeping Bags (110)
  • Sleeping Pads (90)
  • Tenerife (24)
  • Tents and shelters (256)
    • About tents in general (22)
    • Solo tents (23)
    • Tarps and Shelters (12)
    • Tents for 2 People (69)
    • Tents for 3 People (57)
    • Tents for 4 People (91)
    • Winter tents (25)

Copyright © 2025 · Mountains for Everybody · All Rights Reserved