• Home
  • ABOUT
  • HOW TO START
  • ALPS
    • Austrian Alps
    • German Alps
    • Italian Alps
    • Slovenian Alps
    • Swiss Alps
    • Huts and Shelters
    • Roads and Passes
  • TENERIFE TOURS
  • ABOUT EQUIPMENT
  • FAQs
  • WRITE FOR US

Mountains For Everybody

Site about mountaineering, climbing and equipment, for those who love mountains

  • Outdoor Sleeping
    • Tents
      • Solo tents
      • Tents for 2 People
      • Tents for 3 People
      • Tents for 4 People
      • Tents in general
    • Tarps and Shelters
    • Sleeping Bags
    • Sleeping Pads
  • Backpacks
    • Day Packs
    • Mid-Size Packs
    • Large Packs
    • Kids & Youth
    • Packs FAQs
  • Clothing
    • Men’s
    • Women’s
  • Footwear
    • Men’s
    • Women’s
    • Insulated
  • Gear
    • Camp stuff
    • Lamps
    • Poles
    • Filters
  • Newsletter subscribe

Jalovec From Vršič – Jalovško Škrbino route

Last Modified: 10/14/2018


Martin Olsen
Martin Olsen

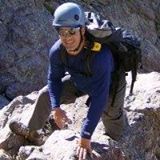
This is a text by the Guest Author: Martin Olsen.

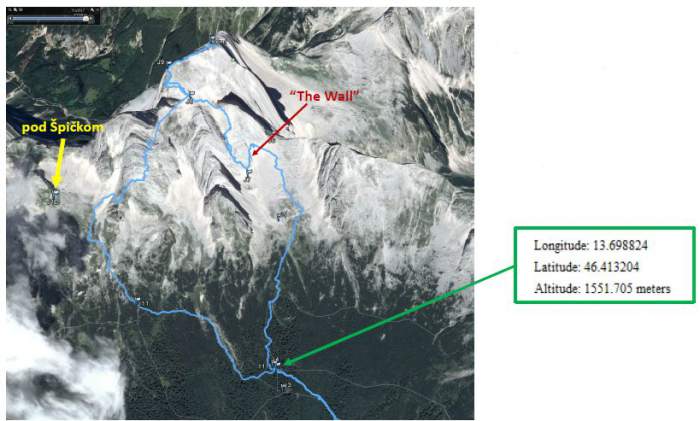
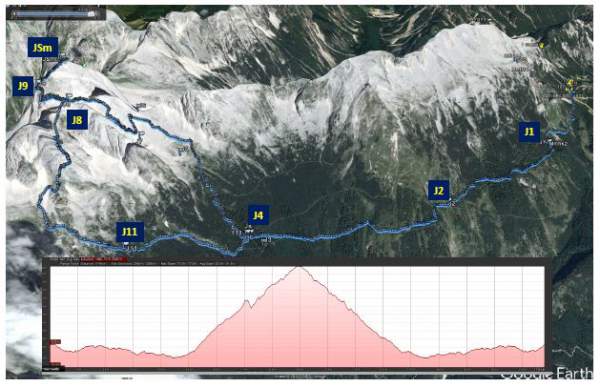
We aimed for an early start, knowing it was to be a long day. Our intended route was to go to the summit from Vršič Pass, taking the Vršič – Jalovec (čez Jalovško Škrbino route) route. We would take the route towards Dom pod Špičkom down, rejoining the ascent path at the point marked as J4 on the map.

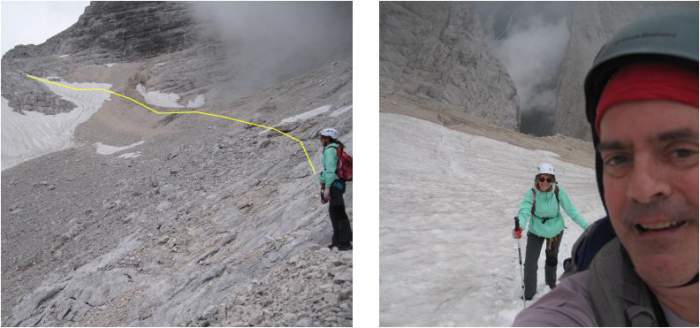
In the map below, the blue line is the ascent route, green the descent. The actual path was a bit different, however (shown on another map a bit further down):

Ascent and descent routes.

The path from Vršič is simple enough, although it does have some ups and downs which add up. The junction where the trail towards Dom pod Špičkom breaks of is marked by point J4, GPS coordinates below. We used this location to stash water (1 liter per person), which was a good idea. There are not any water sources, unless you have a filter. However, there are still snow fields which could be used for water in a pinch.

The route split point.

Here are some photos showing the route:
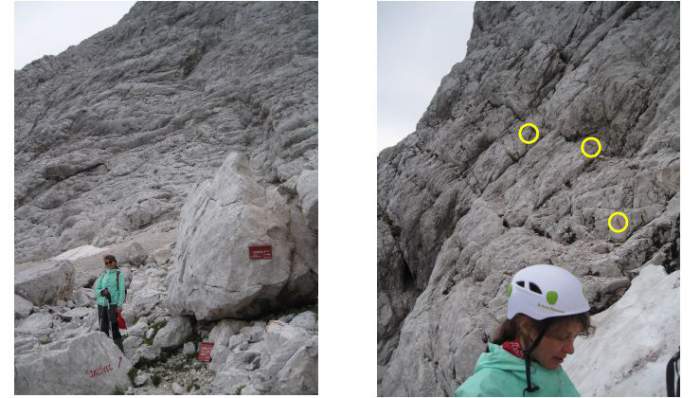
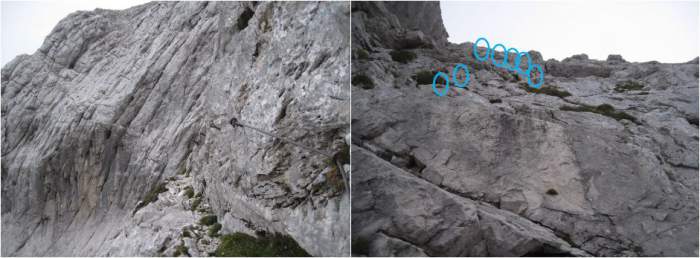
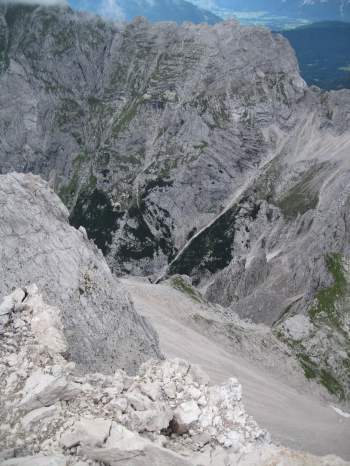
On the left - The path towards Tamar meets here. The entrance to “The Wall” is behind Olga, barely 100 meters away. On the right - Preparing to start on The Wall. Trail markers in yellow. A few pegs along this early part.
On the left – The path towards Tamar meets here. The entrance to “The Wall” is behind Olga, barely 100 meters away. On the right – Preparing to start on The Wall. Trail markers in yellow. A few pegs along this early part.

Climbing The Wall

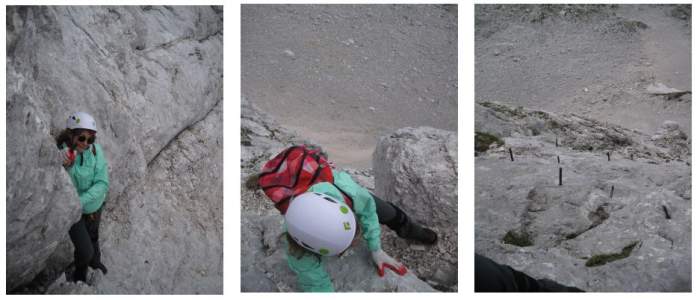
It is pretty exposed, but the pegs are plentiful, and rock is solid. I was able to secure one of the clips to pegs and then secure the other clip to Olga. A short rope (~.7m) also helped give a little more room for movement while still keeping her secured.

Most of the pegs are at an angle sufficient to keep the clip stable in the event of a mishap. It is probably not necessary, as everything is solid, but it is an idea for those who get a little terrified from exposure.

The beginning of the Wall section.

A couple of cable sections are along the wall as well. The Hribi description implies that the wall is relatively short, but it is not short. Entertaining, yes. Short, no. The blue circles show more pegs:

Cable sections in the Wall.

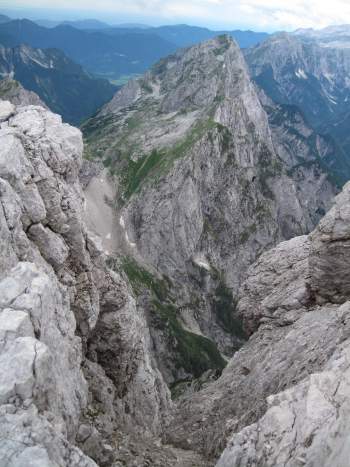
Once off the wall, things flatten out. It is a nice place to have a snack and catch your breath. There is still a lot of snow, but it is easy to kick steps in and make your way up to the saddle where more climbing fun awaits you:

On the snow field above the Wall.

Traversing to the summit

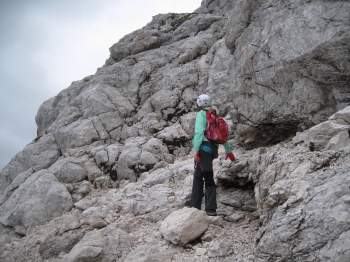
We now are traversing towards the summit ridge. It is steep, and some of the trail markers are a little faded. It is not terribly exposed and there is protection intelligently placed. But still, be sure to follow the trail markers intently. It would be very easy to get cliffed out in this section!

At the beginning of the summit ridge.
Olga scrambling on the summit ridge.

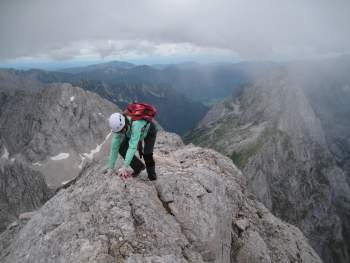
The summit ridge is a fun scramble, with one fairly sketchy section which appears as if it is a knife edge. Here, Olga negotiates this short section, which has plenty of air below on both sides! The views along this ridge are incredible, which is typical for these beautiful mountains.

Stunning views along the way to the summit…

Stunning views around...
Stunning views around…
...and some more.
…and some more.

Descent towards Dom pod Špičkom hut and back to Vršič

The descent towards Dom pod Špičkom hut is fairly steep (and long) but technically not difficult at all. I would recommend this route for the descent as The Wall would be a much more tricky way down. It would be doable, but this way was much easier, and besides, I prefer doing loops as opposed to “there-and-backs”.

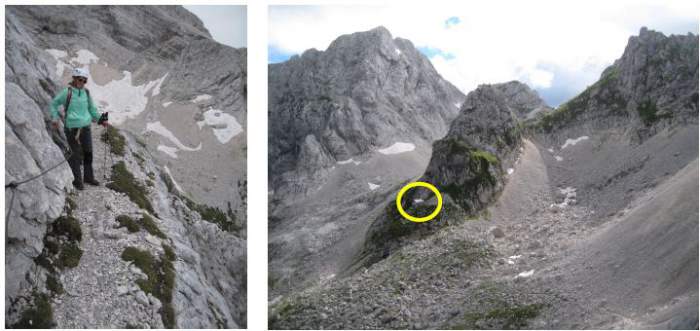
We can see the Dom pod Špičkom (yellow circle), but the trail back to Vršič does not take you there. It would be a short detour, however.

Descending in the direction of the hut.

Here below is the junction for the return to Vršič or the last bit of path to Dom pod Špičkom. The trail back is well marked and easy to follow. It is long, however, and after the days climbing our feet were already begging for mercy.

The junction for the return to Vršič.

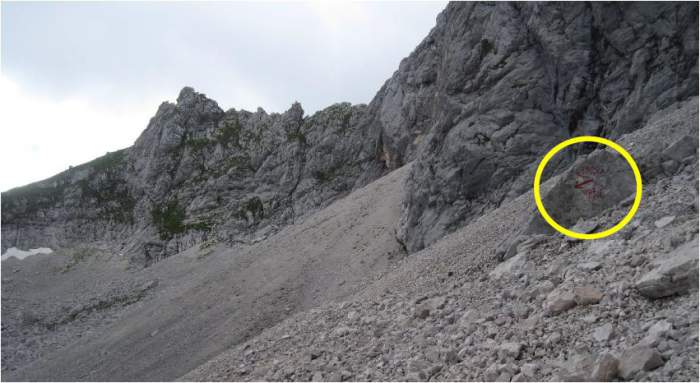
As you approach the J4 point (about 150 m from it), you will come to a fork in the trail. You will need to take the left side, which goes very slightly uphill. To go right may get you back to Vršič, but I am not absolutely certain of it.


Summary

Overall, it was a gorgeous hike, and the weather cooperated fully. We had a small amount of drizzle and mostly cloudy skies. Had it been blue skies and sunny, I suspect we would have eaten a lot of snow. We took 3.5 liters of water each (stashing one liter each at J4) and that was just about right.

We did not go very fast through the climbing sections and had several relaxing breaks. But still, it was a long day, almost 14 hours on the trail. I would recommend an early start for even fit hikers. A map with our tracks and waypoints is below.

Martin and Olga

GPS waypoints.


I wish to thank Martin and Olga for this text. I am sure now you can get a feeling about the route and decide if it is too challenging for you or not. I can’t wait to get there again. Note, there is yet another text by Martin, about Rjavina tour, so have a look. I myself climbed Jalovec from the south side, so please check my story here.


Spread the love

Mountains for Everybody site is reader-supported. This means that some of the links in the text are affiliate links, and when you buy products through our links we may earn some small commission to keep running the site. Filed Under: Guest Author posts, Slovenian Alps Tagged With: Jalovec, Jalovsko Skrbino route

Comments

  1. Denis says

    08/21/2019 at

    Thanks man! Pretty much you saved our lives. We did the same track and that wall is quite scary. It can pe better equipped or at least warning signs at both of its ends are necessary.

    Reply
    • Jovo says

      08/21/2019 at

      Hi Denis, great to hear from you. This text is by my friend Martin Olsen so all credit goes to him. I did the same route later myself and described it here. You are right, there are no enough cables at that wall. I did it solo and as you rightly say it was scary. Good that you added such a comment so that readers know what to expect.

Leave a Reply Cancel reply

Your email address will not be published. Required fields are marked *


My photo on the summit of Jalovec.Hi everybody and welcome to my site which I nurture with love and passion. Here I describe my own climbs and give reviews of equipment. I hope you will enjoy it. More about the site and about me here.

Categories


Cookies Statement

In this site we do not have any cookie tool. But we do use services by third parties that either use cookies or may be doing so, yet we do not have any control of it. This is covered in their privacy policies. For more details please check in our Privacy Policy page.


  • Contact
  • Privacy Policy
  • Affiliate Disclosure

My Most Memorable Tours

  • Magic Moments On Mount Teide Tenerife
  • Climbing Weissmies solo
  • Climbing Mount Fuji
  • Climbing Zugspitze solo
  • Lagginhorn my first 4000er

Recent Posts

Is It Better to Sleep Without Clothes in a Sleeping Bag featured picture.

Is It Better to Sleep Without Clothes in a Sleeping Bag?

Differences Between Men's and Women's Osprey Backpacks featured picture.

Differences Between Men’s and Women’s Osprey Backpacks

How Do You Attach a Sleeping Bag to a Daypack featured picture.

How Do You Attach a Sleeping Bag to a Daypack?

Can an Overweight Person Go for a Trek featured picture.

Can an Overweight Person Go for a Trek?

The Physiological Impact of Thru-Hiking featured picture.

The Physiological Impact of Thru-Hiking: Body’s Response and Effects

Affiliate Disclosure

I am a participant in the Amazon Services LLC Associates Program, an affiliate advertising program designed to provide a means for sites to earn advertising fees by advertising and linking to amazon.com. So when you buy something from this website, I may receive an affiliate commission. These are my opinions and are not representative of the companies that create these products. My reviews are based on my personal experience and research. I never recommend poor quality products, or create false reviews to make sales. It is my intention to explain products so you can make an informed decisions on which ones suit your needs best.

Categories

  • About mountains in general (33)
  • Alps (138)
    • Austrian Alps (5)
    • German Alps (3)
    • Great mountain roads and passes (10)
    • Huts and Shelters (27)
    • Italian Alps (84)
    • Slovenian Alps (25)
    • Swiss Alps (21)
  • Backpacks (249)
    • About Packs in General (77)
    • Day Packs (63)
    • Large Packs (79)
    • Mid-Size Packs (52)
    • Packs for Kids & Youth (2)
  • Clothing (22)
    • Men's Clothing (11)
    • Women's Clothing (8)
  • Equipment (61)
    • Camp stuff (37)
    • General Stuff (3)
    • Headlamps (8)
    • Trekking poles (3)
    • Water filters & purifiers (9)
  • FAQs (128)
  • Footwear (22)
    • Insulated Footwear (4)
    • Men's Footwear (17)
    • Women's Footwear (6)
  • Guest Author posts (5)
  • Hiking tours (22)
  • Sleeping Bags (110)
  • Sleeping Pads (90)
  • Tenerife (24)
  • Tents and shelters (256)
    • About tents in general (22)
    • Solo tents (23)
    • Tarps and Shelters (12)
    • Tents for 2 People (69)
    • Tents for 3 People (57)
    • Tents for 4 People (91)
    • Winter tents (25)

Copyright © 2025 · Mountains for Everybody · All Rights Reserved