Cristallino d’Ampezzo and Ferrata Ivano Dibona tour is among the best tours you can have in the Dolomites. Here you have a detailed report from my round tour that also includes Bivacco Buffa di Perrero.
Cristallino d’Ampezzo is one of 3000ers in Monte Cristallo group. The easiest way to get to the summit is from Passo Tre Croci above Cortina d’Ampezzo. Plan four hours if you walk all the way up. For most people summit itself is not the main goal, it is Ferrata Ivano Dibona with its suspension bridge and Bivacco Buffa di Perrero on the way.
Cristallino d’Ampezzo quick facts
- Elevation: 3008 m (9869 ft).
- Nearest place for supplies: Cortina d’Ampezzo.
- Mountain group: Dolomites, Italian Alps.
- Summit coordinates: 46.5816244 N, 12.1899719 E.
- Route difficulty: walk up and moderate ferrata.
- Elevation difference from the car parking: 1199 m (3934 ft).
- Time needed from the parking to the summit: 4 hours.
- Shelters: Rifugio Son Forca, winter room at Rifugio Lorenzi, and Bivacco Buffa di Perrero.
- Useful map: Tabacco number 03, Cortina d’Ampezzo e Dolomiti Ampezzane. 1:25000.
- Included in my map of best known ferratas in the Dolomites.
Access roads and map
Here you have my interactive and zoomable map which I created to offer some details of the route. When you zoom in you can see the route, and zoom out to see access roads to the area. The added markers show some important points on the route and their meaning is as follows:
- Marker 1: The main road and Tre Croci pass where the route starts, 1805 m (5922 ft).
- Marker 2: Rifugio Son Forca.
- Marker 3: Rifugio Lorenzi (permanently closed).
- Marker 4: Ponte Cristallo, suspension bridge.
- Marker 5: Cristallino d’Ampezzo summit.
- Marker 6: Bivacco Buffa di Perrero.
- Marker 7: Descent route back to Tre Croci.
Ascent route
A big part of this route is the same as the one you use to go to Monte Cristallo di Mezzo. But instead of going to Ferrata Bianchi, at the ruined Lorenzi hut and Forcella Staunies you turn to the west to Ferrata Ivano Dibona. All these details you can see in the map above.
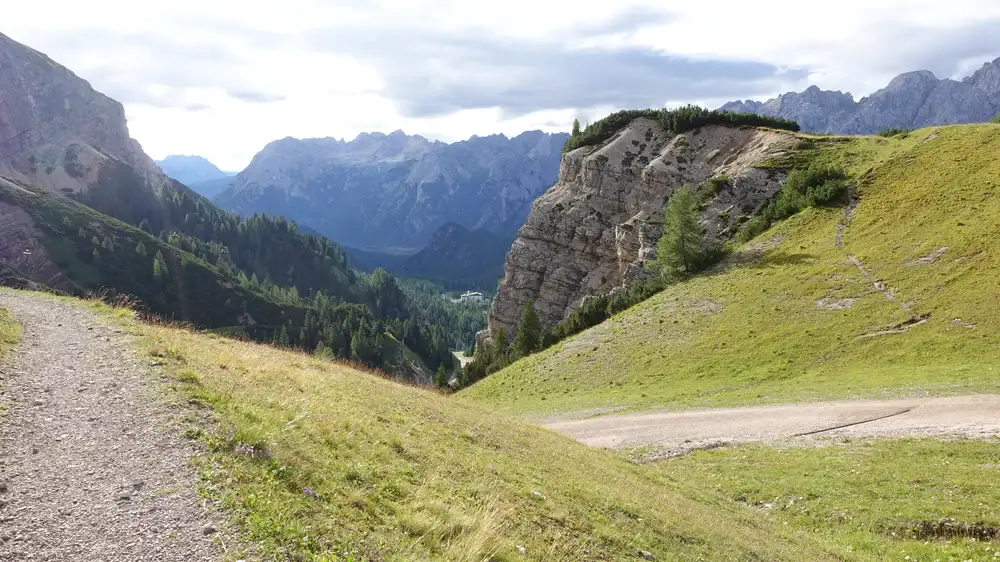
So the start is at Tre Croci pass. Some people use lift from the lift station Rio Gere which is down the road in the direction of Cortina, and get to Rifugio Son Forca shown in the map, and it is at around 2200 m of elevation.
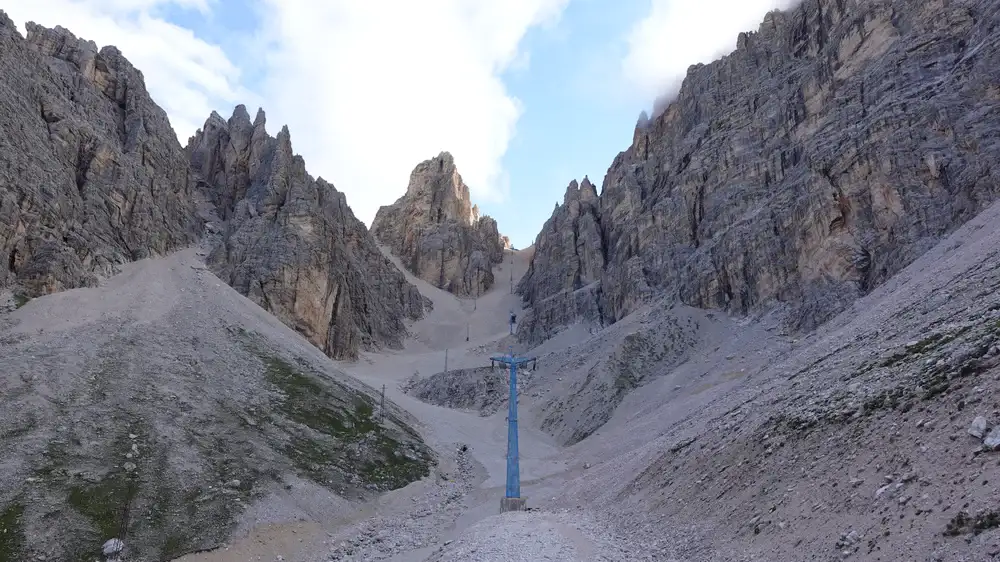
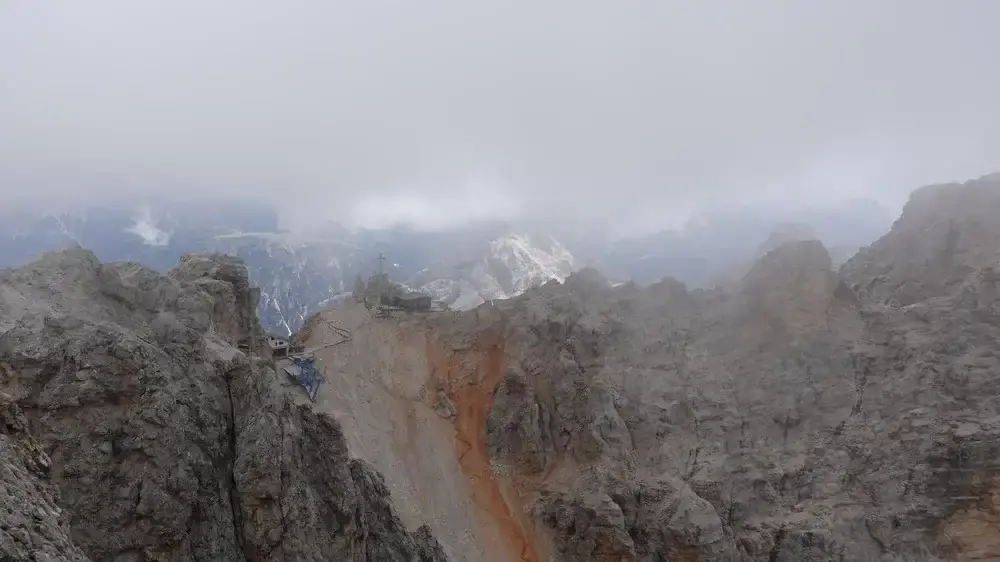
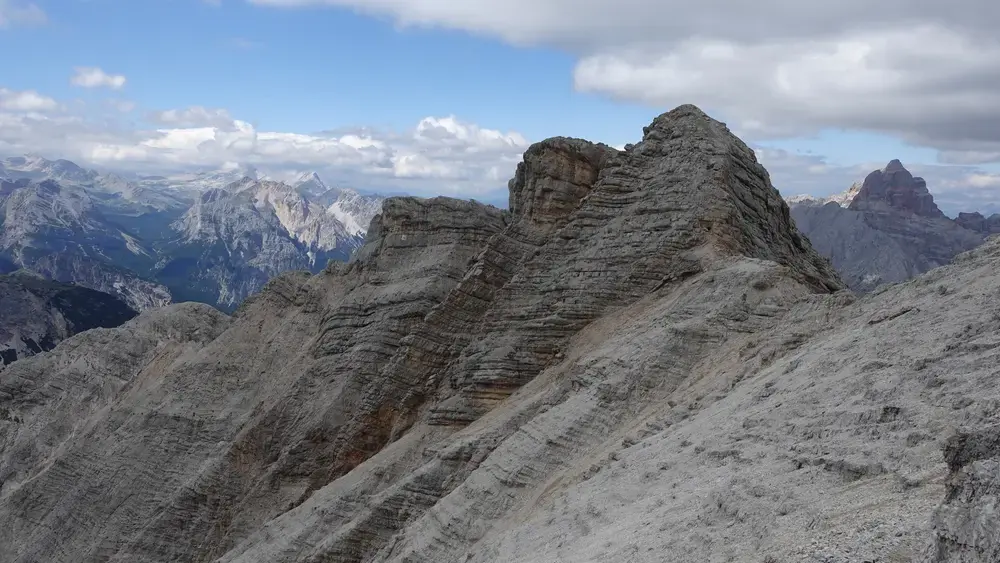
If you walk from the road, the route is marked so it is easy to follow. After Rifugio Son Forca this is still a moderate walk up, but the part below Forcella Staunies (2906 m) is incredibly hard and steep, with unstable scree and rock debris.
The photo below shows how this part of the route looks. The lift towers are not in use any longer. In the final part, it is far harder than you could conclude from the photo. Some photos below will show this.
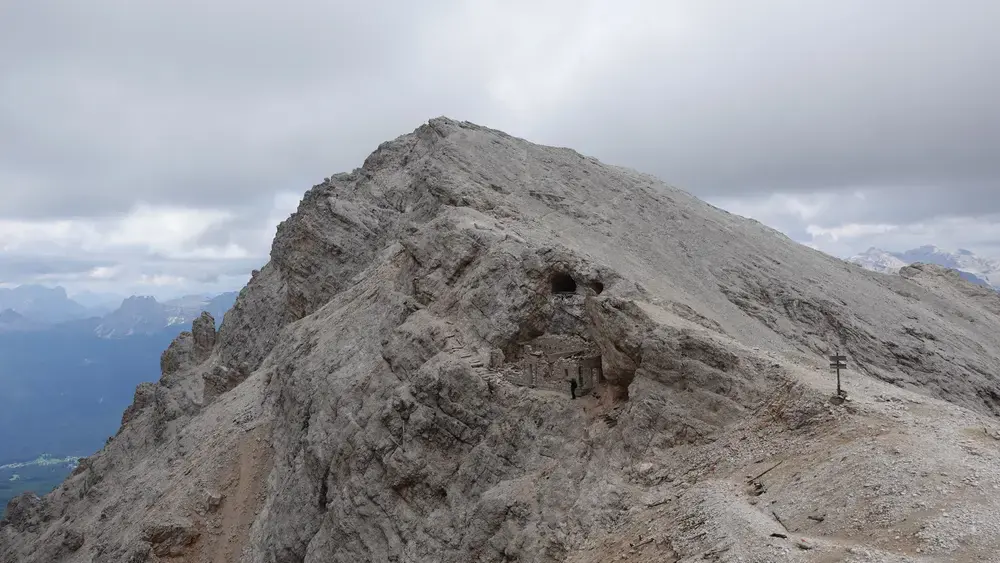
At Rifugio Guido Lorenzi
The Rifugio Lorenzi was founded in 1959. It served as the primary base for climbers tackling the Marino Bianchi and Ivano Dibona via ferratas.
The refuge has been closed since 2016. Its abandonment was not due to the building itself failing, but because the Staunies cable car reached the end of its legal operating life and was decommissioned.
From what I read, without the lift, the flow of tourists dropped significantly, making the refuge’s operation unsustainable. To tell you frankly, this is hard to believe, the area is very crowded.
Currently, Lorenzi hut is just a ruin. But there is a winter room which is quite good and you will feel pleasant inside if you happen to be there in a windy and cold day.
Ferrata Dibona
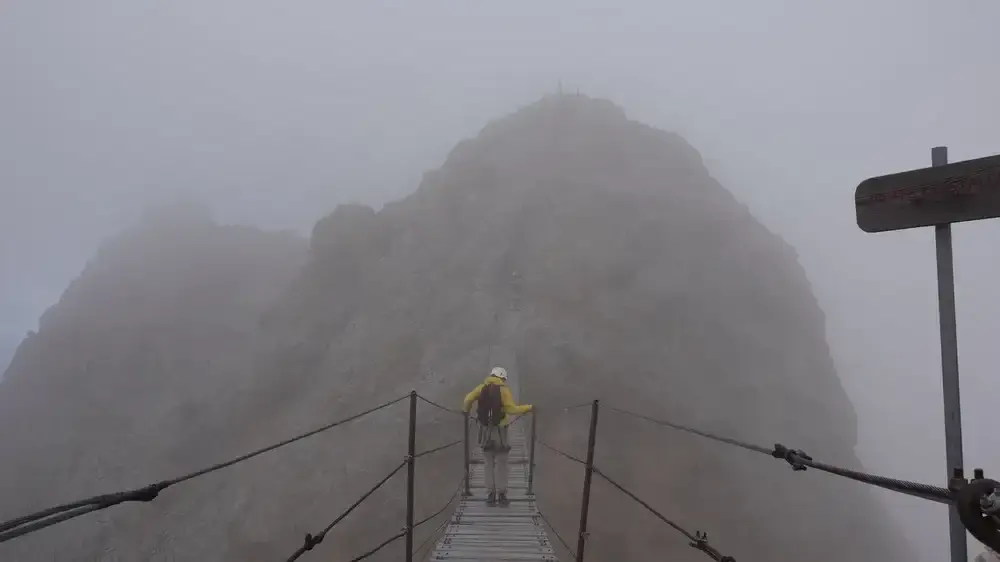
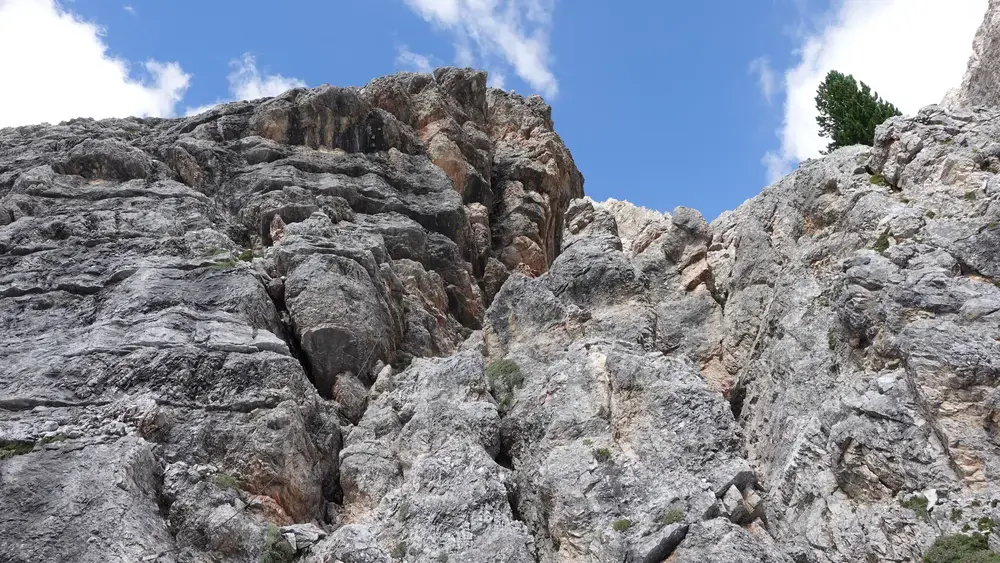
The most attractive part of the tour start there, so you will put your ferrata equipment because you will need it as soon as you start climbing up from Forcella Staunies. This is where Ferrata Ivano Dibona actually starts, I mean from its east side.
After you climb a ladder, in just a few minutes you will arrive at one of the main attractions on the route, the suspension bridge built in 1967. It is 27 meters long. the longest in the Dolomites.
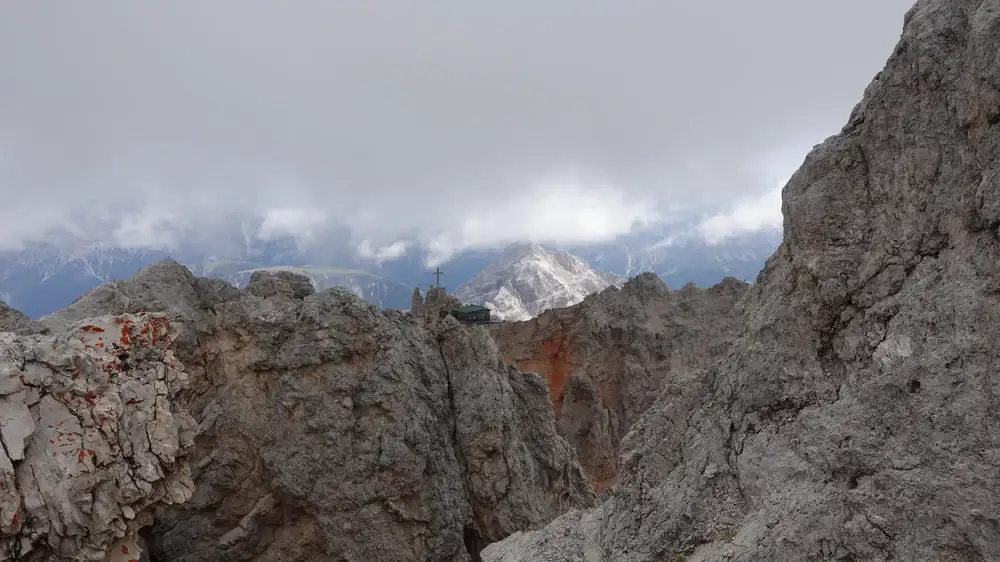
The photo below shows how I saw it earlier from my tour to Cristallo di Mezzo and Ferrata Bianchi.
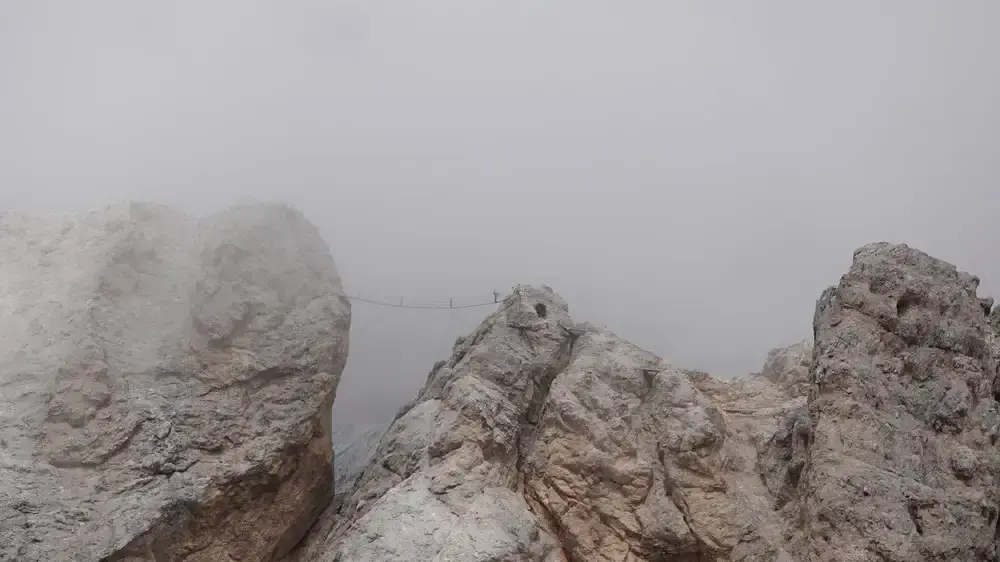
The bridge is a windy place, and the drop below it is quite substantial. The planks are not really in the great state, so it is important to attach yourself on the cables on both sides of the structure. In good weather this spot may be very crowded because people make their trophy photos here.
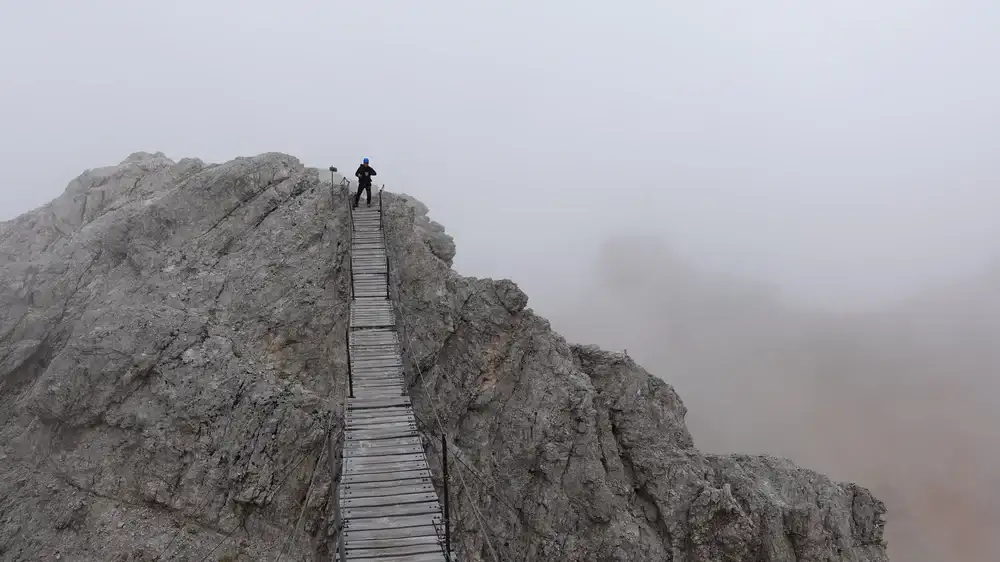
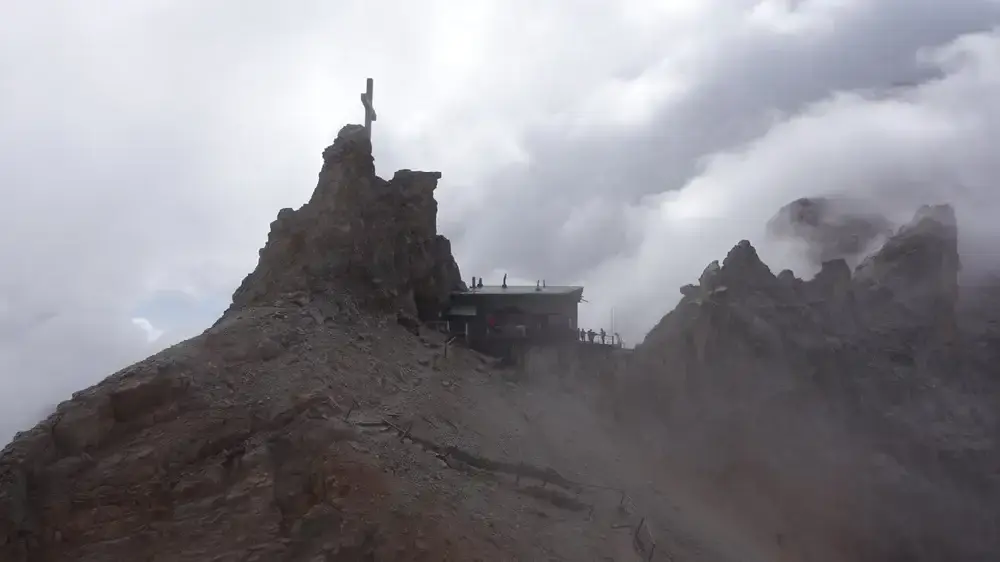
The part after that includes yet another ladder and then an easy ridge walk secured by cables, and the highest point on the route is close, the summit of Cristallino d’Ampezzo (3008 m).
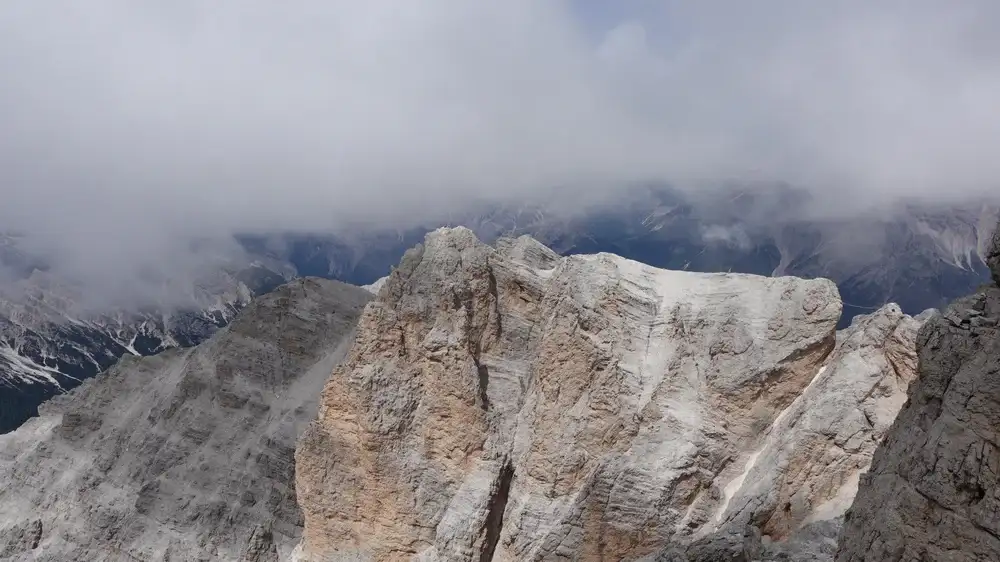
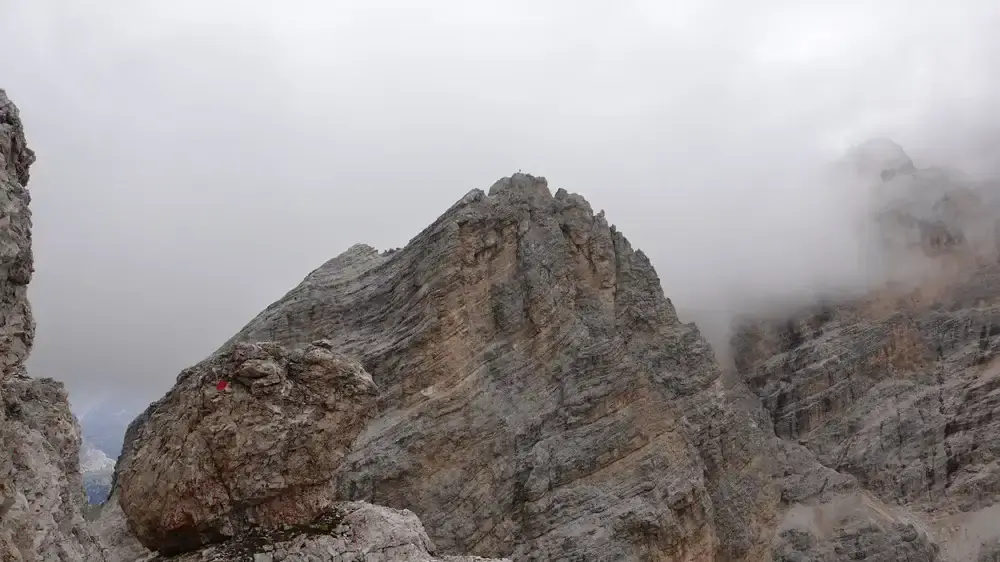
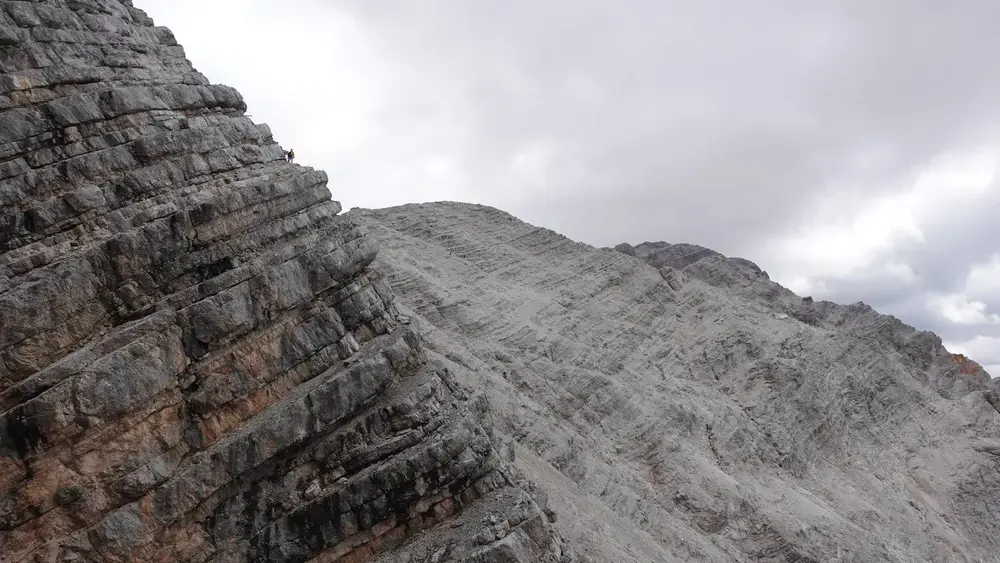
If you are not in clouds, from this part you will be able to see the upper part of the walk-up route to the Forcella Staunies, see the photo below and you might realize how steep and hard it is.
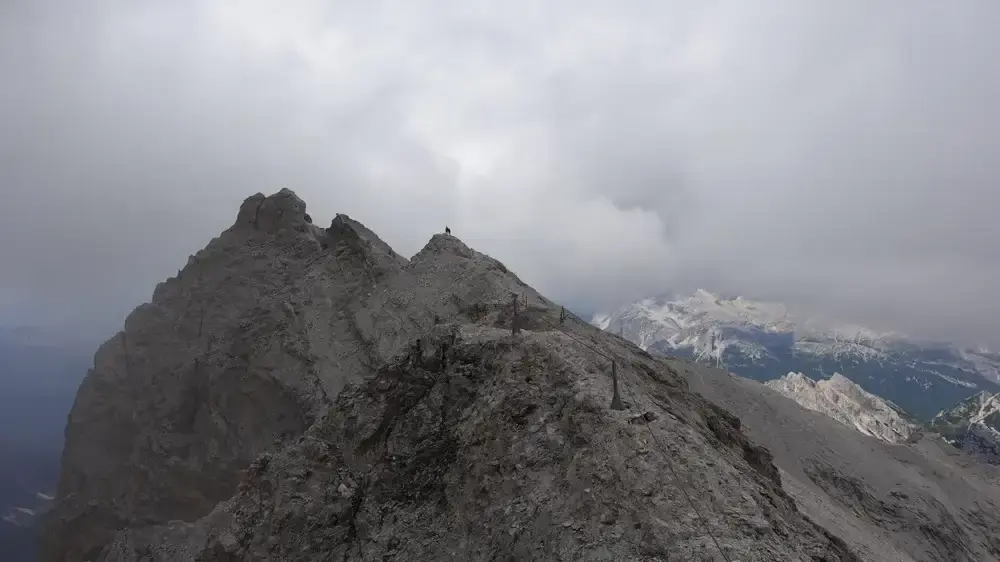
This all area is close to 3000 meters of elevation, and views around are spectacular. The cables are just for security in case of strong side winds, no need to attach yourself. With clouds, this is an ever-changing spectacle.

Here is one moment with clear views back to the Lorenzi hut, just before getting to the summit:
Descent route
From the summit to Bivacco Buffa di Perrero
From the summit it is up to you, you can walk back the same way as many people do, or make a round tour. But if you decide to make a round tour, bear in mind that this implies descending over some more exposed and steep passages, and this is a long route, so make sure you have enough water and food.
Also, do not go if there is snow on the route. Once, I was on the other side at Buffa di Perrero bivouac in July and could not continue. Narrow ledges under snow can be extremely dangerous, and cables can be buried in snow and ice.
But if you go, there is a steep part you have to descend, with a few fixed cables in place and a ladder. The photo shows how this looks, the route descends to the pass in the middle of the photo, this is Forcella Granda (2870 m) in the map above:

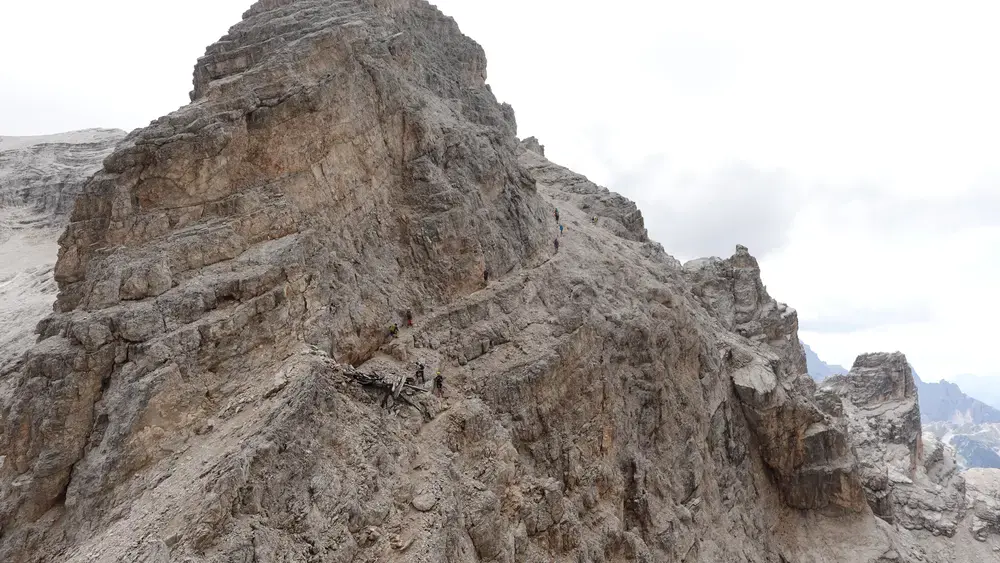
Now you continue over Cresta Bianca (2932 m) which you have to climb. Here is view back to the summit, and Cristallo di Mezzo is in the clouds on the right.
There are many fortifications and ruins of military installations from WWI around. Here is the view of the part you have to walk, the route goes through the ruins you see on the left, Cresta Bianca summit is above:
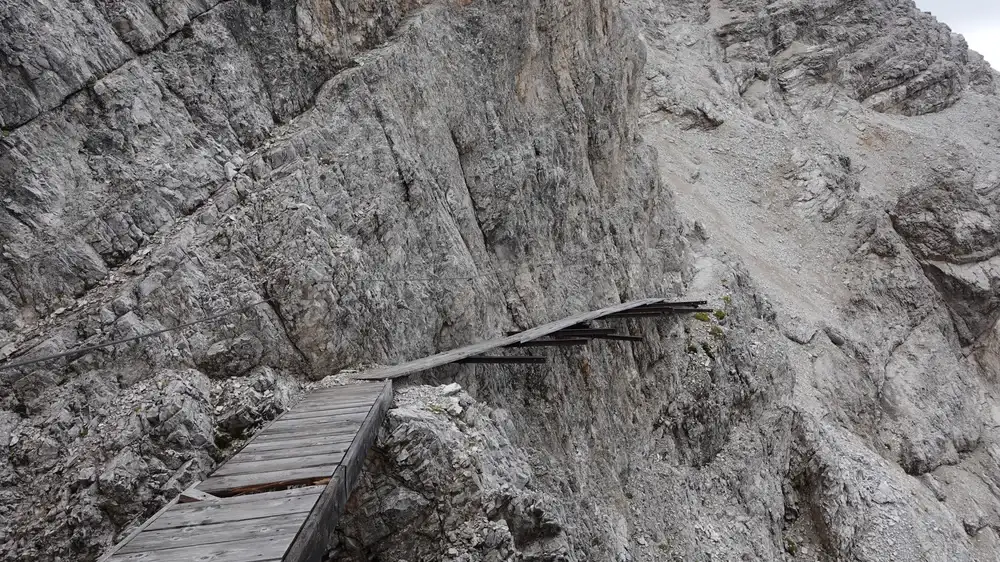
Below you can see one very exposed passage from this part, the planks here are quite rotten so it is essential to be attached to the cables.
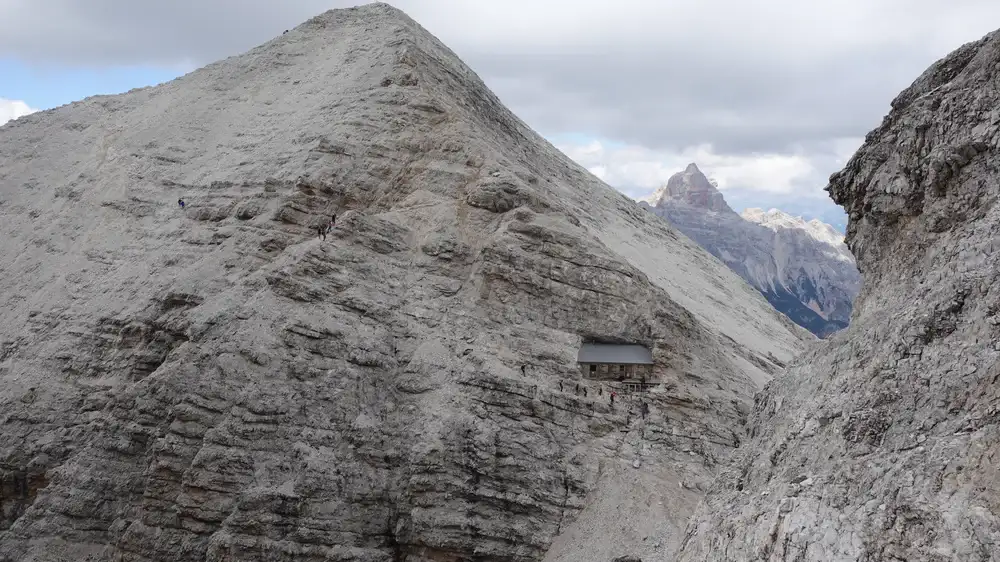
After this, you will have a long descent part with cables and exposed passages. And then, yet another attraction of the tour will appear in front of you, Bivacco Buffa di Perrero, it is hard to find words to describe this incredible place:
Here you can see a part of that descent route towards the Bivacco, with some ruins on the way and narrow ledges. Remember what I said about danger in the case of snow.
At Buffa di Perrero
The Bivacco is a pleasant place, and I have a separate text about it here in the site. It is always open and free to use. The photo below shows what you have for sleeping. Note that there are no mattresses.
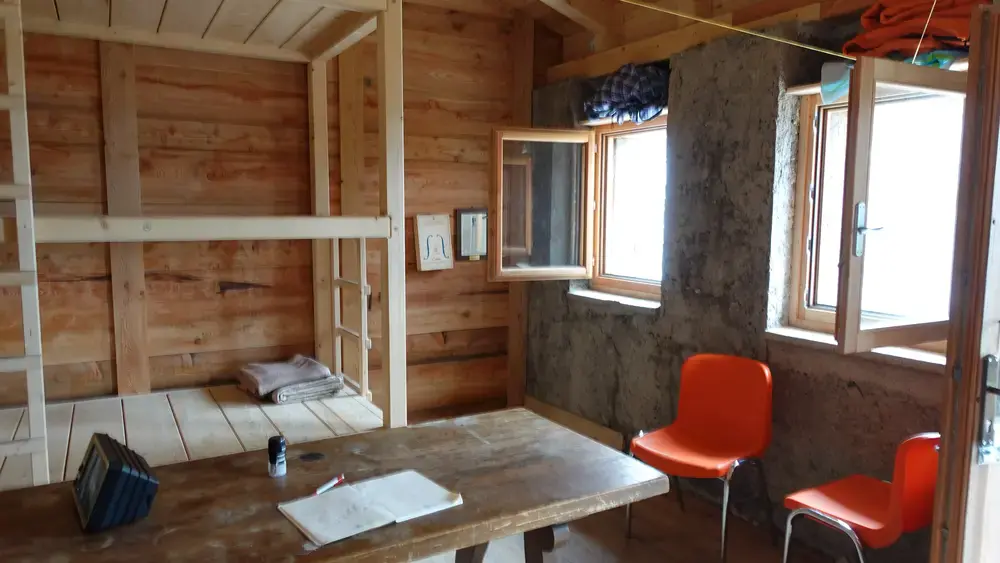
There is a wood burning stove in another corner, but this place is far above tree line so do not count on wood for fire. Surprisingly, some wood was available.
The final descent route part
After the Bivacco, the route follows many ledges, see the photo below, some exposed and equipped with cables and some easy to walk. This part is shown and described in my text about Buffa di Perrero.
Below you have my view back, observe one person on the ledge, this is where the descent route goes.
At one point you have a place where the ferrata routes splits, you can see this in the map above. So you descend south, and after some walk you get to the final steep part with a few cables.
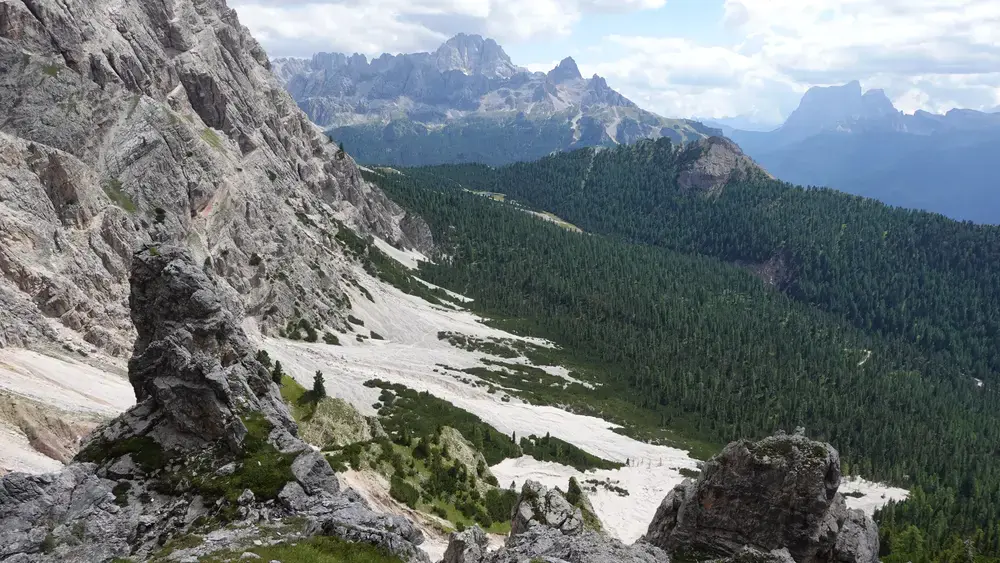
When this is over, you can pack your ferrata equipment. What follows is a long walk over the scree area in the photo below, and then through the forest in the direction of Son Forca hut. There is one place with water in the forest, you will want to know this.
All the tour is presented in my video, please have a look:
My rating of Via Ferrata Ivano Dibona
My rating assumes that you make the round tour as described in the text above. It is based on three essential criteria, and it implies that you walk all the way up from the car parking:
| Rating Criteria | Rating (A-E; 1-5) |
|---|---|
| Technical difficulty | B |
| Ferrata length | 5 |
| Access route difficulty | D |
| Overall Score | B5D |
There are only a few passages that can be rated B, most of the time this is just A+. So in my view, this ferrata is technically easier than the nearby Ferrata Bianchi, although in some sources (including the interactive map above) you will find them with the same rating.
Regarding access rating, it is completely the same as for Ferrata Bianchi that also starts at Forcella Staunies. So this is a long and hard walk up.
As for the length rating, it is difficult to be exact here because I could not find reliable data. Cables are numerous but easy, and they span a very long distance, in particular on the descent.
However, if you would decide to walk back from the summit, then this is a very short and easy ferrata and my rating would be A2D.
My tour
I have already described the route above as I walked it, so here I will mention only a few personal details and timings. I started at 7:40 am and reached Forcella Staunies shortly before 11. It was very cold and windy, and it was not obvious that I could continue.
I went into the winter room. It was full of people in the same situation, all undecided. In the end, I chose to go on and reached the summit at about 11:50 am.
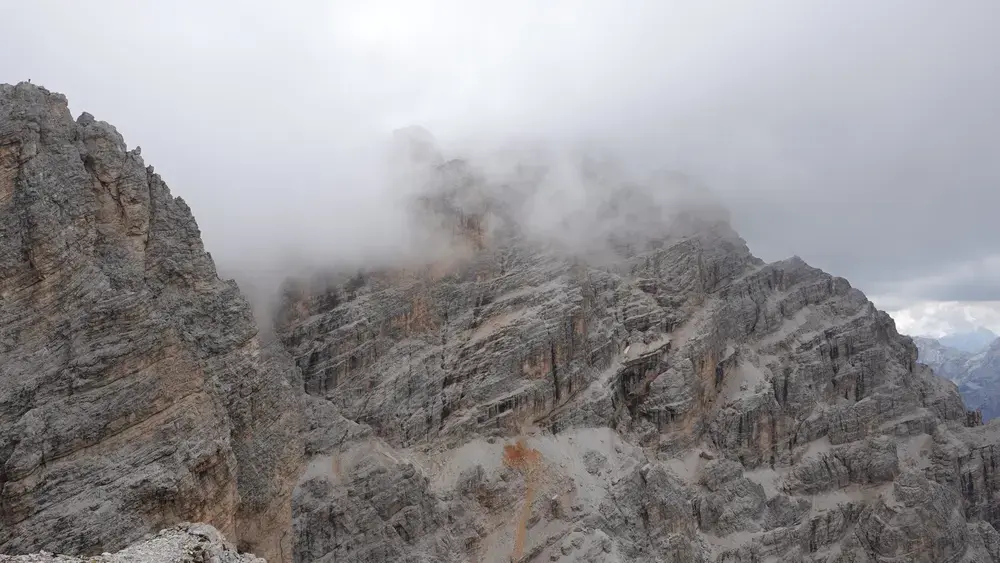
On a calm and sunny day, I would stay longer in such a place, which offers one of the best views of Cristallo di Mezzo. This time it was not possible. It was cold, and it was better to keep moving, so I continued the round tour. The higher peak mentioned above stayed in the clouds, as shown in the photo.
At first, there were only a few people on the descent route. Some were going down like me, others were climbing up.
Closer to the bivouac, the situation changed. A large crowd was coming in the opposite direction, and in some narrow sections I had to stop to let them pass. When the shelter came into view, I could see dozens of people around it and on the route.
I reached Buffa di Perrero at 1 pm and was alone for a short time. Some people briefly looked inside and then moved on. I could hardly believe how many large groups simply passed by this exceptional place.
I realized that some of them did not even notice the bivouac, although they passed within one or two meters of it. I could see people on Forcella Padeon below pointing up after realizing they had missed it. But they were in groups and could not go back.
While I was eating, a few people entered. Two young men from Hungary told me they planned to stay overnight. A good idea. Later a few more came with the same plan.
After a long break, I descended along a route I knew well from a visit one year earlier. I was not in a hurry, and the weather stayed stable, with no risk of storms. I reached Son Forca hut at 4 pm and returned to the car about an hour later.
Overall, it was a long tour, more than nine hours in total.
What gear to use for this tour?
If you do the tour described here, you need a full ferrata set, and this means a harness, a Y-rope, and a helmet.
This is a harsh environment and it is good to have reliable mountaineering boots with strong sole. I used a pair of trekking poles, and my Mammut Lithium 40 backpack. Gloves for cables are definitely necessary, and I used them.
In the backpack, as usual, I had a rain poncho and rain pants, plus a rain jacket. If you do not have any and not sure what to choose, think about the Mammut Crater Pro HS which I use myself.
If you want to stay the night in the bivouac, make sure you have at least a sleeping bag and also a pad if you have place in the backpack. As you have seen, matrasses were not available in the shelter.
Water and food
On the way up, there is one or two water springs you cross before getting to Son Forca hut, but this all is quite low on the route.
There is no water anywhere higher on the mountain. So there are no water flows to filter and purify water and to refill. Therefore make sure you carry enough.
On descent, as mentioned above, there is water at one place in the forest, but this is even lower than the hut.
Do you want to walk this route?
As you realize, I walk solo, but I have been in this for 40 years already. If you have some mountaineering experience, you can do this tour too.
However, if you want to play safe, which I warmly advise, get in touch with some experts and guides who can help you getting here.
Final thoughts
In summary, this tour on Cristallino d’Ampezzo and Ferrata Ivano Dibona stands out in the Dolomites for its mix of brutal access, spectacular ridge walking, the iconic suspension bridge, and the unique perch of Bivacco Buffa di Perrero.
The round version demands a full day, solid fitness, and respect for exposure and weather, but delivers views and atmosphere that few other routes match. Going back the same way shortens it considerably and reduces difficulty, yet most of the appeal remains.
If you handle steep scree, moderate ferrata sections, and high altitude without issue, this is a must-do. Start early, carry enough water, check conditions, and consider the bivouac for an overnight that turns a great day tour into an unforgettable one.
The Dolomites have plenty of classics, but this combination of summit, bridge, and incredible shelter is hard to beat.
You might want to know that I have a book Dolomites Solo with my first-hand mountaineering reports, have a look:

Thank you for reading. Let me know if you have questions or comments, there is a comment section below. Please join us at our Facebook group Dolomites Visitors Hub.
FAQs
What is the best time of year to attempt Ferrata Ivano Dibona?
The optimal window for this route is from mid-July to mid-September, when snow has typically melted from higher elevations, reducing risks on narrow ledges and cables, and weather tends to be more stable with longer daylight hours for the full-day commitment.
Early summer might still have patchy snow in shaded areas, so check recent reports, while late season offers fewer crowds but potential for early autumn storms. Avoid spring or late fall due to unpredictable conditions and closed facilities in the Dolomites region.
Do I need a guide for Ferrata Ivano Dibona?
While experienced mountaineers familiar with via ferrata techniques can tackle it independently, beginners or those new to high-exposure routes should hire a certified alpine guide to learn proper clipping, pacing, and emergency responses.
Guides also provide local insights on variable conditions like rockfall or wind, and group tours often cap at 3-4 people for safety. Costs start around 300€ for small groups, making it a worthwhile investment for confidence on this historic path.
What is the historical significance of the Ferrata Ivano Dibona?
This via ferrata follows trails carved during World War I, part of the Dolomite front where Italian and Austrian forces built trenches, tunnels, and fortifications amid brutal mountain warfare.
Named after Ivano Dibona, a renowned Cortina guide from a legendary climbing family who perished on Monte Cristallo in 1968, it preserves remnants like bunkers and ladders from that era.
The route gained modern fame through its suspension bridge featured in the 1993 film Cliffhanger, blending military history with cinematic allure.
How should I physically prepare for this via ferrata?
Focus on building hill-specific fitness through regular steep hikes or stair climbing to handle the demanding approach and descent, combined with cardio sessions like running 30-60 minutes, 2-3 times weekly, to boost endurance for the 9+ hour tour.
Incorporate upper-body strength work, such as pull-ups or resistance training, for secure handling of cables and ladders, and practice balance on uneven terrain to manage exposure without fatigue. Starting with shorter, easier ferratas in the Dolomites can help acclimate to altitude and gear use before committing to this one.
Leave a Reply