I climbed Monte Paterno by walking from the car parking below Lago d’Antorno to Rifugio Locatelli and then to the summit. After that I traversed the mountain and descended toward Rifugio Lavaredo.
Monte Paterno (Paternkofel) can be climbed from three sides, and all three routes converge at Forcella del Camoscio (2680 m). From there you have a short C-rated ferrata to the summit. If you approach from Rifugio Locatelli, you will need about 90 minutes to the summit. However, every route to Rifugio Locatelli is long. Here you have the route from Lago d’Antorno to Rifugio Locatelli and then to the summit described in detail.

Paternkofel quick facts
- Elevation: 2744 m (9003 ft).
- Nearest places for supplies: Misurina, Cortina d’Ampezzo.
- Mountain group: Dolomites, Italian Alps.
- Summit coordinates: 46.6304108 N, 12.3151775 E.
- Route difficulty: medium ferrata.
- Elevation difference from the car parking: 914 m (3000 ft).
- Parking coordinates: 46.5912092 N, 12.2628478 E.
- Time needed from the parking to the summit: about 5 hours.
- Shelters: Rifugio Auronzo, Rifugio Lavaredo, Rifugio Locatelli.
- Useful map: Dolomiti di Auronzo e del Comelico. Tabacco 017, 1:25000.
- Included in my map of best known ferratas in the Dolomites.
Access roads and map
Below is my interactive and zoomable map where I have added the following markers important for the tour:
- Marker 1: Car parking.
- Marker 2: Rifugio Auronzo.
- Marker 3: Rifugio Locatelli.
- Marker 4: Access tunnel.
- Marker 5: Forcella del Camoscio.
- Marker 6: Monte Paterno summit.
- Marker 7: Descent route.
- Marker 8: Rifugio Lavaredo.
If you zoom in, you can see lots of details regarding the route. Zoom out to see access roads to the area.
Route description
From car parking to Rifugio Locatelli
The free car parking in the photo below is 300 meters down the road below Lago d’Antorno. From this place the route to Rifugio Fonda-Savio also starts. So from the parking you walk along the road in the direction of the lake and continue to the road toll point above. From there you follow path 119 through the forest.

After about 2 hours and 20 minutes, you will see Rifugio Auronzo in front of you as in the photo below. So keep going in the direction of Rifugio Lavaredo and Rifugio Locatelli.
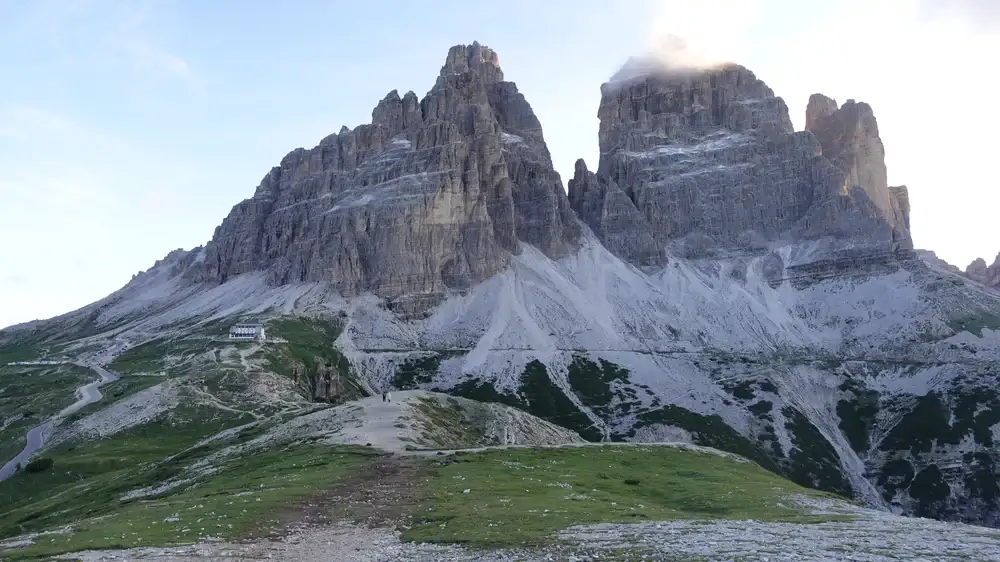
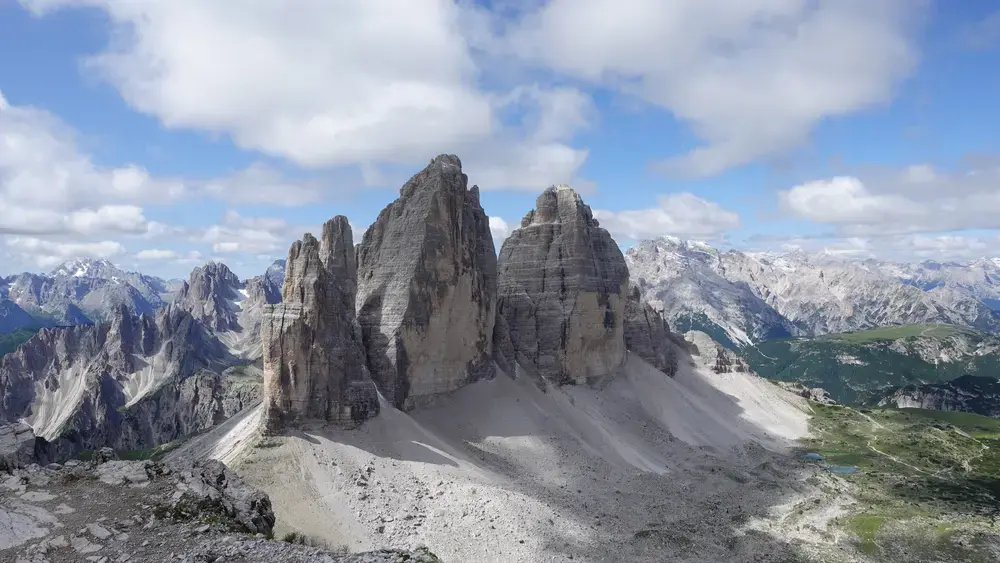
You walk under Tre Cime and when you are close to Locatelli hut, this will be your view back to these beauties:
Till this moment, the walk has been long and hard, and it may be a good idea to take a proper rest at Rifugio Locatelli before you continue.
From Rifugio Locatelli to Monte Paterno summit
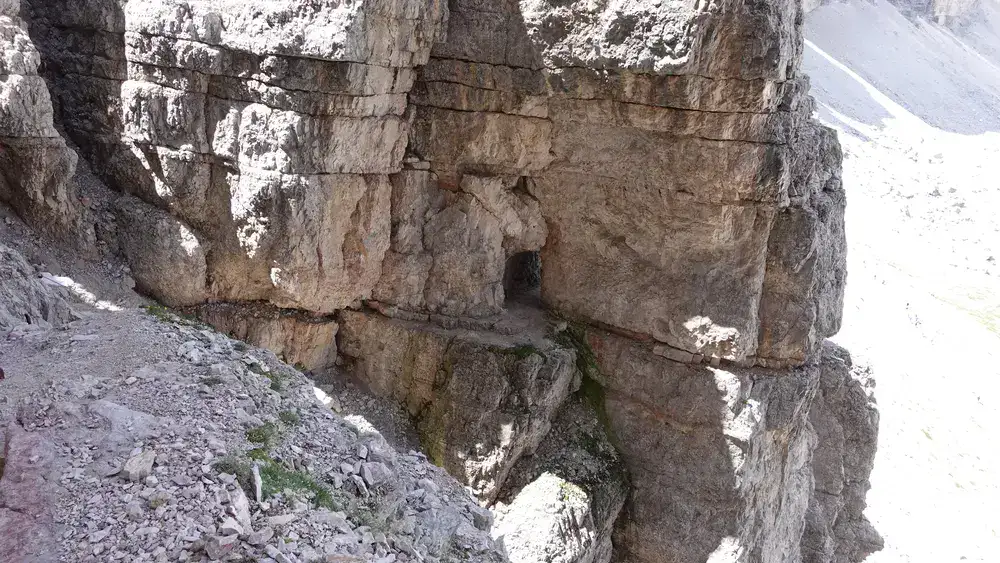
From the rifugio you follow an easy ridge in the direction of the tunnels (galleries as described in the maps). The photo below shows the entrance.
From my experience, the tunnel is around 300 meters long, but if you search around you might find very different numbers, and they are definitely wrong.
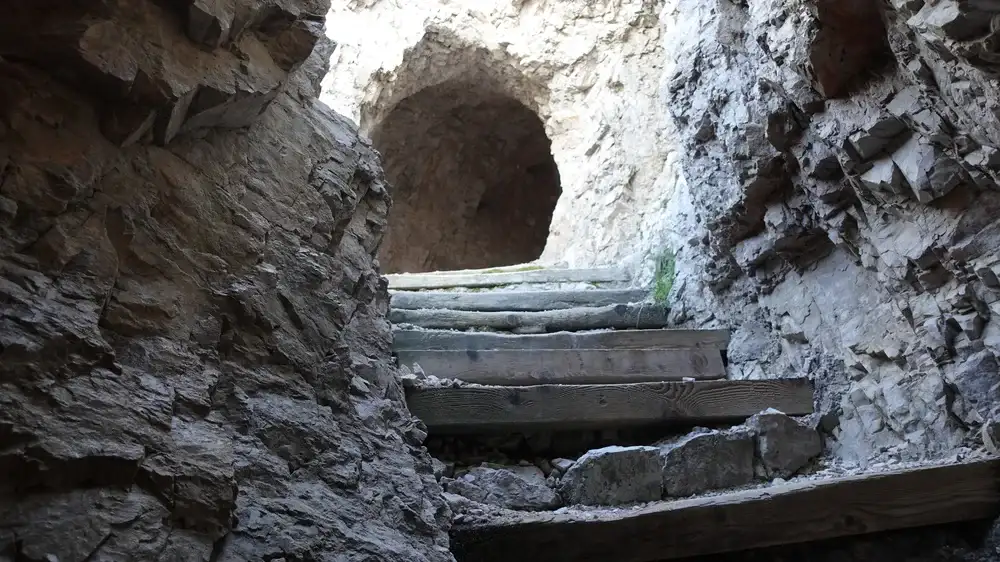
There are stairs all the way up, and they are high and steep,the photo show them. At some point you will see an exit on the left; this is the place to put your ferrata equipment on.
This first part of the ferrata is relatively easy, level A+ to B- or so. Below you can see the view back; Rifugio Locatelli is visible:
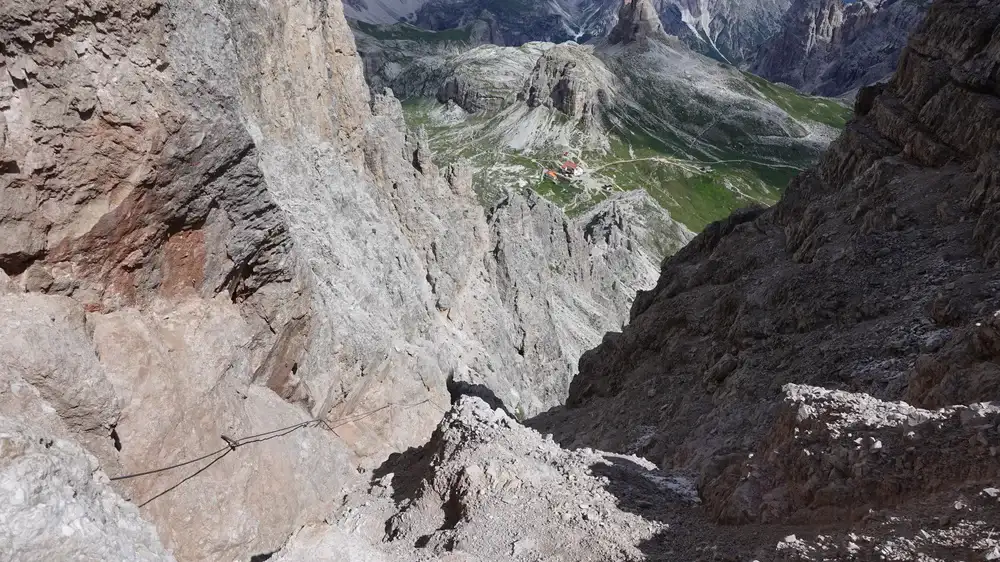
The views are incredible already here, see what you have on the north side:

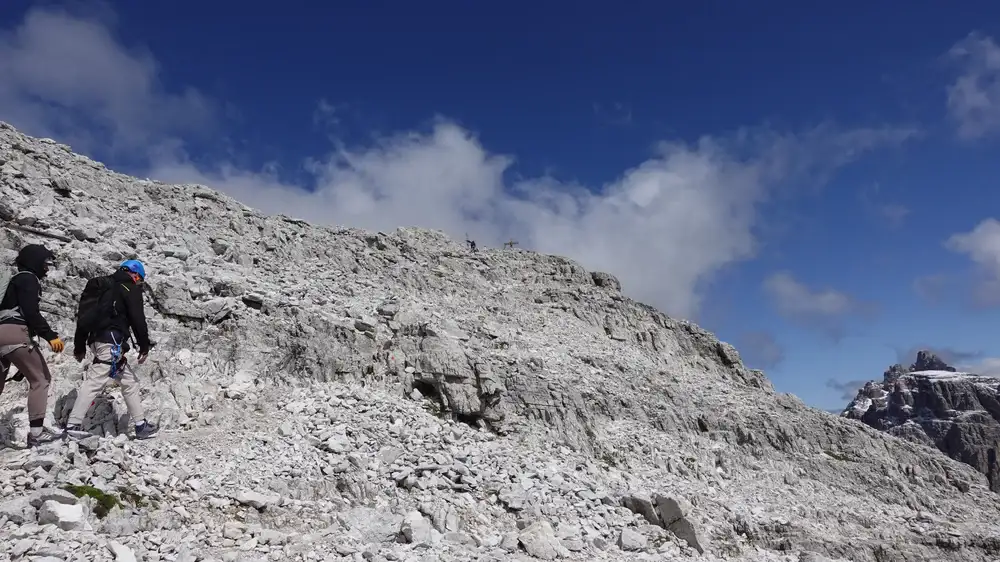
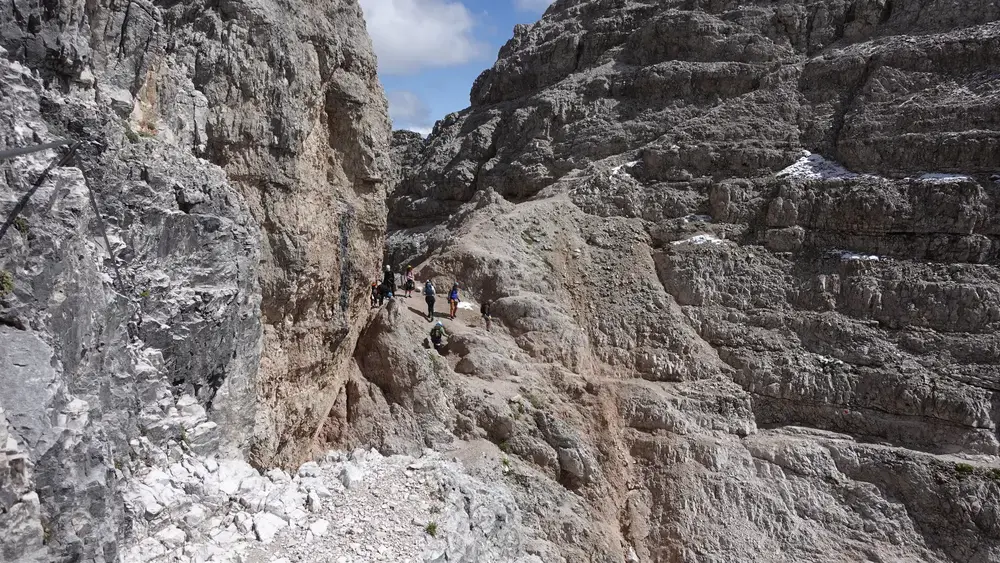
The cables will lead you to Forcella del Camoscio, which is a junction point as you may realize from the map above. The beauty of the area is surreal:

This is how Forcella del Camoscio looks as you approach it from the north side:
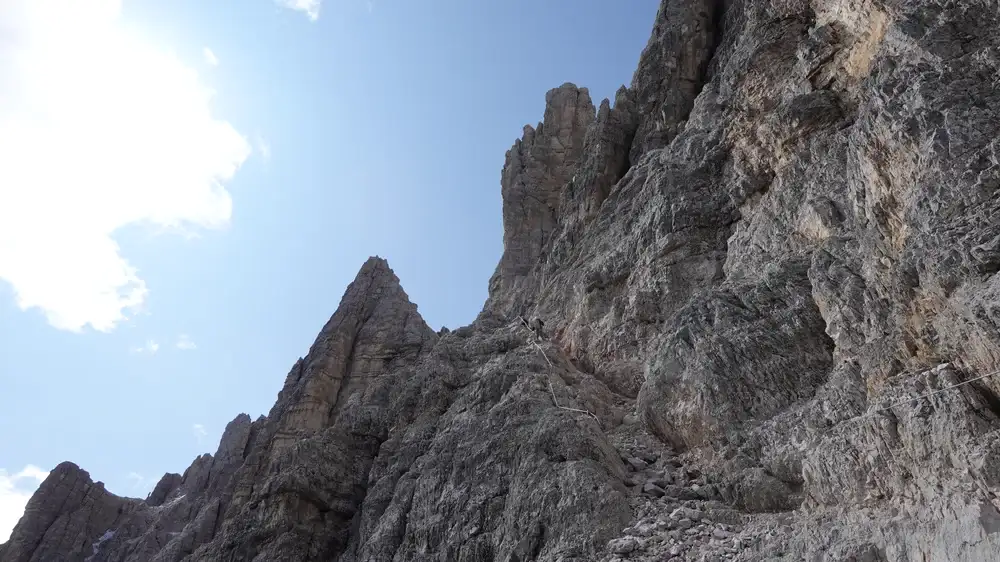
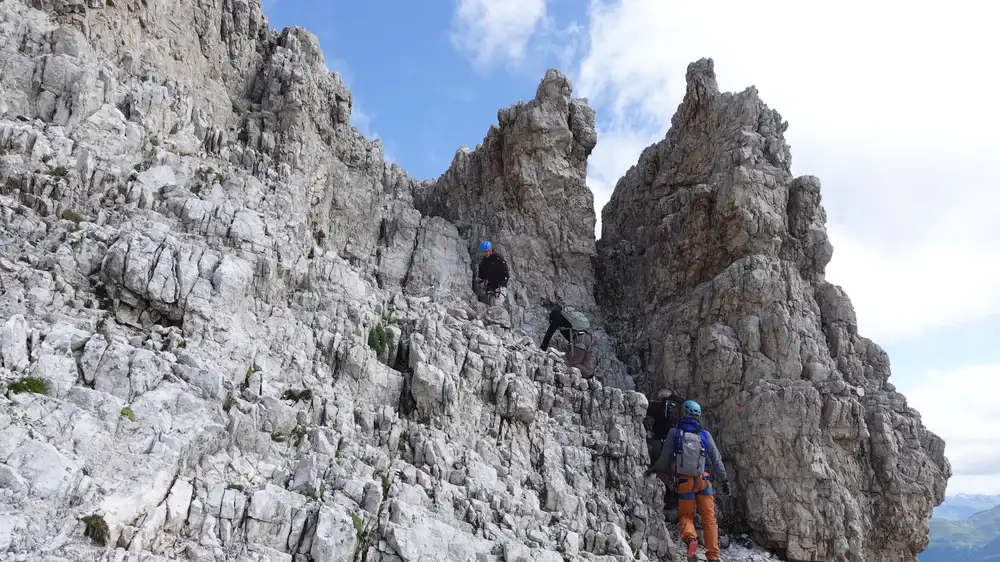
From this place you have an overview of the remaining summit ferrata, and what you can see might look scary; the wall is almost vertical here. I added the arrow to show you a climber on the wall.

You should know that there are two cable lines here, one for ascent and one for descent. This is to avoid traffic jams on such a popular ferrata.You choose the line on the right. The exposure is maximal, but luckily this passage is not long. Very soon you will see the summit cross, and that upper part is pleasant and easy.
The summit area is surprisingly wide and pleasant. When you look from a distance, the summit looks very sharp. Here is the summit cross:

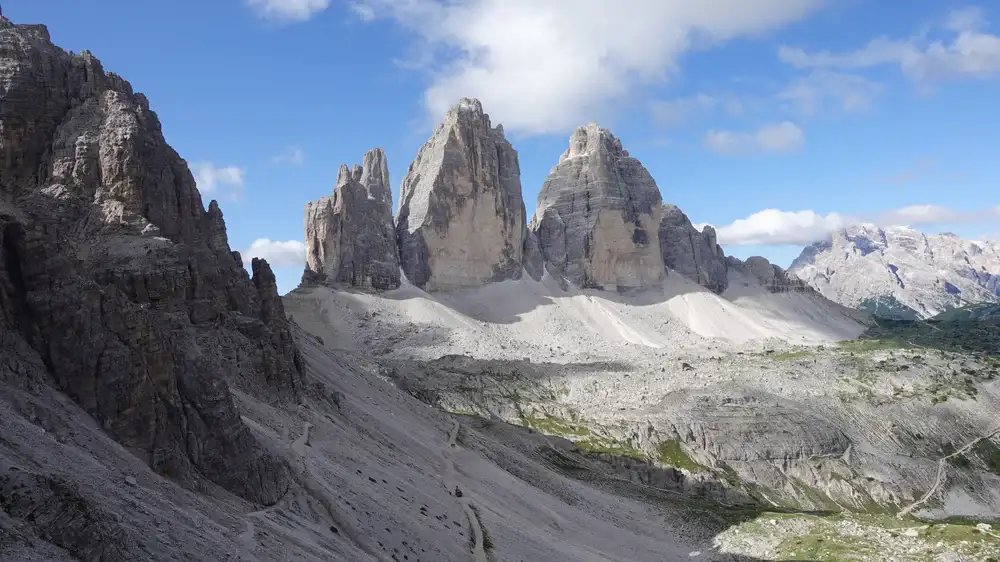
Tre Cime dominate the area, so here is yet another view, this time from the summit:
Lavaredo descent route: Passportensteig
I descended back to the point very close to Forcella del Camoscio. There were many people coming from all three directions, and it became a real crowd.
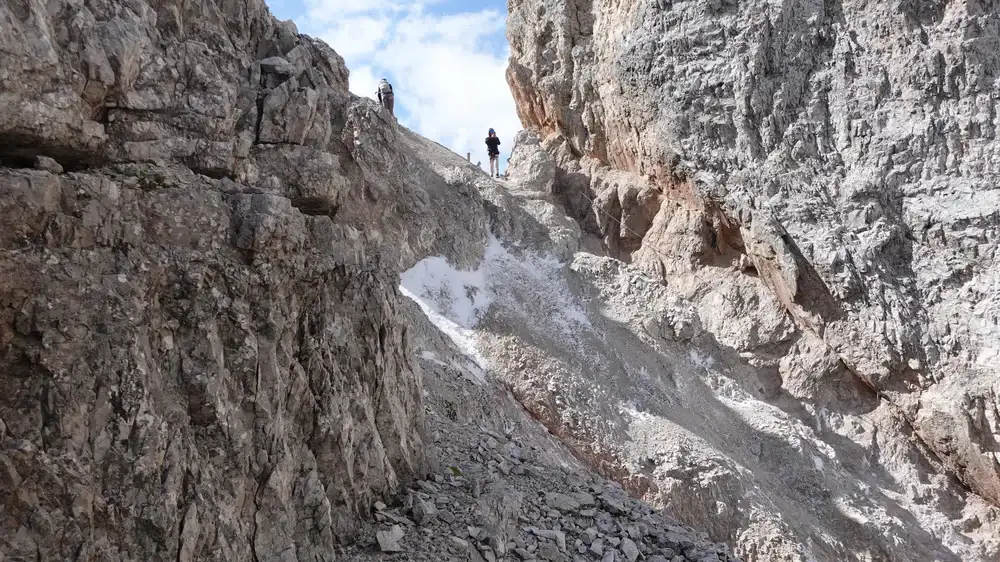
My direction was the beautiful and flat route that is cut into the steep rock walls. On maps, this part is called Passportensteig.

The photo below shows the area where the route goes to the other, west side of the mountain. All the way to that point it remains flat and pleasant.

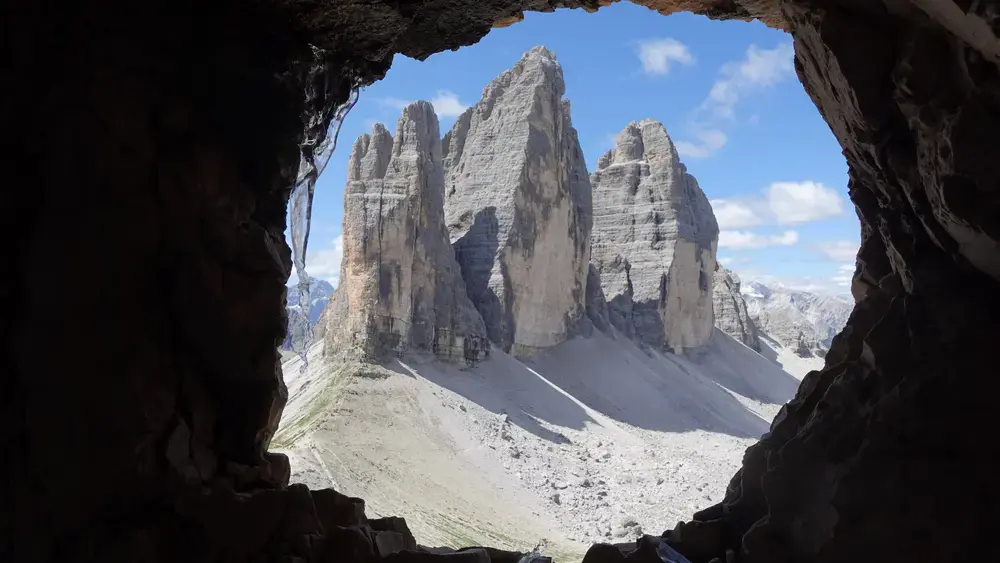
Here is one military cannon point from WWI with a view toward Tre Cime. Observe the ice, and this was July.
Very close to the end of this route, there is a low tunnel passage where you have to go on your knees and hands to pass. It was very unpleasant because of the water and ice on the ground. Add a strong draft in such a narrow passage to get a clear picture.
My rating of Innerkofler-De Luca via ferrata
My rating below is based on the assumption that you follow the route described here. This applies to the access route difficulty in particular.
I have seen some totally ridiculous ratings for this ferrata, and I must say they look irresponsible to me because people may get into danger if they expect a ferrata without exposure.
My rating, based on my three essential criteria, for the most difficult part is C.
| Rating Criteria | Rating (A-E; 1-5) |
|---|---|
| Technical difficulty | C |
| Ferrata length | 3 |
| Access route difficulty | E |
| Overall Score | C3E |
My estimate of the ascent cables length is in the range 150–250 meters, but here I may be wrong; I could not find reliable information.
On the other hand, this was a long walk from the car parking. It took me more than 4 hours in total to the beginning of the ferrata. But if your access is different, you may ignore this part of my rating.
The rating doesn’t apply on Passportensteig descent ferrata (Lavaredo route) which is much easier. I would rate it A+ or so for technical difficulty.
My tour to Monte Paterno (Paternkofel)
I started at 4 am and it was completely dark, but the first part of the route was along the road. At the toll point I switched to the forest route and enjoyed it in complete solitude. Later during the day this whole area is full of people, but in those early hours not a single person was around.
This remained so all the way to Rifugio Auronzo. I was there 2 hours and 20 minutes after the start, and continued without stopping.
It was surprisingly cold and windy, especially at Forcella Lavaredo. I reached Rifugio Locatelli around 8 am and had a long rest. I did not check how long I stayed there, pity, so I cannot say exactly how much time you need for the tour described here. Most likely up to 5 hours.
But from Rifugio to the summit it took me 90 minutes. Only much later I realized that I did not stay long on the summit, and my guess is that it was due to the cold, although the weather remained perfect.
In the ascent tunnel, there was only a couple from Japan. At the exit of the tunnel, we were together while putting ferrata equipment on, but they remained behind. There were two people from Poland in front of me on the lower ferrata.
At Forcella del Camoscio there were more people, not surprising as we were all converging there from three different directions.
Some were without ferrata equipment, and they were undecided what to do. Going up was not an option.
The second part of the ferrata was much more exposed than I anticipated. But this is only a short passage, yet this is why I give it a C rating.
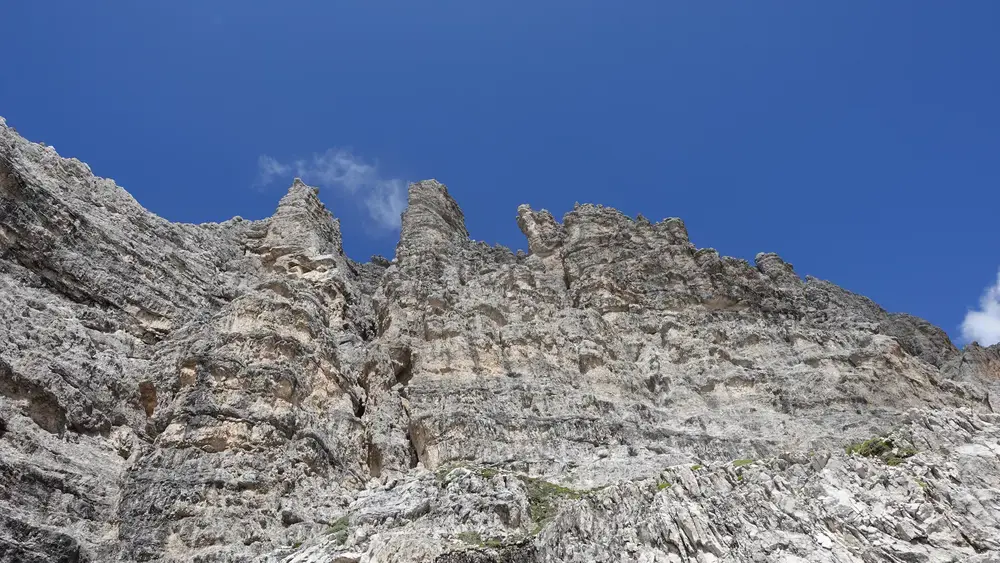
The area is surreally beautiful. The cliffs above looked like walls of cathedrals; see below to realize what I mean.
As mentioned, the most unpleasant part was the exit tunnel at the end of Passportensteig; this is a very low passage, some 20 meters or so, with ice and water on the ground. You have to crawl here, and even then your backpack catches the ceiling, crashing icicles that fall down on you.
The picture below shows the entrance, and you will see in the video how it is inside; dark, wet, cold, and claustrophobic.
This is a sharp contrast to the rest of the Passportensteig, which is breathtakingly beautiful and pleasant. After that passage, the remaining walk was simple, so I descended to Lavaredo hut and had a rest with a coffee.
Hundreds of people were in the area between Lavaredo and Auronzo huts. I continued and walked the same way back to the parking.
All the tour is presented in my video, please have a look:
What gear to use for this tour?
Make sure that you have a full ferrata set, and this means a harness, a Y-rope, and a helmet. I have seen people without equipment, obviously ill-informed, who had to return from Forcella del Camoscio.
This was a long walk for me so I needed very comfortable boots, and used Mammut Sapuen GTX boots. I had a pair of trekking poles, and my Mammut Lithium 40 backpack. Gloves for cables are definitely necessary, and I used them.
The sky was clear, but as usual, in the backpack I had a rain poncho and rain pants, plus a rain jacket. If you do not have any jacket and are not sure what to choose, think about the Mammut Crater Pro HS.
Do you want to walk this route?
If you have a bit of ferrata experience, you can do this tour solo as I did.
However, if you want to play it safe, which I strongly advise, get in touch with some experts and guides who can help you.
Huts contact details
- Rifugio Auronzo (2333 m): +39 0435 39002; email info@rifugioauronzo.it
- Rifugio Lavaredo (2344 m): +39 349 6028675, email rifugiolavaredo@hotmail.it
- Rifugio Locatelli (2438 m): +39 0474 972002, phone winter: +39 329 6690335, e-mail: dreizinnenhuette@rolmail.net, rifugio-locatelli@rolmail.net
Final thoughts
Here are my final thoughts on climbing Monte Paterno via this route from Lago d’Antorno parking.
The approach is the real challenge, long, steady uphill walk of over 4 hours to reach the ferrata start, with 914 m gain. It feels endless at times, especially if you carry full gear and start early in the dark like I did. But the solitude in the forest and under Tre Cime in the morning makes it worth it.
Once you hit Rifugio Locatelli, the real climb begins and everything changes fast. The ferrata itself is short but serious. The upper part on the right cable has real exposure, vertical wall, big drop, heart in throat for a few minutes.
That’s why I rate the technical difficulty C, even though most of it is easier. Don’t underestimate it if you have no head for heights. The two separate cables for up and down are smart and prevent chaos on busy days.
Passportensteig descent is the highlight for me; flat, exposed path carved in the rock with insane views and WWI history. Beautiful and surprisingly relaxing after the summit push.
The low crawl tunnel at the end is horrible though; wet, icy, claustrophobic, backpack scraping the ceiling. It is a nasty surprise after such a nice traverse.
Overall, this is not an easy “medium” ferrata day trip because of the access. It is a full, demanding mountain day that rewards early start, good fitness, and proper gear.
If you are comfortable on C sections and don’t mind long walks, it is one of the best Dolomites experiences; surreal scenery, historic tunnels, summit with Tre Cime dominating everything. Just go prepared for the whole package, not only the cables.
You might want to know that I have a book Dolomites Solo with my first-hand mountaineering reports, have a look:

Thank you for reading. Let me know if you have questions or comments, there is a comment section below. Please join us at our Facebook group Dolomites Visitors Hub.
FAQ
Is Monte Paterno suitable for first time via ferrata climbers?
Monte Paterno is not ideal as a first ferrata. The technical difficulty is moderate, but the exposure on the upper section is serious. You also need to handle a long and tiring approach before you even reach the cables. Beginners should first gain experience on shorter and less exposed ferratas.
Do I need a guide for the Innerkofler De Luca via ferrata?
A guide is not mandatory if you already have ferrata experience and are comfortable with exposure. The route is well equipped and logically laid out.
That said, weather changes fast in the Dolomites and the area is complex, so hiring a guide makes sense if you lack confidence or local knowledge.
When is the best time of year to climb Monte Paterno?
The usual season runs from late June to early October. Early season often means snow and ice in tunnels and shaded sections, especially on the descent. July and September are usually the best balance between conditions and crowds, with early starts strongly recommended.
How crowded is Monte Paterno during peak season?
Monte Paterno is very popular due to its location near Tre Cime. From mid morning onward, Forcella del Camoscio and the summit ferrata can become congested. Starting very early or choosing shoulder season dates helps avoid queues and improves safety.
Leave a Reply